Friday, September 6, 2013

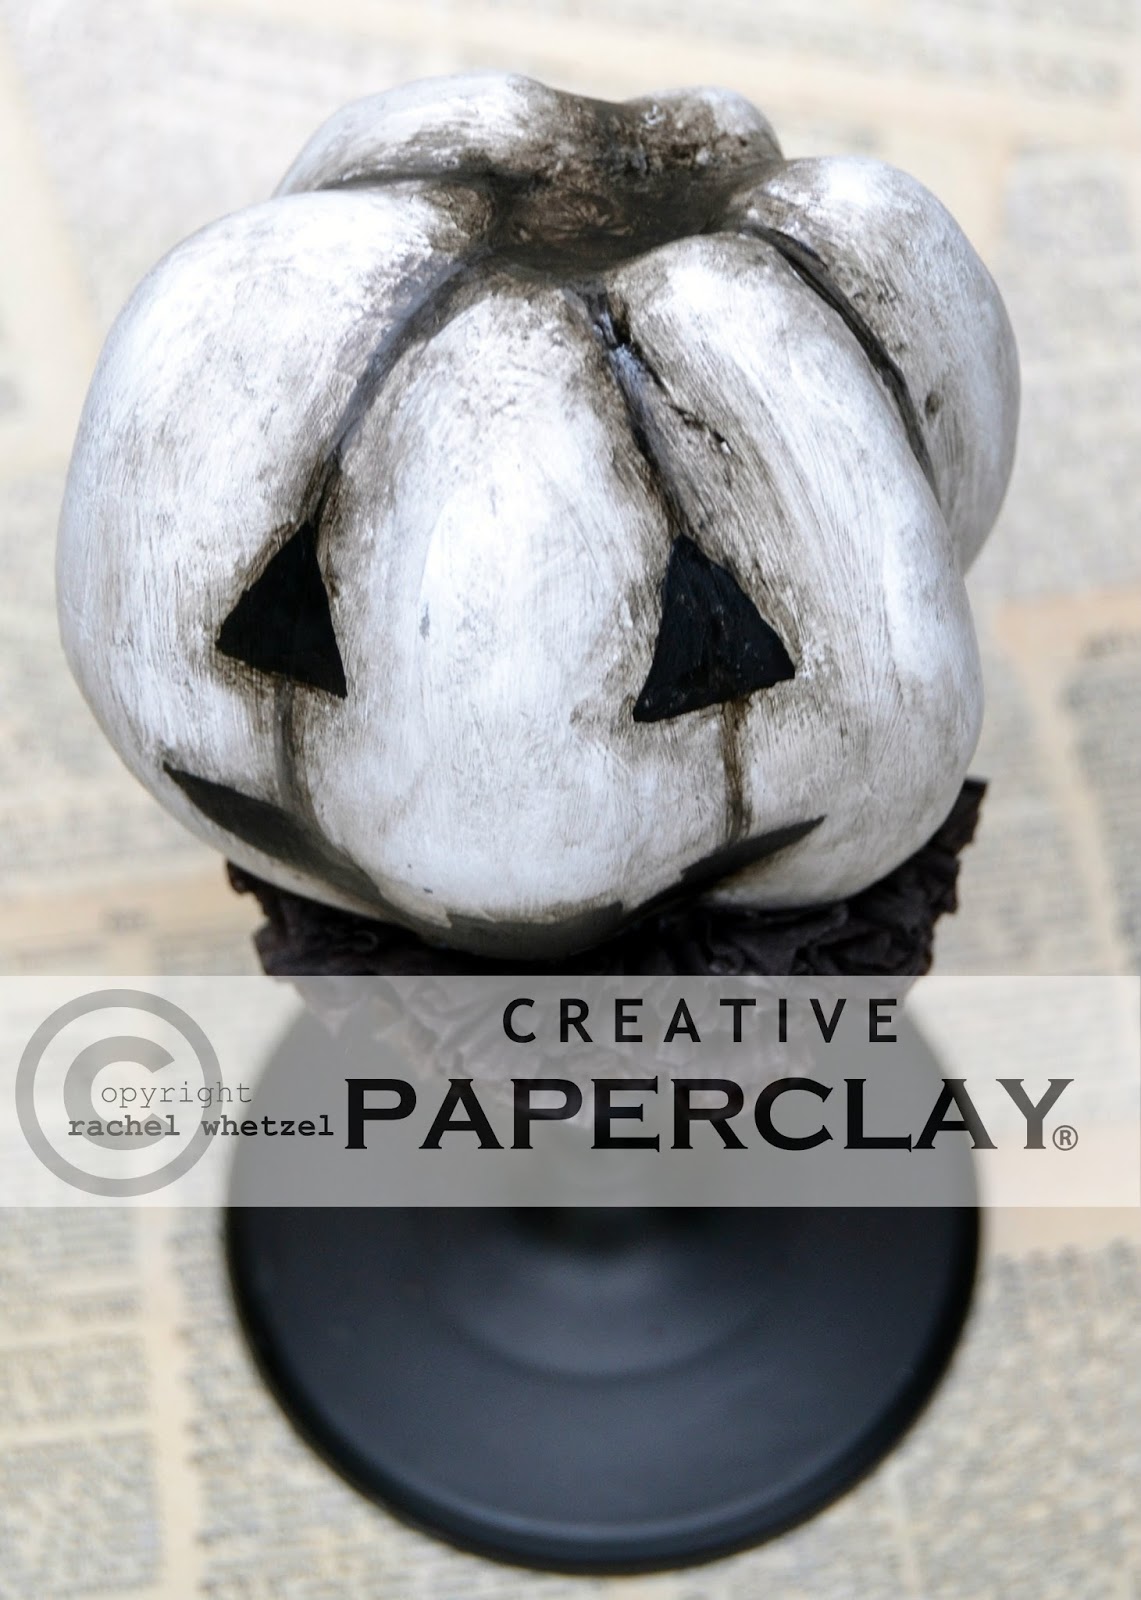
Halloween Pumpkin by Rachel Whetzel

Hello, Creatives!! It's Rachel here! The weather here is feeling more and more like Fall every day, and it's gotten me in the mood to create some goodies for Halloween!! Today, I'm going to share my process for making this spooky Jack 'O Lantern Pumpkin using Creative Paperclay® modeling material.
If you'd like to make one for yourself,
YOU WILL NEED:

I started by creating my base shape using the techniques I have shared with you in PREVIOUS POSTS.  Once the base' clay is dry, I made "ribs" for the pumpkin by rolling out some rough shapes.
 Then I laid the ribs onto the base shape, and pressed the ribs into it while they were still wet. To make the dry clay and the still wet clay stick, use some water to wet the dry clay. This will create a good bond between the two pieces.
 Here's what the ribs looked like when I was done pressing and shaping them onto the base.
 Once the ribs were dry, I painted grey stripes into the valley areas of each rib. Then I followed behind the stripe with some stain to shade and blend the lines a little bit.
 Next, I painted a Jack 'O Lantern face onto my pumpkin using black paint, and then added more shading with the stain. While that paint was drying, I made a crepe paper collar and glued that to the top of my candle stick. Then I turned the stick upside down to help hold the collar into place while the glue dried.
 Here is the finished piece!!
Have YOU got any ideas for something spooky to create with Creative Paperclay®? Leave me a comment, and let me know what you 're planning!!
Don't FORGET!!
 We'll be having a Halloween Link Up on October 5th, here on the blog!  
Be sure to get your creative juices flowing, and come share YOUR Halloween projects with us!
I would love for you to visit me at my "house" too!! Thank you so much for reading!!  ~rachel 

Thursday, September 5, 2013

Jess B's - SHE Silhouette

Hello Everyone,

Sharing with you another fun way to use Delight®
I was listening to Maxwell - A Woman's Work
It made me think about all the things we do day in and day out
It's never ending and we keep pressing!

Dedicate to all the Women of world


I mixed the Delight® with black acrylic paint
I had a unfinished canvas board that I took out of my stash
found the silhouette on line
I rolled out the Delight® and did some free hand carving using the silhouette as my guide
I pressed the floral flourish textured tread to give more texture
Added a butterfly made with with Delight®

INGREDIENTS
Black acrylic paint
Rangers Melt Art Texture Tread - Floral Flourish
Jacquard - Lumiere - Peal Blue
Bling
.

A Woman's Worth

A woman's beauty is not only
In the glow of her skin
But the depth of her eyes
And the warmth of her heart

A woman's strength is not only
In the bow of her back
But the magnitude of her tears
And the softness of her words

A woman's wisdom is not only
In the value of her words
But the knowledge of when to hold them
And the journey she takes to learn them

A woman's courage is not only
In her determination to fight
But her willingness to walk away
And confidence to say no

A woman's grace is not only
In the way she dances through her day
But in the love notes she leaves
And the wonderful meals she prepares

A woman's love is not only
In the kisses she gives
But in the sacrifices she makes
And the moments given to you alone

A woman's worth is not only
In the things she does
But who she truly is
And who she helps you become


~ Mary Costanza -A Woman's Heart And Soul


Don't forget about our Link Up Party


Tuesday, September 3, 2013

Lynda's September Project


I am so excited to bring you today's project...and since I scrapbook more than I craft you get more of those type of ideas from me!  I absolutely love doing vertical paper bag albums - being able to customize the covers to match the papers inside!  With this project - it was made for my sassy sister Allison's birthday!  (The one shown in last months post!)  I can't wait for her to see it!!!   
 
I started with the basic Creative PaperClay product, added my alphabet templates for scrapbooking I haven't used in a while, and my Xacto knife!  It is a bit tricky to cut out the letters with the clay, but the look of it was perfect!  As you are cutting out the letters, simply use your finger to fix any imperfections when the clay is being cut out.   
 
As I let the clay pieces dry out - I always turn them over about 12 hours in to things to allow for the other side to dry too.  After the pieces have completely dried, grab your paint and paint the clay letters.  I also molded and painted the 2 flowers on the left side, painted them with the same paint as the letters are. 
 
The inside of the album will be shown on my blog - Memories in Tyme tomorrow with each of the inside pages detailed, so check that out for sure!   I am in love with this clay - fun embellishments I can make myself, use a bit of paper, punches, paint and extra's to get the look I am wanting!  I hope you enjoy today's project! 
 
Lynda Jeffs
Memories in Tyme and Creative PaperClay Design Team 


Lynda's August Tips


I just noticed this did not post on 8/20...so you get 2 posts today!  Creative Paperclay® and their Delight product is just amazing to work with.  If you are in to scrapbooking - I have used it for one of a kind embellishments on my pages and cards!  Recently I pulled out some of my old scrapbooking templates to see what I could come up with!  On the next project I am showing you, you will see how I made clay names to put on the front of a paper bag album cover for my sister!  My tips for this month is all about using templates with your creations!  
  • Use scrapbook templates to create shapes cutting them out with an Xacto knife when the clay is wet.  You can also use cookie cutters, but if you already have templates for scrapbooking, then this works just as good! 
  • If you have any edges that you have cut in to - simply flatten it against the clay to make it smoother.  When using the Xacto knife, you will get flaws in your edges as you cut the clay out.   
  • Look at both sides of the clay you are working with for the best side before you cut into the clay with the knife.  This way you get the best side, not one that has a lot of flaws in it.  
  • Find something that is round, such as an old bottle of some sort that you can use to roll out the clay.  You can use something smaller - such as a pen or pencil...but it's harder to use when working with the clay!  
  • I've said it before - I will said it again...DON'T be afraid to play with the clay at all!!  You never know what you will end up making!  Also - don't be afraid to use different things to create with if you don't happen to have exactly what it is you need!  Sometimes the best things made have been made with substitutions!  
 I hope you have enjoyed my tips for this month as much as I have had fun in bringing them to you!  I can't wait to show you the fun things I have made with this awesome stuff!  
Thanks for stopping by,
Lynda Jeffs
Creative PaperClay Design Team and

Friday, August 30, 2013

Blue Bird


I have a very small collection of blue birds.
Since it is so rare that a new one is added, I thought I would use some Creative Paperclay ® 
to create my own addition.

Supplies:
Creative Paperclay ®
paper towel
sandpaper
gesso
mod podge
sponge brush
paint brush
acrylic paint
additional decorations

1.  First, I balled up some paper towels for the body of my bird.
Then I formed Creative Paperclay ® around it into the shape of a bird.
2.  Let dry. Remember this takes some time. I tend to cover it loosely with plastic for a day or so.
Then I take it off so it can dry completely. This helps cut back on cracking and breaks.


3.  Then, sand your piece.


4. Next I seal it with Gesso. I like having a seal before I decorate my pieces.


5.  Using acrylic paints, I mixed a pretty blue color up.  When you are mixing your own color, make more than enough to cover your piece in case you need touch ups and second coats.

6.  Use Mod Podge to seal your design.  Again, feel free to apply a couple of coats.


 7.  Don't stop there.  Why not add accent baubles or frilly designs in paint pen?
I was thinking about doing that.  But I loved the simple shape...and so I stopped. 


This is my new favorite part of my Blue Bird Collection.
Though, I now want to make a few more and over embellish them!
What can you make out of Creative Paperclay ® to add to your collectables?

Thanks for visiting us today. 
Tweet!

Dawn Mercedes, of Sunnyside Up


Tuesday, August 27, 2013

Barbara's Creative Paperclay® August Tips and Techniques

Hi everyone. Barbara here with my monthly tips and techniques to share with you. Today's tip is also a bit of a technique, and I actually made this discovery while trying to fix a boo boo. Funny, but I think a lot of ideas come from the need to fix something that did not quite work out. Reminds me of that old saying, "Necessity is the mother of invention".

 So, here is what happened. I was teaching a group of ladies how to use Creative Paperclay®, and we were using all different sorts of things, like molds, texture sheets, stamps, or our own creative imaginations. I opened a brand new package of Creative Paperclay®, which was very moist. We were rolling out bits of Paperclay® onto various texture sheets and removing the clay to air dry. Some of the texture sheets were finer than others, such as this honeycomb texture plate. Needless to say, one person got overly anxious and did not wait until the clay had time to dry out a bit before removing it from the mold. What happened next? Well, she pulled up the clay and left the design in the texture plate.

 Here is where necessity took over, in my mind. The way I saw it, I had two choices: 1) take the texture plate and a stiff brush to the sink and, under running water, scrub away the clay; or 2) roll another piece of clay over the same area and see if it will stick to the clay already "stuck" in the texture plate. I chose to try number 2. Because the clay was so moist, it worked. (If the clay was a bit more dried out, then I would have added, or spritzed, a bit of water between the two layers to get the same effect. Remember, water is like glue to Creative Paperclay®.)  Well, much to my surprise, it worked!!!
However, I made yet another discovery during this process. As I said, I left the clay to dry in the mold and, where I had not covered the "stuck" clay, some of the open design from the texture plate pulled off, too. Here is the result, shown in a couple of close-ups.  I was so amazed to see that even the open parts of the clay came up, too.

 Now, guess what I want to do next? I want to see if I can get an open honeycomb design by spreading a thin layer even with the surface of the texture plate. After allowing it to dry thoroughly on the plate, I want to see if I can remove it without breaking it into a million pieces.  You can see in the photo below that it is thinner in some spots than in others, but you can see the texture of the plate coming through.  I knew it was not going to be completely open, but it is all about experimenting.
Oh my goodness!  It worked again.  You can see in the photo below where I was able to get more open design area from a much thinner application.  And much to my surprise, it is very durable, and even more exciting, it is extremely flexible, unlike my piece above, where I spread it about 1/4" thick.  After all, it is paper in clay form.  How cool is that?
Well, you can imagine the ideas running through my head with my new discovery.  I know, some of you more experienced Paperclay® artists may already know this, but, just in case, I had to pass it on.  I am so excited to share this with anyone out there who does not know this.  I can see so many possibilities and cannot wait to see what else I can discover about this wonderful product.

So, please stay tuned to see what I have in mind for all these honeycomb pieces.  It should "bee" a real treat.  In the meantime, I hope you will visit the Creative Paperclay® online store and blog for products, updates, and more inspiration from the rest of the Design Team.  I also hope you will take a moment to visit me at my blog at Black Hole Art Studio.

Thanks for stopping by, and have a wonderful end of Summer!

Barbara Rankin
Creative Paperclay® Design Team Member

Friday, August 16, 2013

DawnMercedes' August tip!


Here are some tips on how to save left over Creative Paperclay ®!


Supplies:
water bottle
Cling Wrap
Clear Packing tape
ziplock bags
a wad of left over Creative Paperclay ® or Delight ©


1.  I tend to take small amounts out of the packaging at a time so the bulk of my Creative Paperclay ® still in the packaging.
2.  Knead left over clay together to ensure that there are no air bubbles left inside the wad.
If the wad seems dry, I will spritz it with water as I knead it to give it more moisture before storing.


3. Tuck it back inside the original packaging.  Use clear packing tape to close up the thick plastic.
4.  Wrap entire package in cling wrap.


4. Place this package inside of a ziplock bag. You  may want to double bag it.

**Remember for each layer, squeeze out the extra air.**

But I suppose THE BEST WAY ..
is to just use it all up. 
That way, the next time you design, you can start with a fresh package!

Thanks for stopping by today!
Dawn Mercedes, of Sunnyside Up