Showing posts with label Roses. Show all posts

Wednesday, January 29, 2020

The Transformation of Dough Art Using Delight Air Dry Modeling Compound!

 
Hello all!
Recently a Facebook post has been making the rounds on multiple artist friends' pages as well as on my own from well-meaning friends who said: "This made me think of you!".  Well, I had to rise to the challenge.  Could I take the pastry art shown and create the same pieces using Delight Air Dry?  I had to try and do it.  I grabbed a package of Delight and went to work.

The video is from a Chinese artist (I apologize, but I cannot pull up a working link to share).  The speed in which she works had me watching each segment multiple times to be able to create just one piece (haha).  After my "painstaking" research, I have broken down the steps into photos for you.

First up, "The Heart":
The heart begins with one circle.  (NOTE: The cutter size doesn't really matter since I believe these simple directions will work no matter what size you are creating.)  I own a set of Ateco circle cutters (12 pcs) and they worked great for this project!
Pull off a bit of Delight Air Dry Modeling Compound and flattened it with a roller on my work surface.  Cut three circles and place the remainder of clay in a damp paper towel to keep the clay moist.


Next, stack the 3 circles, one on top of the other, without squishing them together.
Use a skewer or needle tool of some sort to press the stack together in the center without cutting through.  I used a darning needle, but a knitting needle or turkey lacer or (in a pinch) a pencil should work just as well.
Fold the stack in half.  Again, do not squish (that is the technical term) the layers together.  Use the skewer to once again compress the stack together in the center without cutting through.  Fold the stack in half again, then turn it so the flat side is on your work surface.
 
Pinch the bottom to form the heart bottom and manipulate the rest of the layers to form a beautiful layered heart!
Set aside to dry.  Once dry, the heart can be painted with watercolors or acrylics OR it can be left white.  That's it!  Easy peasy lemon squeezy heart.  Imagine creating a batch of these for a mixed media canvas...Delight Air Dry is so lightweight that it can be glued to a canvas in multiples and hung on the wall for a lightweight seasonal decoration ❤

On to our next creation: The Rose
To start, pull off a bit of the Delight Air Dry (from the clay wrapped in the damp paper towel) and flatten it on your work surface.  Cut 5 circles (I cut 2" circles for this one).  Place any remaining clay back into the damp paper towel.
Cut each circle in half.  Line them up with the cut edges all in a line.  Overlap the points (as shown) and press together.
In the video tutorial, the pastry artist used a comb to imprint a texture on the curved edge of each petal.  I am a curly-headed girl and do not own a comb, so I found the next best thing: the attachment from personal shaver!  Tiny, but it worked to add a texture to the edge.  In the absence of a "personal shaver", you could add detail with a needle tool (one line at a time), the coil from inside a pen, OR the edge of a spiral binder!  Trust me when I say you will see texture in everything once you get started looking!
(NOTE: I forgot to take a photo of texturing the rose, so this is the same tool being used in an upcoming tutorial)

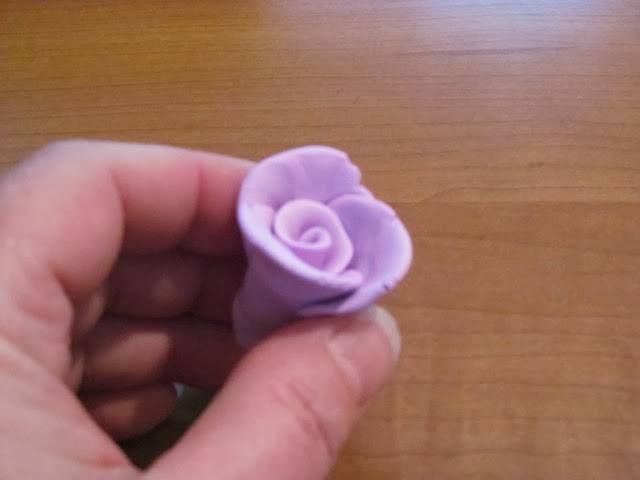
Once each petal has a texture, it is time to roll up the rose.  Begin at one end and roll tightly.  I did not press the petals at the top.  Instead, I focused on pressing the bottom of the petals (the flat edge) together.  This will allow the top of the petals to begin to flare out.
 

Once the rose is completely rolled up, place it face up on the work surface and gently flare out the petals to create a lovely rose (see above photo).  Leave to dry and then paint if desired.  Wouldn't this make a lovely pin for Mother's Day??

Next up: The Braided Feather/Leaf
This is probably one of the easiest of the ideas!  Pull off another piece from the reserved clay (damp paper towel).  On your work surface roll out a snake.  
Coil the snake, gently tucking the end into the center (as shown). 
Use a needle tool (I used a darning needle) to impress a line down the center of the coil without cutting through.
Pinch the top end and it is done!
Please note: After impressing the line, the feather/leaf can be curved to create a more natural effect.  Of course, set aside to dry and then paint as desired.

One last one: The Butterfly
Begin the butterfly in the same way as the others by grabbing a bit of the reserved clay.  Flatten the clay on your work surface and then cut out a circle.  I used the largest of the cutters (approx 4") for this one.  Use a cutting tool (a plastic knife or butter knife will work well) to cut lines as shown below.
Next, manipulate the "wings" to add curves and points rather than flat edges.  Can you see the butterfly taking shape??
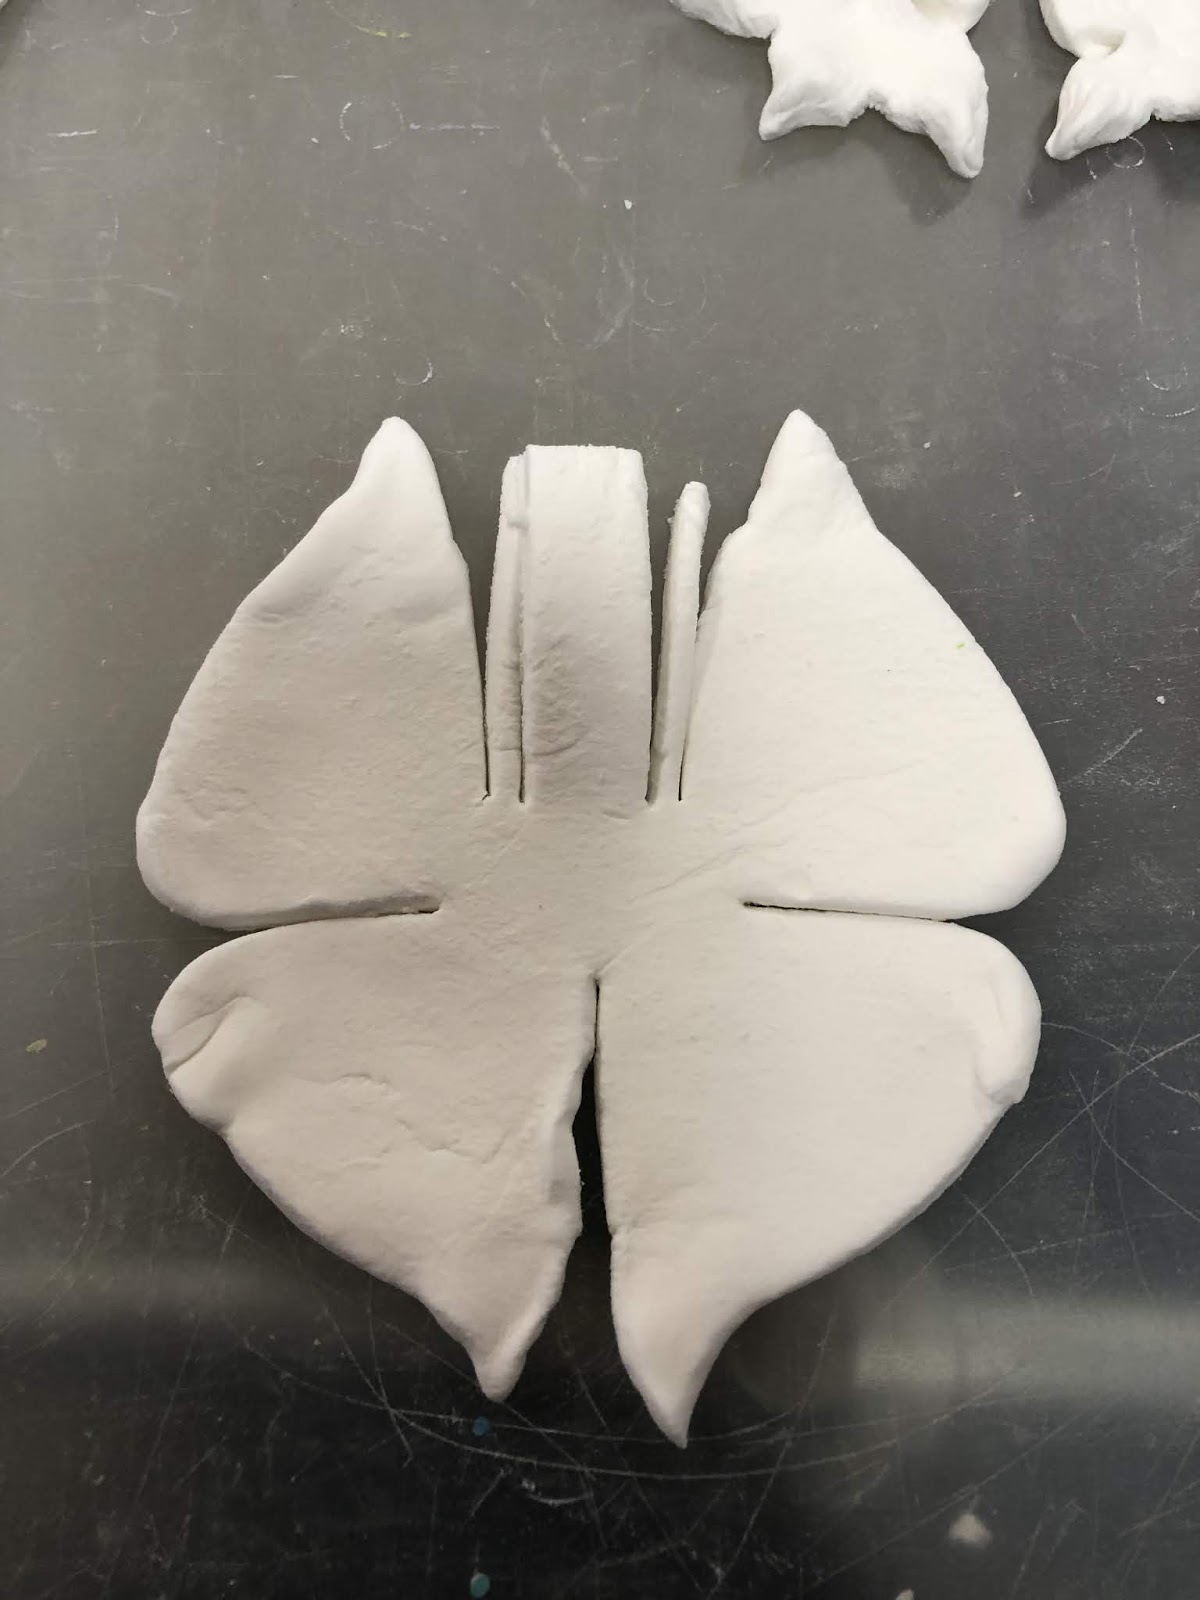
Fold down the center to create the butterfly's body.  Be sure to pinch the end to help the body take shape.  Curve the antennae.  Add lines to the wings using a needle tool (I used my darning needle, but the back of your knife will work just as well).  As you can see I used the attachment from the shaver to impress lines down the center of the body.
 

The final step? I decided to roll the antennae down onto the top of the body and add a couple of glass beads to give the butterfly sparkly eyes. 
Of course, the butterfly is just as beautiful with the antennae curved between the wings and no visible eyes.
As with the others, set the butterfly aside to dry and then paint as desired.

I hope you have enjoyed these quick and easy creations.  Return next month for a few more of the Delight "pastry creations".

Linda Hess


Friday, April 10, 2015

Roses

Hello, Ann here today from the AnnMakes blog over at http://annmakes.blogspot.com, and for the Design Team here at Creative Paperclay®.  I tried something new to me recently and I liked it so I am sharing it with all of you!

I tried using the Creative Paperclay® to add dimension to a canvas with a stencil.  Guess what?  It worked.  So here it is.

I painted the canvas with some acrylic  paint and let it dry.  I used a thick plastic stencil of a rose and spread the Creative Paperclay®over it.  I made sure that the clay did not overlap the edges of the stencil and I took the time to press down on the clay to make sure it was sticking to  the canvas.  I gently removed the stencil by using a sharp edge tool to keep the clay from staying stuck to the inside rides of the stencil.  I let the Creative Paperclay® air dry completely over night.


The following day I sanded the the rose with "Sandits" sanding sticks, blew off any dust and then painted.  To colour the rose I used Twinkling H2O water color luminescent paints by "Colourate".


I wrote out a quote, inked the edges with distress inks, and adhered with gel medium.

Products used:
Creative Paperclay® air dry modelling material http://www.paperclay.com
Canvas
Acrylic Paint
Gel Medium
Ink
Sandits (sanding sticks) http://shop.sandits.com
Water colors, H2O's Twinkling by Colourarte www.colourarte.com
in: Pretty Peridot, Wild Vine, Coral Berry, Poppy Red, Sunset Glow, and Peppermint Taffy.

I hope I have inspired you to look at this wonderful medium in a new way.  Have fun making your own creations.  Please come by my blog to see what other projects I am into.

Thank you for stopping by.

Wednesday, January 28, 2015

Delight AirDry+Washable Markers=Fabulous Flowers! by Linda Hess

I teach art to grades K-8th, a job that daily has me giving thanks.  It is truly the best "job" on this Earth!  With that tidbit of info you will understand why I embrace projects that are quick and easy for ALL ages (children-adults) while projecting high impact with the use of only a few materials.

I have to say that Delight Air Dry Modeling Compound is one of my favorite things to share with the students.  When I pull out plain white clay they were not very excited.  As I share how to change the color with markers you would think I performed magic for them :-)  I tend to pull this project out to create pins for Mother's Day or Happy Spring or (as I am currently thinking) a way to push the winter blahs away.  Lets get started...

Materials:
Delight Air Dry Modeling compound
washable markers (any colors)
flower cutters
needle tool or fork
damp paper towel

Procedure for cookie cutter flower:
1)  Open package and pull out a ball of clay.  Be sure to tightly close the remainder of the clay package in a Ziploc baggie before going any further.
2) Choose a marker and dab the clay as shown. 
3) Fold the clay over the color to seal it inside.  Knead the ball until color is dispersed.  If more color is desired, repeat.
4) Flatten the ball of clay into a sheet.  This can be done with your fingers (as I tend to do) or with an acrylic roller.  Once flattened, cut out 3 flowers (one of each size).
5) Thin and curve the petals of the largest flower.  Repeat with other 2 flowers.  Stack them, curving petals on each layer.  SURPRISE...use the cap of your marker to create a center for your flower.
6) Use the needle tool or fork to add detail to the center and the edges.
7) Mix another ball of clay with green for leaves.
8) Roll a 1/2" ball of green clay.  Flatten. Pinch one end to create a teardrop. 
9) Press the center with needle tool or edge of fork.  Press into place.  Add additional leaves if desired.
 
Procedure for Roses:
1) Follow step #2 & 3 above.  Roll six 1/2" balls from the mix. 
2) Roll one of the balls into a log as shown. 
3) Flatten.
4) Pinch thin along one of the long edges.
5) Roll from one end to the other as shown keeping thin edge at the top.  Flare out to create realistic rose center.
6) Flatten 2 more balls.  Pinch into teardrops. 
7) Thin the top edge.
8) Wrap one petal around the center and one from the other side so the edges touch. 
9) Flare out the edges to create realistic petals.
10)  Repeat steps 7-9 with other 3 balls.  Wrap around the center.  Flare out edges.
11) Create leaves from cutter flower directions above.  Press into place, then turn flower over and CAREFULLY cut off the bottom to create a flat bottom.
 
That's it!  All done. 
Once dry, use these to create pins, magnets, or journal embellishments.  Feel free to contact me with any questions.  ENJOY!


Thursday, October 10, 2013

"Fall" Back Roses


With the brisk fall weather finally upon us and my toes tucked inside shoes instead of free to enjoy the warmth outside, I decided to bring thoughts of warmer weather out into the studio.  With that in mind, I give you the Creative PaperClay Rose pendant (or ring or bracelet or headband...whatever you would like to attach it to).

The supplies are simple: Creative PaperClay, Prismacolor markers (or any watercolor marker), a damp paper towel, a cutting tool, and your hands

Begin by pulling off a bit of PaperClay from the package.  Knead it a bit and then flatten into a "pancake".  Dab the pancake with your chosen marker color.  Begin folding and squishing the color into the PaperClay.  Once mixed in, look at the color.  Not dark enough??  Repeat the process until you are happy with the color.  Now time to start the rose.

Roses begin with small marble sized balls of clay.  Of course, the size can be adapted depending upon what size rose you would like to end up with.  I will start with a small rose.  Roll 3 marble sized balls from the colored clay.  Cover the remainder with the damp paper towel (this will keep it from drying too quickly). 


Roll 1 of the balls into a short log.  Flatten slightly along the length.
 Then pinch one side firmly between your thumb and pointer finger from end to end (this will thin the edge to give a more realistic rose petal appearance).

Immediately roll the log up from one end to the other (like a cinnamon roll).  Flare out the thinned edge slightly.  This is the center of your flower.  Set aside.

For the other 3 balls, flatten each slightly and then pinch into a teardrop shape.  Along the curved edge, pinch firmly to thin the edge.  Be sure the center of the petal stays thick as this gives your finished rose stability and strength.  Repeat process until you have 3 "petals". 

Now, retrieve the center of your flower.  Place one petal next to the center and press into place at the base. 
Add a second petal, overlapping the first one slightly and press into place.  Finally add the third petal overlapping edges with the other 2.  Press into place. 
Flare out the upper edges by pulling back and pushing up (all one motion)...I hope that makes sense!


Once the rose is complete, use the cutting tool to even up the bottom so your rose will sit flat. 
Repeat process until colored clay has been used.  Larger roses can be accomplished by adding a second layer of petals (5 marbles instead of 3).  Set aside your rose garden to dry (about 24 hrs).  Once dry, glue onto pins, pendants, headbands, etc using tacky glue (I use The Ultimate by Crafter's Pick).

I hope this brings a bit of warmth to your day.
P.S.  The process also works with Delight Air Dry Modeling Compound ;-)