Showing posts with label #Embossed hearts. Show all posts

Thursday, March 29, 2018

Patina Look Jewelry with Creative Paperclay®


Hello there! Jenn here sharing my jewelry project using Creative Paperclay®.
In a previous post I demonstrated how I created molded pieces using embossing folders and cookie cutters. That post can be found HERE.
Patina and rust effects are a major trend right now so I decided to create some jewelry using the hearts and some other items.
The additional supplies I used are as follows:
2 clay molded beads
metal butterfly embellishment
Strong glue
Satin Cord
Copper jump rings
Medium sized rusty washer (this was previously treated with a sulfur to patina) from stash
Earring wires
Acrylic paints in patina/rust shades
Liquid ink in a dark blue shade (I used Art Anthology Minx ink in Stargazer)

Start with a base coat of an aqua colored acrylic paint on all of the hearts, butterfly, and beads.

Using a darker teal acrylic mixed with water apply lightly with a brush and wipe off all excess to re-expose the lighter color in all areas except crevices. This will give more dimension. Alternate between golds, blues, and a bit of the liquid darker blue until you reach the desired patina look.


Make sure all pieces are completely dry. Tie a knot part way down the cord and slide one bead on. Tie a knot on the other side of the bead and make sure both knots are tight and secure.

Next, tie the washer onto the cord in the middle using a slipknot.
Make sure the knot is secure and tight and add a dab of strong clear glue to the back of it.
Place a large jump ring onto the main heart and then onto the washer. Add earring wires to the two smaller hearts and there you have it! Such fun!


I hope that you enjoyed my tutorial today! Thanks for visiting!
For all of your Creative Paperclay® needs visit our online store HERE.
You can also find Creative Paperclay® at the following retailers

Thanks again! Happy Creating!!


Thursday, January 4, 2018

Embossed Hearts


Hello Creative Paperclay® Fans!! Jenn here today to share with you another unique way to use your paperclay! Making these embossed hearts is easier than you may think.

I hope you all had a wonderful Holiday season and that you are ready to get even more creative this year.

Have you ever used embossing folders? Have you tried to use them with Creative Paperclay®? Well, that is exactly how these adorable little hearts were created.

First, gather the supplies needed:
Creative Paperclay® modeling material
Selection of embossing folders
Rolling pin
Wax paper
Medium grit file
Tool to create small hole
Heart shaped cookie cutters


Once you have all your supplies ready, lay a sheet of wax paper down. Roll some paperclay into a ball and roll it out to the desired thickness using your rolling pin.


Next, place your rolled out clay into an embossing folder and close it. Use your rolling pin to make a nice impression of the pattern onto the clay.

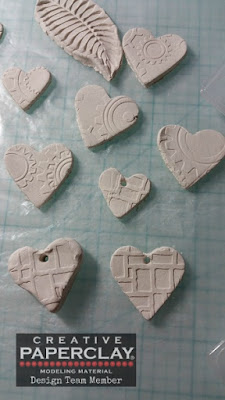
Gently remove the embossed clay and place it back down on your wax paper. Using your cookie cutters, cut out as many hearts as desired. Make sure you remove the clay from the cookie cutters gently so you do not affect the pattern with fingers, nails, etc.  If you will be using your hearts to create jewelry, place a small hole in the top with a paper piercer. If your going to use them as embellishments you will not need the hole. I will be using my hearts for more than one project so some only some were pierced. Leave your cut out hearts on the wax paper to dry for the night. This may take longer depending on thickness of the hearts.

Once your hearts have dried they are ready to paint, stain, etc. and use to create jewelry or as embellishments on other projects. Use your file to gently remove all of the rough edges. If you look at the hearts below, you can see the before and after filing effect.


 I have painted one using an oxidized silver texture set from Art Anthology to show how they look painted.


I just love these hearts and how easy they were to create! I hope you are inspired to get some Creative Paperclay® and embossing folders and try this technique! the possibilities are endless!

Thanks so much for visiting the blog today and viewing my post!
For your convenience Creative Paperclay® is available to purchase at the online store HERE.
You can also find it at the following craft stores:

Thanks again!