Showing posts with label #Jewelry. Show all posts

Thursday, May 16, 2019

Beaded Clay Pendant by Jenn

Hello everyone! Jenn here today sharing a pendant I have created using Creative Paperclay® and Dew Drops!
One of my favorite things to create with Creative Paperclay® is jewelry. For this pendant I wanted it to look natural. I hand molded the shape rather than using a silicone mold. For the jewels I rolled small balls of the clay and then used the end of a paintbrush to hollow the middles. I used Dew Drops from The Robin's Nest to the holes to appear like gemstones. The middle is another rolled small piece of clay that I used a clay tool to put lines in. I then carved some lines into the leaf to give it texture.
I used Plaid paints in metallic green and copper to finish it, then added a hemp cord.

Here is a collage featuring some other jewelry I have created using this amazing clay!

Creative Paperclay® is moldable and sculptable!


Thanks so much for viewing my post today! I hope that you are inspired to give this amazing clay a try and create something amazing!
Creative Paperclay® and Delight™ are conveniently available for you to purchase online and at the below listed retailers.

Until Next time Stay Creative!


Thursday, March 29, 2018

Patina Look Jewelry with Creative Paperclay®


Hello there! Jenn here sharing my jewelry project using Creative Paperclay®.
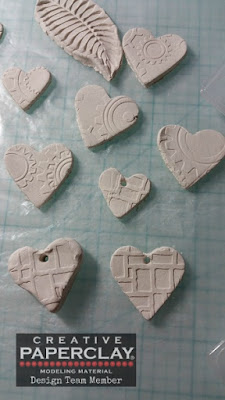
In a previous post I demonstrated how I created molded pieces using embossing folders and cookie cutters. That post can be found HERE.

Patina and rust effects are a major trend right now so I decided to create some jewelry using the hearts and some other items.
The additional supplies I used are as follows:
2 clay molded beads
metal butterfly embellishment
Strong glue
Satin Cord
Copper jump rings
Medium sized rusty washer (this was previously treated with a sulfur to patina) from stash
Earring wires
Acrylic paints in patina/rust shades
Liquid ink in a dark blue shade (I used Art Anthology Minx ink in Stargazer)

Start with a base coat of an aqua colored acrylic paint on all of the hearts, butterfly, and beads.

Using a darker teal acrylic mixed with water apply lightly with a brush and wipe off all excess to re-expose the lighter color in all areas except crevices. This will give more dimension. Alternate between golds, blues, and a bit of the liquid darker blue until you reach the desired patina look.


Make sure all pieces are completely dry. Tie a knot part way down the cord and slide one bead on. Tie a knot on the other side of the bead and make sure both knots are tight and secure.

Next, tie the washer onto the cord in the middle using a slipknot.
Make sure the knot is secure and tight and add a dab of strong clear glue to the back of it.
Place a large jump ring onto the main heart and then onto the washer. Add earring wires to the two smaller hearts and there you have it! Such fun!


I hope that you enjoyed my tutorial today! Thanks for visiting!
For all of your Creative Paperclay® needs visit our online store HERE.
You can also find Creative Paperclay® at the following retailers

Thanks again! Happy Creating!!