Showing posts with label #paperclay. Show all posts

Friday, May 22, 2020

How to Create a Wall Plate Sculpture

wall plate sculpture


Hello everyone Cinnamon here, I am hoping that you all are home safe and sound. I've been doing some home improvement projects since the quarantine, so I decided to work on a wood wall plate cover that I brought some time ago. I will walk you through the steps that I took to create this project.


Supplies: Creative Paperclay®, unfinished wood base switch plate cover, 
Pencil, Sand paper, Acrylic paint, Sealer, Varnish


I started out my design by sketching out my idea directly onto the plate with a pencil.
I went with the robot that I created in a previous tutorial out of a vinyl toy. He was inspired by a toy that I had as a child.


Creative Paperclay does well with adhering to porous surfaces such as wood. In the
photos above, I am painting water onto the areas that I want to stick clay to. I dabbed
a drop of water onto the clay as well and mashed small pieces to the damp surface of
the plate until they were held securely. I shaped the clay as much as I could in this 
damp state with my clay knife and continued to fill out the sketch.


 After you are done building up the clay and shaping it, sit it aside 
and allow it to dry which would be roughly 24 hours. You can always
come back and add more clay by using water as I did above.


When the piece dries and no longer needs clay to be added
to it, sand it down to smooth out the rough edges. I am using
an 800 grit piece of sandpaper to get it nice and smooth. 


The great thing about paperclay is that you can draw on it. Here
I am mapping out some details from the robot to be painted later.


I am used acrylic paint to finish up the piece. I find
it easier to work on the background first and then 
work my way up to painting the smaller details.


He looks a bit different from my first robot Alphie, 
but they at least look like they can be related. I have a
hard time painting small letters so I left them out this time.


Here is the plate out in the wild. Thanks for following! 


*****Stay Safe, be well and take care!*****

You can find Creative Paperclay® at the following retailers

See more of my work at Melandolly.com and 
be sure to catch updates on my Instagram page!


Wednesday, March 4, 2020

Painting a Creative Paperclay® Art Doll Bust


Painting a Creative Paperclay Art Doll Bust


Today I will demonstrate my painting techniques for a Creative Paperclay® Art Doll Bust.

Here is a list of tools and supplies that you will need:

Creative Paperclay® Art Doll Bust
Black Gesso
Acrylic Paints - I prefer heavy body for full coverage
Carbon Black  

Titanium White

Burnt Umber
Titan Buff

Quinacridone magenta
C.P. Cadmium Yellow Medium

Phthalo Blue
Prism Violet
Fixative/Sealant - Krylon (or Hairspray) Acrylic Gel Medium or Mod Podge (Optional)
Assorted paint brushes.  

At least some fine detail brushes and some flat for dry brushing
palette knife - for mixing paint colors
palette - a ceramic tile or paper plate will work
receptacle for water and a couple of rags for clean up.


This is a hand sculpted Creative Paperclay Art Doll Bust based on a design by my friend Linda Misa.  She came to teach in my Northern California studio all the way from Australia!  That's really far away!  Anyway, it was a wonderful workshop!  If you get the chance to sign up for a class with her, jump on it!  She is super generous with her knowledge and ensures that everyone is successful with their project!

At this point the bust is dried and lightly sanded.
The texture on her bodice was done with a beautiful silicone texture sheet by my friend Victoria James. Click on the link to check out her great designs. She will ship them anywhere within the continental U.S. for FREE!

http://www.victoriajamesart.com/realtextures/

First I add a coat or two of black gesso.  I used Golden brand.  You'll notice the streakiness.  That was because I started painting her and didn't like it so I covered her up with more black.  I was also really impatient to get back to painting.  You can always sand yours down to smooth things out. 400 - 600 grit sandpaper is good.  I'm going for a more primitive look so I won't do that here. 


Supplies and intro


Flesh Tone Underpainting

Shadows and Lowlights - I use some weird colors


Flesh Tone Highlights

Highlights, eyeliner, eye whites, blush, lips, and brows
Eyes
Once you get the eyes in she starts coming to life

Final Face paint.  Isn't she a cutie?  I darkened her eyebrows to go better with her dark hair.  
I painted the bodice and hair black.


Eyes, Pupils, Hair, & Bodice

Here are the final photos.  
The bright lights washed out her complexion a bit 
but, you can see the highlights in her hair and dress this way.  


Monday, April 2, 2018

DIY Sitting Bird Ornament

Hello! Welcome to another Creative Paperclay® Design Team tutorial. Today I have a sitting bird ornament to share with you. Not only do I show you how to sculpt this, but also how to apply a crackle and a gilding wax.  Isn't that exciting? It is actually very easy and when you are finished you will have this cute little bird sitting on your shelf.


The supplies you will need are:

Creative Paperclay®

foil
toothpick
a stone to help weigh-down bird
white glue
gesso
white acrylic 
black acrylic 
Golden Acrylic- Inference Gold
Americana Multi-surface Acrylics-
  • Jade Green
  • Mushroom
Decoart Media Crackle Glaze
Pebeo Gilding Wax - Empire Gold
jute twine
scissors
Sculpting tools
glue gun and glue sticks
sandpaper
paintbrushes
stencil brush or cotton swab
paper towel or soft cloth 
gloves
water
template for birds feet


Let's get started!


Step 1

Place a stone in a large piece of foil and wrap tightly. This will ensure your sculpture sits without toppling over.

bird_1


Step 2

Add more foil as needed until you are happy with the shape.


 Step 3

Form the wings and attach with hot glue.


 Step 4

Form the beak with foil wrapped around a toothpick and insert. Secure with hot glue.

          bird 4


 Step 5

Coat armature with diluted glue. This is not absolutely necessary but I like to ensure my clay sticks to the armature properly so all my hard work is not ruined. 

Bird5


Step 6

Cover with Creative Paperclay®. Ensure you press down carefully so no air bubbles are trapped.

bird 6


Step 7

Cut out the feet using your template. Poke a hole in the heal of each foot using a toothpick.

bird 7

Step 8

Roll two balls of clay for the eyes and attach. Set aside to dry.


Step 9

Roll out some clay and cut out two circles for the eyelids. 


Step 10

Cut off about one third of each circle.

bird10

Step 11

Paint on a little diluted glue and attach eyelids blending in seams. 

bird 11

Step 12

Set aside to dry.

Step 13

Paint your bird whatever colors you choose.


bird 13


Step 14

Leave to dry overnight. It needs to be thoroughly dry before you apply the crackle.

Step 15

Cover with a coat of crackle medium and let it dry overnight. Don't use a fan, hairdryer or heat gun. Let it dry naturally.

bird15

Step 16

Use a stencil brush to apply a coat of gilders wax. Work in a well ventilated area!


bird 16

Step 17

Wipe wax off of surface leaving in the cracks.

bird 17


Step 18

Drill two holes in base to attach the legs.

bird18


Step 19

Use a needle to thread twine through hole in each foot. Tie a knot to secure.

bird 19

bird20

Step 20

Now to attach the legs. Place a bit of glue in each hole on the base and insert the other end of the string.

bird 21

bird 22

Congratulations! You are done! Isn't he cute?


I have also made a video if you would like to follow along.


I do hope you enjoyed this tutorial! You can share your creations with us on our Facebook page. We would love to see them! For more inspiration have a look around the blog. There are tutorials for many levels using Creative Paperclay®. You can also visit my blog www.papermachepatch.com.

Thanks for stopping by!


Suzette


Thursday, March 29, 2018

Patina Look Jewelry with Creative Paperclay®


Hello there! Jenn here sharing my jewelry project using Creative Paperclay®.
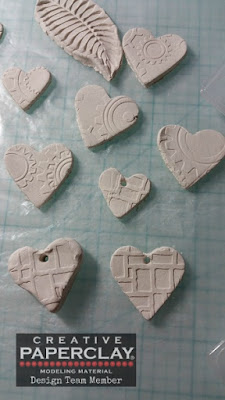
In a previous post I demonstrated how I created molded pieces using embossing folders and cookie cutters. That post can be found HERE.

Patina and rust effects are a major trend right now so I decided to create some jewelry using the hearts and some other items.
The additional supplies I used are as follows:
2 clay molded beads
metal butterfly embellishment
Strong glue
Satin Cord
Copper jump rings
Medium sized rusty washer (this was previously treated with a sulfur to patina) from stash
Earring wires
Acrylic paints in patina/rust shades
Liquid ink in a dark blue shade (I used Art Anthology Minx ink in Stargazer)

Start with a base coat of an aqua colored acrylic paint on all of the hearts, butterfly, and beads.

Using a darker teal acrylic mixed with water apply lightly with a brush and wipe off all excess to re-expose the lighter color in all areas except crevices. This will give more dimension. Alternate between golds, blues, and a bit of the liquid darker blue until you reach the desired patina look.


Make sure all pieces are completely dry. Tie a knot part way down the cord and slide one bead on. Tie a knot on the other side of the bead and make sure both knots are tight and secure.

Next, tie the washer onto the cord in the middle using a slipknot.
Make sure the knot is secure and tight and add a dab of strong clear glue to the back of it.
Place a large jump ring onto the main heart and then onto the washer. Add earring wires to the two smaller hearts and there you have it! Such fun!


I hope that you enjoyed my tutorial today! Thanks for visiting!
For all of your Creative Paperclay® needs visit our online store HERE.
You can also find Creative Paperclay® at the following retailers

Thanks again! Happy Creating!!