Showing posts with label Spring. Show all posts

Tuesday, April 21, 2015

Spring Birds by Linda Hess & her 2nd grade students

Hi all!  Spring has sprung in a big way here in Virginia.  The trees are out, the birds are singing, the allergy eyes are itchy!  All of this has me creating wonderful Spring projects with my art classes.

A few weeks back (just before Easter) I made pinch pot birds with my 4th graders.  We used earthen clay that goes into the kiln to cure.  Sadly I had a few students who trapped air in their bird sculptures...the result of this is EXPLODING birds in the kiln.  Sadly, when they explode they not only destroy that creation, but they take out a few around them as well :-(  For that reason, when I decided to create birds with my 2nd graders I wanted to simplify the process and remove the possibility of the creations meeting an "untimely demise".  Naturally I pulled out my go-to airdry Creative PaperClay.

To create these birds you only need a few materials:
Creative PaperClay (obviously)
a small bowl of water
a damp paper towel
tools: plastic knife, pokey tools (a pencil or pen will work for this!)
acrylic paint & a brush

That's it!  Now to create.
1)  For my 2nd graders I cut each package of Creative PaperClay into 6 equal pieces.  Each student received a piece of clay and a damp paper towel. 
2) The piece of clay was torn in half.  One half was placed into the damp paper towel to keep it moist (lay out the paper towel, place the clay on one side, an then fold the paper towel over).  The other half was rolled into a ball and then into an egg shape. 
3) The egg shape was flattened to create a bird body (no thinner than a pencil).  Wasn't that easy??  Now, time to add details!

NOW any of you who work with children know that they all go to their own beat when creating.  You can tell them "We are creating birds", but they will come up with other options..."Can I make a bunny?" "Can I make a snake?" "Can I ...?"  You get the idea.  So of course when I started to demo the details, the questions began.  The bunny option got a yes...the snake option, a no...and so on.

4) "Remove the extra clay from your paper towel.  This will be used to create wings, beak, eyes, and any other details you wish to add." 
5) For a beak, roll a ball of clay.  Flatten slightly.  Pinch one end to form a tear drop.  Dip one finger in the bowl of water and rub onto the bird shape where you want to place the beak (the water forms a glue between the 2 pieces of Creative PaperClay). 
Press beak into place.  Edges can be smoothed and beak lines can be added.
6) For the wings, repeat the beak steps, but with larger balls of clay. 

Again, dip one finger into the water and rub it onto the bird body.  Press wings in place.  Detail wings if desired.
7) Eyes are SUPER easy...just 2 small balls rolled and pressed into place above the beak (using the water "glue" of course). 
8) Add additional details and then set the bird aside to dry. [NOTE: Clay can be "speed dried" by placing into your oven at 275 degrees for ~20-30 minutes]
9) Once dry, paint with acrylic paints.

That's it!  I hope you have enjoyed this Spring project and the simplicity of using Creative PaperClay.  Here are the birds that my 2nd graders designed.  As you can see a few of them go to the beat of their own drum, but that is what makes my job so rewarding...seeing and experiencing the creative souls that surround me on a daily basis.  I never know what will emerge from those pint-sized brains and I love the surprises :-)


Tuesday, April 7, 2015

Garden Gear - Upcycle project

Tori West here, letting you know that Spring has sprung on Meadow Lane and it's time to get outside and get to work.  Wishing I had a convenient place by the back door to store my hat, gloves, work shirt and maybe the odd garden tool or two, I decided to upcycle an old over-the-door clothes hanger into a piece of wall art & gear hanger.


Supplies:

metal over door clothes hanger
Pliers
foam-core or cardboard
Creative Paperclay® modeling material
Delight™ air dry modeling compound
acrylic paints, paintbrushes
Sandits sanding sticks
collection of flower molds and cookie cutters (I created all of my own, the smaller flowers were from molds of various jewelry pieces, and the large flowers were cookie cutters made from my patterns - see how to make your own cookie cutters from cardboard on my January post)
gesso
acrylic varnish
coffee filters, newspaper, or other paper maché material
white glue


This is what I started with, 
a simple metal door hanger
that hadn't been in use


Using pliers, I straightened out the bars that allowed the piece to hang on the door, then laid the flattened piece on a large piece of paper and traced around it to use as the basis for my design.


As you can see, the bars aren't perfectly flat. That's okay, they will still work for this project.  I also enlarged the screw holes slightly to allow standard nail-in picture hangers to fit through them.  When I was done modifying the metal, I applied several layers of gesso and a coat of varnish to cover any exposed metal in the chipped paint areas, to prevent the metal from rusting.


Once I had the design sketched out, I cut a piece of foam core to fit the outline, then glued it to the metal piece.  To further secure it and create a smooth transition from the metal to the foamcore, I covered all of the connecting edges with a layer of my favorite paper maché material; coffee filters and white glue.


When the paper maché layer was dry, I applied a thin layer of Creative Paperclay®, and then added cut-out clay forms over that.  I made extra leaf shapes to add in with the flowers later, and set this all aside to dry while I created some flowers!


The flowers were made by mixing various colors of acrylic paint with Delight™ air dry modeling compound, then pressing the clay into molds or rolling the clay out, stamping it with a cookie-cutter, then cutting out the clay shapes and assembling the pieces (a technique very similar to the one demonstrated by Linda Hess).

I laid them on the design sketch while I was working, and also made some extra flowers for filling in areas, or to use should I decide to change the design a bit.


...BTW, there are lots of great flower making techniques on this blog, just type "flower" in the search box at the right under the blog heading!


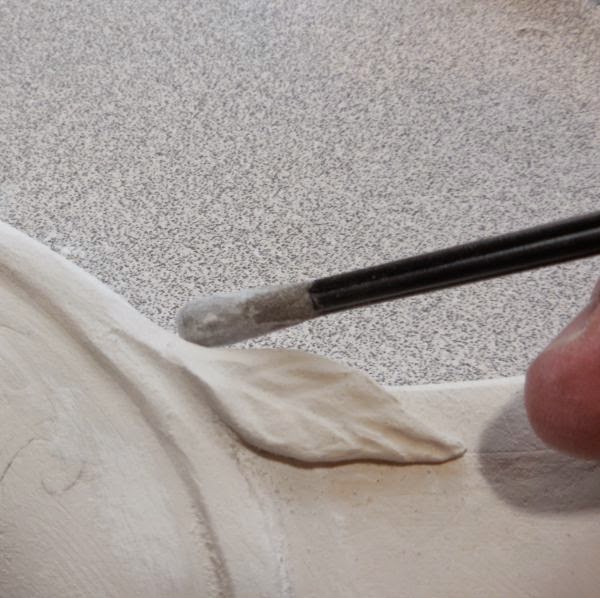
When my base piece was dry I used Sandits to shape and smooth the leaves and vines.  They work well for getting in to smaller areas, but what I like most about them is that they seem to have just the right amount of flexibility and length in the shafts to make smoothing around curved areas easy.


When everything was sanded, I applied a base application of paint in various colors of green as a background to the flowers.


All that was left to do was glue the flowers and leaves in place, paint the saying in the center, and add some sparkle!  Although you can't see it very well in the photo, I used Twinkling H2O's on the center lettering, and on all of the flowers except the small purple ones.  I wanted the effect to be subtle, which it is, the glimmering just catches my eye as I'm heading out to the garden!


I hope Spring is blissful wherever you are! Thanks for joining me here!


I'd love for you to join me for more projects & art adventures on my personal blog
Find me on Facebook, or peruse & ponder pics with me on Pinterest


Connect on Google+ or see what new creations I may have on Etsy

Friday, November 7, 2014

First Friday Fan Day, November 2014 with Rachel Whetzel

Happy NOVEMBER, Creatives!! Rachel Whetzel here! It's First Friday Fan Day, and we appreciate you sharing all your creations using Creative PaperClay® with us!
I hope you hop over to the links I'm sharing with you today, and let your fellow Creative PaperClay® lovers know you saw what they shared too!


FACEBOOK
Willowing shared what's on her mind these days.
Shauna shared a Day of the Dead bust she made.
Cindy shared this adorable pumpkin.
This totally creepy Frankenstein!! 

PINTEREST
This ADORABLE primative bunny rabbit is for sale!
Make yourself some beautiful ornaments.
This fairy tutorial would make a great elf for Christmas! 
Store your Christmas treats in this chilly container!
I love this WIP
MUST make some of these whimsical snowballs!!

HELP ME FIND YOU!!
Use the hashtag #CreativePaperclay on all your social networks. Be sure, when using Facebook, that you make your posts and images using the Creative PaperClay® hashtag are set to public, otherwise, I won't be able to find them. You can also share your projects to the Creative PaperClay® FACEBOOK PAGE. Each month, I'll browse the interwebs looking for projects from YOU, that I can share here! Be featured next month! START SHARING NOW!!

Thanks for reading! If you'd like to keep up with me, and see more of what I'm up to, I'd also love it if you'd visit MY BLOG and Subscribe! You can also find me on FACEBOOK!

Thursday, May 1, 2014

Spring Bugs, Create your own specimens by LuLu Lancaster


Hello There LuLu here again with some creepy crawlers :) Happy Spring and with Springtime I always think about Bugs. Usually the kind invading my home, but these are fun little colorful freeform Bugs ;)

All you need is 
Creative PaperClay®
needle and thread
Acrylic paints
I used brown red and gold
An Acrylic gloss

Start with multiple clay balls any size

squish a few of them together and elongate to make a bug like shape

You can make any type of bug shape I have a few caterpillar types ;)

take your needle and thread and run lengthwise of the body.
Leaving threads hanging on both ends. Creates the illusions of bug "parts"

Now run your thread across the body to create insect arms and legs


Let your new creatures dry in the sun :)


Paint fun colors with spots and stripes. You can even add "wings" from plastic with a drop of glue.


After they have dried add some acrylic gloss to shine them up :)

And that is how you make "bugs" with Creative PaperClay®


Thank you so much for following along :D I hope you have enjoyed this little project.
LuLu


Thursday, April 3, 2014

Spring Marshmallow Party Necklace using Creative PaperClay® by LuLu Lancaster


Hello This is LuLu lancaster with another easy Kids project with a little adult supervision.
My Granddaughter loves chunky necklaces. With their bright fun shapes and colors what kid wouldn't? I thought about a fun easy kid friendly project that brought the fun of coloring with egg dyes and creating something children could wear.  And here is the result!

A Marshmallow necklace :)

All you will need is:
Creative PaperClay®
a knitting needle I used a size 5
an xacto knife ( this part will need Adult )
a length of ribbon,yarn or string.
egg coloring dye
bowls
water
needle and thread (adult supervision)


Start with the square mallows. Just slice squares off your clay. Mine are approx. 3/4 inch squared

Next sculpt a simple Marshmallow bunny 


Slide it all on the knitting needle. This will create the holes so it can be strung together.

Allow to dry before removing from the knitting needle. I put mine outside for the afternoon n a warm day.

Now you can take simple Easter egg dye tablets and select 2 complementary colors. We chose Purple and Yellow. Drop the tablets in the water and allow to dissolve.


using your needle and thread string through the hole. This will allow you to dip the "mallows" into the dye.

It only takes a couple seconds to dye the clay.
Do not leave the clay in the dye for too long it will dissolve. remember it is created from  Creative PaperClay® :)


Here we have all the "mallows" dyed and drying waiting to be strung together. 


You could even add little beads in between the "mallows" :)
Thank you so much for following along and I hope you have enjoyed this little project :)
LuLu


Thursday, February 6, 2014

Mini Spooky Spring Maypole Project with Delight ™ Air dry modeling Material


Hello There! This is LuLu Lancaster with a little spooky Spring Mini Maypole :)

I have many of these Vintage Industrial Bobbins. I have them in baskets and have used them for projects but am always looking for another way to use them creatively. You could use any type of hollow length of material for this project, perhaps Bamboo? If a Bobbin is not readily available.

This is very easy to make

First Gather your materials


A Vintage Bobbin or any hollow length of material like a bamboo stick
Ribbons~Approx. 20" lengths
Delight™ air dry Modeling Material
a 3" styrofoam ball
an xacto knife
needle and thread
acrylic paint
paintbrush
silk or paper millinery flowers
clay shaper tool or chopsticks
Tacky Glue


The fist thing you will need to do is make sure your vintage bobbin has a clear opening all the way through ;) 
Next you will sew approx. 8 ~20" lengths of ribbon at the end just a couple stitches will do.


Now that you have stitched the ribbons at one end,
 you will drop the needle into the larger end of the Bobbin.
When the needle comes out the smaller end you will pull tightly (but not too tight you may snap the thread) add a dab of tacky glue to the small end to hold the thread in place.


Taking your Styrofoam ball and your xacto knife carefully cut the ball in half.
You will only be using 1 half so save the other for another project or maypole :)


Insert the small end of the bobbin into the styrofoam. with some water and your clay start covering the foam. This will be your base of your maypole.


Making the tiny skulls
Now you will shape small skulls.
With small thumb size pieces of clay make a rough ball and pinch the bottom half.

using a clay shaper tool or even chopsticks poke eyes in the clay nostrils and teeth if you like.


It takes approx. 24 small skulls to cover the base.
using the tacky glue start applying the skulls to the base.You do not need to wait for the Delight™ material to dry ;)


Once you have the base covered take a little Black watered down acrylic paint and 

paint the eyes nostrils and teeth on your skulls :)
You can add small silk or paper flowers in the spaces if you like also.


Thank you again for reading along and may you have a Fun Spooky Spring!
LuLu