Showing posts with label Vote. Show all posts

Friday, October 23, 2020

Bottle Tree Seed Pod Sculpture


Hello and happy Friday everyone! Cinnamon here and I am going to show
you how I created this piece I call  "They Didn't Know that We Were Seeds" 
which was inspired by a Mexican proverb. This is one of the smallest
pieces that I've made, I'll show you how I created this with the steps below:

Supplies: 

Creative Paperclay®

Masking tape
Bottle Tree Seed Pods
Cardboard
Exacto Knife
Sand paper
E600 Craft Glue
Aleene's Tacky Glue
Acrylic paint
Sealer, Varnish


I had these pods hanging around my studio that a family member
 gave me after coming back from vacation. They come from a tree
that is native to Australia and is known as Queensland bottle tree. 
I started out by getting a piece of cardboard and folding it to a size that
 would fit inside the seed pod. I covered it with masking tape and clay. 


After getting the rough shape of the piece, sit it aside and 
allow it to dry for around 24 hours. Make sure that it fits in 
the pod with a bit of room at the top and the bottom.


After allowing it to dry begin to work on the face and build 
up the features. This will be a gradual build up and 
break down process, so you need a little patience.


When you are satisfied, sit the piece aside again to dry
before building up the rest and allow it to dry again.


After letting the piece dry, begin to carve into the piece with a 
razor or exacto knife to better define the shape of the face 
and features. Add more to finish out the shape of the clay 
if it still needs more work and allow it to dry again. Continue 
this process until you are happy with how the face comes out.


Once you are done, you can begin to paint the piece with your choice of paint.  


I am using a magnifying glass here so that I could see the lips
better. I didn't want to mess them up because they're so tiny! 
(I also thought it would make the photo 10% cooler, and it did! :)


I am using some wool here for the hair. I decided to put two
 long braids on the doll so I braided the hair in advance so
 that I could glue the braids on later.


I am using Aleene's Tacky glue here so that I could get the hair to stick
to the piece quickly. This glue grabs on to whatever you are gluing
 fast so that you don't have to spend a long time holding the pieces together.


I have panted the eyelashes with a tiny brush to make the strokes
 look like real lashes. I'm not good at putting lashes on my 
pieces, and especially not in this micro size!


With every piece that you add to the doll, be sure that she still 
fits in the pod. She can easily become to big for it when you 
start dressing her, so take note of how big you are working.


I am now wrapping a piece of fabric around her to dress her. 
Again, make sure that it still fits in the pod here!


Wikipedia Image, Public Domain

Wiki image Public Domain

(This is what the pods look like hanging in the tree)


I decided to use corn kernels to resemble the seeds from the plant.
I am using the Aleene's Tacky glue here to get them in place.


I felt that the kernels were a bit too yellow, so I put a light coat
 of brown paint over them to tone  them down.


After getting the kernels in order I moved on to putting the 
doll in place. I went with the E6000 glue here to get a better 
hold of her since she was bigger. I left the bottom kernels off
so that I can glue them after placing the doll.


After the doll has been placed, you can move on to placing the last few kernels.


Thank you all once again for stopping by, and I hope that you enjoyed 
today's tutorial! You can find Creative Paperclay® at the following 

See more of my work at Melandolly.com, catch updates on 
my Instagram page and here is a link to my shop!


Make sure you go out and VOTE 
if you didn't already!


Friday, October 25, 2019

Create a Ring holder with Creative Paperclay


Hello everyone! My name is Cinnamon Willis and I am going to show you how I created this sculpture. With Election Day coming up, I was inspired to create this hand with the fingers shaped in a "V" to inspire all who are capable to go out and vote! This sculpture also doubles as a ring holder, you can create this with all five fingers extended to have a full hand of ring holders if you would prefer.

Supplies:

  • Creative Paperclay®
  • E6000 Glue
  • Wire to build an armature with, can be aluminum
  • Pliers
  • Acrylic paint
  • Sanding paper
  • Drill
  • Wooden base
  • Dowel


To begin, take the wire and bend it into the shape of a hand. Do this step with pliers so that it would be easier.


Cover the armature with masking tape and newspaper to bulk it up. If you plan to have any fingers bent, cover them with tape in newspaper and leave the knuckle exposed so that you can manipulate the fingers to get underneath them to sculpt later.


Begin to add the clay onto your hand, leave knuckles exposed if you plan to bend the fingers and pose them afterwards. It will be easier to work on shaping and sanding them last after you are done working on the rest of the hand. When you have worked out the overall shape of the hand, proceed to go back to bend the fingers in place to work on the knuckles. Wrap the wire with masking tape and then cover with clay.


When the piece is dry, sand if you would like a smooth finish and paint with acrylics.


Take the base that you plan on using for the piece and drill a hole in it that would be roughly the same size as the dowel that you plan on using. Take the same drill bit and use it on the base of your sculpture.


Paint the base with your choice of paint before attaching it to the sculpture. When it dries, take your E6000 glue and attach the rod to the base. Sit the base out for 24 hours and allow to dry.


Attach the base to the sculpture with the E6000 glue and allow it to dry.


Take a photo and remember to go out and vote!

Thank you all once again for stopping by, and I hope that you enjoyed today's tutorial! You can find Creative Paperclay® at the following retailers Creative Paperclay® Online Store, Michael'sAmazon, Joann's.

See more of my work at Melandolly.com and be sure to catch updates on my Instagram page


Friday, October 26, 2018

How to Create An "Elkey" Sculpture with Creative Paperclay


Hello everyone! Cinnamon here, I'm going to show you all how I created what I call "Elkey" with Creative Paperclay® (Scroll down to the bottom to see the piece in it's entirety!). With Election Day creeping up on us November 6th, I was inspired to create this donkey/elephant hybrid as a reminder for us to mark our calendars and get ready to go out and be heard! Below are the steps that I took to create this creature!

Here is what you will need:
  • Steel wire, 18 gauge and 22 gauge 
  • Pliers 
  • Creative Paperclay® 
  • Newspaper 
  • Masking tape 
  • Sand paper 
  • Wool 
  • Acrylic paint 
  • Sealer, Varnish 
  • E600 Craft Glue 
  • Reference photos for elephants, donkeys and horses 


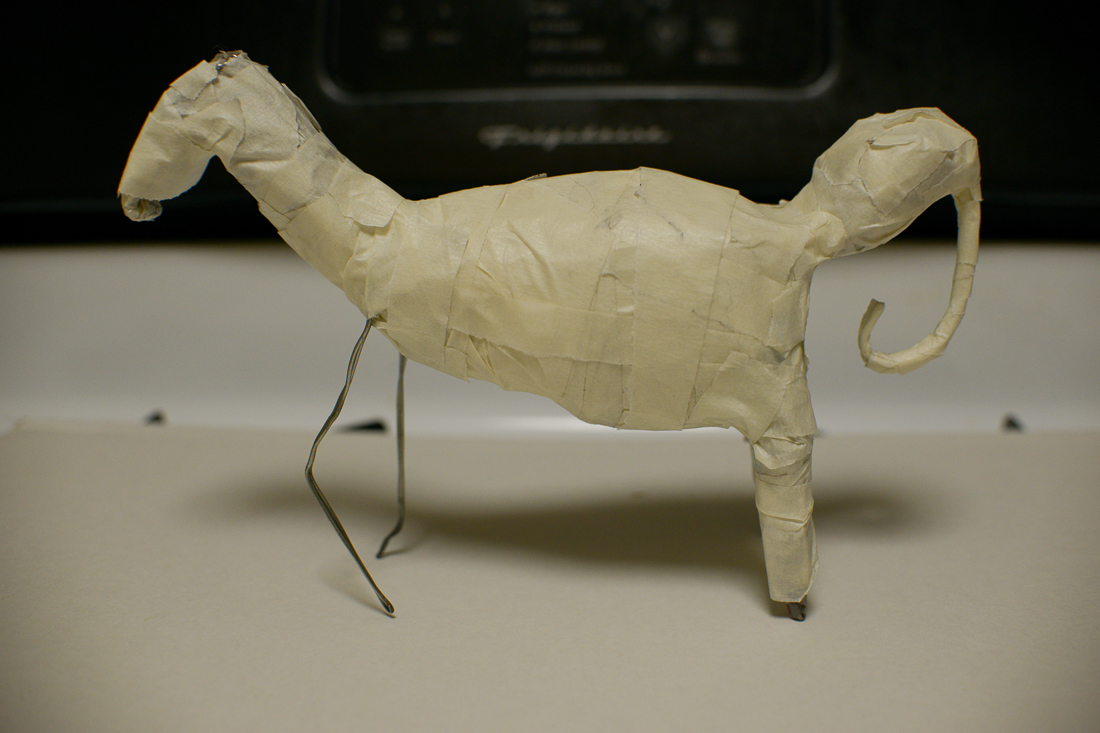
I first started this project out by manipulating the 18 gauge wire and turning it into a rough frame for the piece. I needed the wire to be sturdy enough to be able to support all the added weight of the elephant.


I began to bulk out the body with newspaper and masking tape, in addition to building up a neck for the donkey half of the creature.


After studying my reference photos, I created the head for the elephant half. I made sure to keep it lower to the shoulders of the piece for accuracy.


I didn't want to fuss too much with the positioning of the ears and tusk at this stage so I decided to work on them separately with wire connecting them in the middle and attach them later. This way it would be much easier for me to figure out where they looked best after the piece has all of it's meat on it's bones.


Once I was done with working out the shape for the ears, I put them aside and started adding clay on the body of the creature. I bulked up the legs for the elephant and tried to go light on the legs for the donkey.


I had to study both the photos for a donkey and a horse to make sure that I wasn't sculpting a horse. They are very similar but there are small characteristics that stand out such as the short stubby neck, shorter legs and large ears that donkeys have in comparison to horses.


At this stage where I'm satisfied with how the body looks for both animals, I begin to work out the  placement of the ears. For the elephant, I carved a little indent where the wire could rest for the ears and put some e6000 glue to secure them to the head and used masking tape to keep them in place. For the tusk, I had wire protruding from the top of them and just stuck them into some moist clay that I put on the sides of the elephant's trunk. I then covered the tusk with more clay and let it dry in place. For the donkey, I placed the ears in the same way that I did for the elephant. I concealed the wire by covering it with clay. After allowing the piece to fully dry, I began the process of smoothing out the clay with sanding paper.


After things were all smoothed out, I applied a few coats of paint to the piece until I was happy with the color. There is no reason why I painted the whole piece grey here, I was just playing with paint application.


With the donkey, I wanted to place a few tufts of hair on to the top of it's head. I used some wool here and Aleene's Tacky glue to attach the hair.


I sprayed this piece with a varnish at this stage and here is what it looks like. I wish I would have turned both neck so that they would be facing the camera :D


Thank you for stopping by, and I hope that you all enjoyed today's tutorial! You can find Creative Paperclay® at the following retailers Creative Paperclay® Online Store, Michael'sAmazon, Joann's

See more of my work at Melandolly.com and be sure to catch updates on my Instagram page