Showing posts with label slurry. Show all posts

Saturday, November 25, 2023

Odds & Ends Add "POP"


I love adding a bit dimensional pop to my collage paintings and what better to it with than Creative Paperclay®. Because of the diversity of uses for the clay, I can can get different looks depending on whether I am using a slurry, stamp into the clay or shape it with a silicone mold. 

With so many old paintings laying around, I have access to paintings that I can update with techniques I may not have known when I originally created them.

SUPPLIES

Creative Paperclay®
Acrylic paint including gold
Alphabet & floral stamps
Silicone mold
Substrate (old painting used here)


You can make a slurry from all the small dried up pieces of Creative Paperclay®. I prefer to grind it into very fine pieces then add some color and a touch of acrylic medium. It makes a texture with a fine grit.
I added the slurry to an old painting of mine. One edge was taped so I could get a straight line when the tape was pulled off. Lines were added with the edge of my ruler.
The slurry color was changed to have more of a blue tint and stamped. When it dried, an umber wash was applied to the slurry. Because it was a wash the color stayed in the stamped areas more.
The top bar of clay has been stamped into with alphabet stamps, allowed to dry then sealed with polymer medium.


When the medium has dried, paint with a burnt umber paint, let dry and then rub gold paint on it with your finger so it just picks up the high areas.
Clay was applied to a silicone mold then allowed to dry thoroughly before removing it. The same technique above is used to color this and add the gold highlights.

And the painting continues.

Dream in Color!

Darlene Olivia McElroy

darleneoliviamcelroy.com


Friday, February 9, 2018

Creative Paperclay® slurry + Scissors = WOW

Want to cut Creative Paperclay® slurry with scissors? Sounds weird but always great to know all kinds of little tricks to expand that ever growing art arsenal.

SUPPLIES

Creative Paperclay® slurry
Wax paper
Soft gel or Modge Podge

Start by thoroughly mixing Creative Paperclay® slurry and soft gel together. I add approximately 40%-50% soft gel to the clay slurry.


My work table is cover with a plastic tarp. I spread the mixture on the plastic and cover with wax paper before rolling it out with a rolling pin. Because no air is getting to it because of the wax paper and plastic it will take 1-2 days to dry depending on humidity and thickness. I live in the desert so things dry faster than other places.


 When it has dried, it can be peeled off the plastic and cut with scissors. Great way to cut shapes for mobiles, gift tags, collage elements for art, etc. A small idea with endless possibilities.

Dream in Color!

Darlene Olivia McElroy


Tuesday, September 27, 2016

Combining Plastic & Clay

I played with Plastic Modeling Pellets when I wrote my book on Mixed Media in Clay (which has a whole chapter on paper clay). Fun stuff. When Creative Paperclay® sent me some, I had to experiment with it.

SUPPLIES

Plastic Modeling Pellets 
Creative Paperclay® slurry
Acrylic paint
Rubber Stamp
Hot water
PAM cooking spray


Hot water makes the plastic pellets moldable. Although you can heat water in a pan or in skillet, I usually just microwave a cup of water until it bubbles. Note that the steam greyed out my photograph. The pellets go into the hot water white and hard then become transparent and clump together. At this time take it out of the water to mold. It may be very hot. If it is, let it cool down enough to touch.


I placed it on a rubber stamp that sprayed with PAM. I was using it as a cheap mold release. It is not necessary on rubber but makes the release of the plastic easier.


As it cools down it will become white again. At this point, you can remove it from the stamp. If you don't like the design, just reheat it and start again.


My first experiment was to do apply a wash of irridescent Bronze paint. This color will separate when used as a wash and leave green areas.


If we stamp with the original rubber stamp we would get a debossed look. We did that to the plastic so when stamped into paper clay we get the look of the original rubber stamp  Got that? One is embossed and the other is debossed.


Then I made a colored paper clay slurry and applied it to the painted cast plastic.


I wiped off the excess with a damp paper towel so that the pattern showed. When this is dry, I will cut it with my table saw into a shape to put into my art.

I love the process and playing.

Dream in Color!

Darlene Olivia McElroy

Thursday, June 23, 2016

Thicken Your Paint with Creative Paperclay®

Creative Paperclay® slurry allows me to paint much thicker.

What is a slurry and how do I make it? Slurry has the consistency of porridge. I make it by putting all the dried out little pieces of paper clay in a sealed container with water. It reactivates the paper clay. This mixture also allows me to stencil with it or add it to paint for a thick paint look.

SUPPLIES

Creative Paperclay®
Palette knife
Acrylic paint.


I start by mixing acrylic paint into the slurry. It actually takes a small amount of paint to color it. Not only do you end up with a thick paint but you save money by doing this.


I applied the colored slurry to my piece of art. The background was a dark grey which I allowed to show through in areas.


Next, I mixed a lighter version of the colored slurry. I applied it in broad strokes—the bravura stroke, the grand gesture, is an expressive application of paint on your surface. There is something freeing about doing large strokes rather than small precise ones.

Play with Art and Dream in Color.

Darlene Olivia McElroy

Thursday, April 14, 2016

Layered Stencils with Creative Paperclay® Slurry


I had an old art panel with paint on it and wanted to try creating a raised fresco look on it. So out came the stencils, masking tape and Creative Paperclay® slurry. Slurry is a porridge like substance made from bits of Creative Paperclay® and water mixed together well.

SUPPLIES

Creative Paperclay®
Stencils
Masking Tape
Sand paper
Acrylic Paints
Art panel


I layered the stenciled slurry. Letting each stencil dry to the touch before layering another one. When all had dried thoroughly, I sanded it back to smooth out the edges. Then started adding more stencils, paint and collage elements.

Have fun with art & dream in color,

Darlene Olivia McElroy

Thursday, December 10, 2015

Multiple choices with Creative Paperclay®


I decided to try and make a faux handmade paper with Creative Paperclay® and netting. Think of all the things you could do with this. It didn't end there. I cast a couple little men so I would have multiple options.
Here's what I got out of my experiments.

SUPPLIES

Netting
Creative Paperclay® slurry
Silicone mold of man
Gold Metallic acrylic paint
Soft gel gloss
Gold glitter
Ribbon
Small bag


I laid the netting on wax paper then applied the Creative Paperclay® slurry on top.


I laid another sheet of wax paper on top and brayered the slurry flat. I left the wax paper on until the slurry was almost dry.


Next I applied slurry into a silicone mold and left the slurry to dry in the mold.


Next, I painted both gold. There can never be enough gold and bling.


I applied soft gel gloss through a stencil then removed the stencil and added coarse glitter for a rich tapestry look.


Glue the cast man and a ribbon and you have a great gift tag, gift card or ???


Or make a pocket shrine for your man, maybe a Chinese fortune cookie fortune, herbs, etc. Then tuck it in your purse. Or gift to a girlfriend that is looking for a boyfriend or husband for luck!


Dream in Color

Darlene Olivia McElroy

Thursday, November 12, 2015

Winter Story


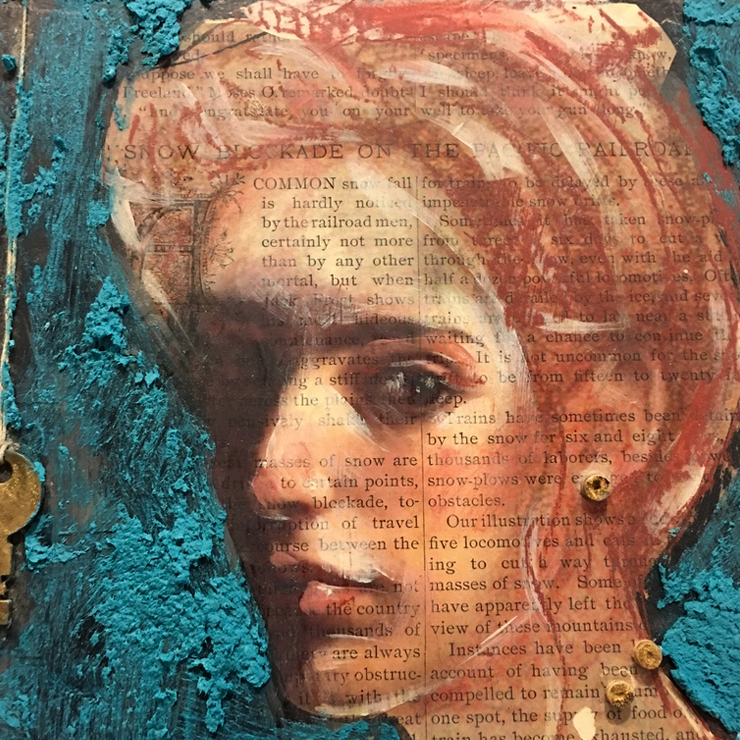
I am feeling cold with all the news stories about the upcoming winter so I took out on old canvas to put down a story of how I feel about winter. Brrr. I am such a summer girl that I cringe just thinking about cold weather.

SUPPLIES

Creative Paperclay® slurry
Waxpaper
Soft gel matte
Wax paper
Toner image
Colored pastel pencils
Gold rub


I start with pouring a paper clay slurry on my canvas then brayering it flat. I put a sheet of wax paper before brayering and leave it on until the slurry is totally dry.


I apply a layer of gel over the dry slurry and let it dry. Because I plan to do a dry gel transfer and will use moisture to remove the paper, it is important that I seal the surface. Next I apply gel to both the face of the image and the surface, lay the image face down and brayer flat. I let this dry overnight. I usually do this at night so I have something fun to do while the coffee is percolating.


I slightly sand the paper, then spritz with water and rub the paper off. The ink will stick to the dry slurry.
After it has dried, you may see some paper ghosting just spritz again and rub it off.


I then add paint, gold rub and some pastel and more soft gel matte to ghost the image more. I wanted that cold, ghosty of feel of a show storm. I finished by patching up a few areas of where the slurry got rubbed off with my enthusiasm.

Tell your story with imagery and paper clay.

Dream in Color and Play Hard.


—Darlene Olivia McElroy