Showing posts with label acrylics. Show all posts

Saturday, January 27, 2024

It's All About the Story

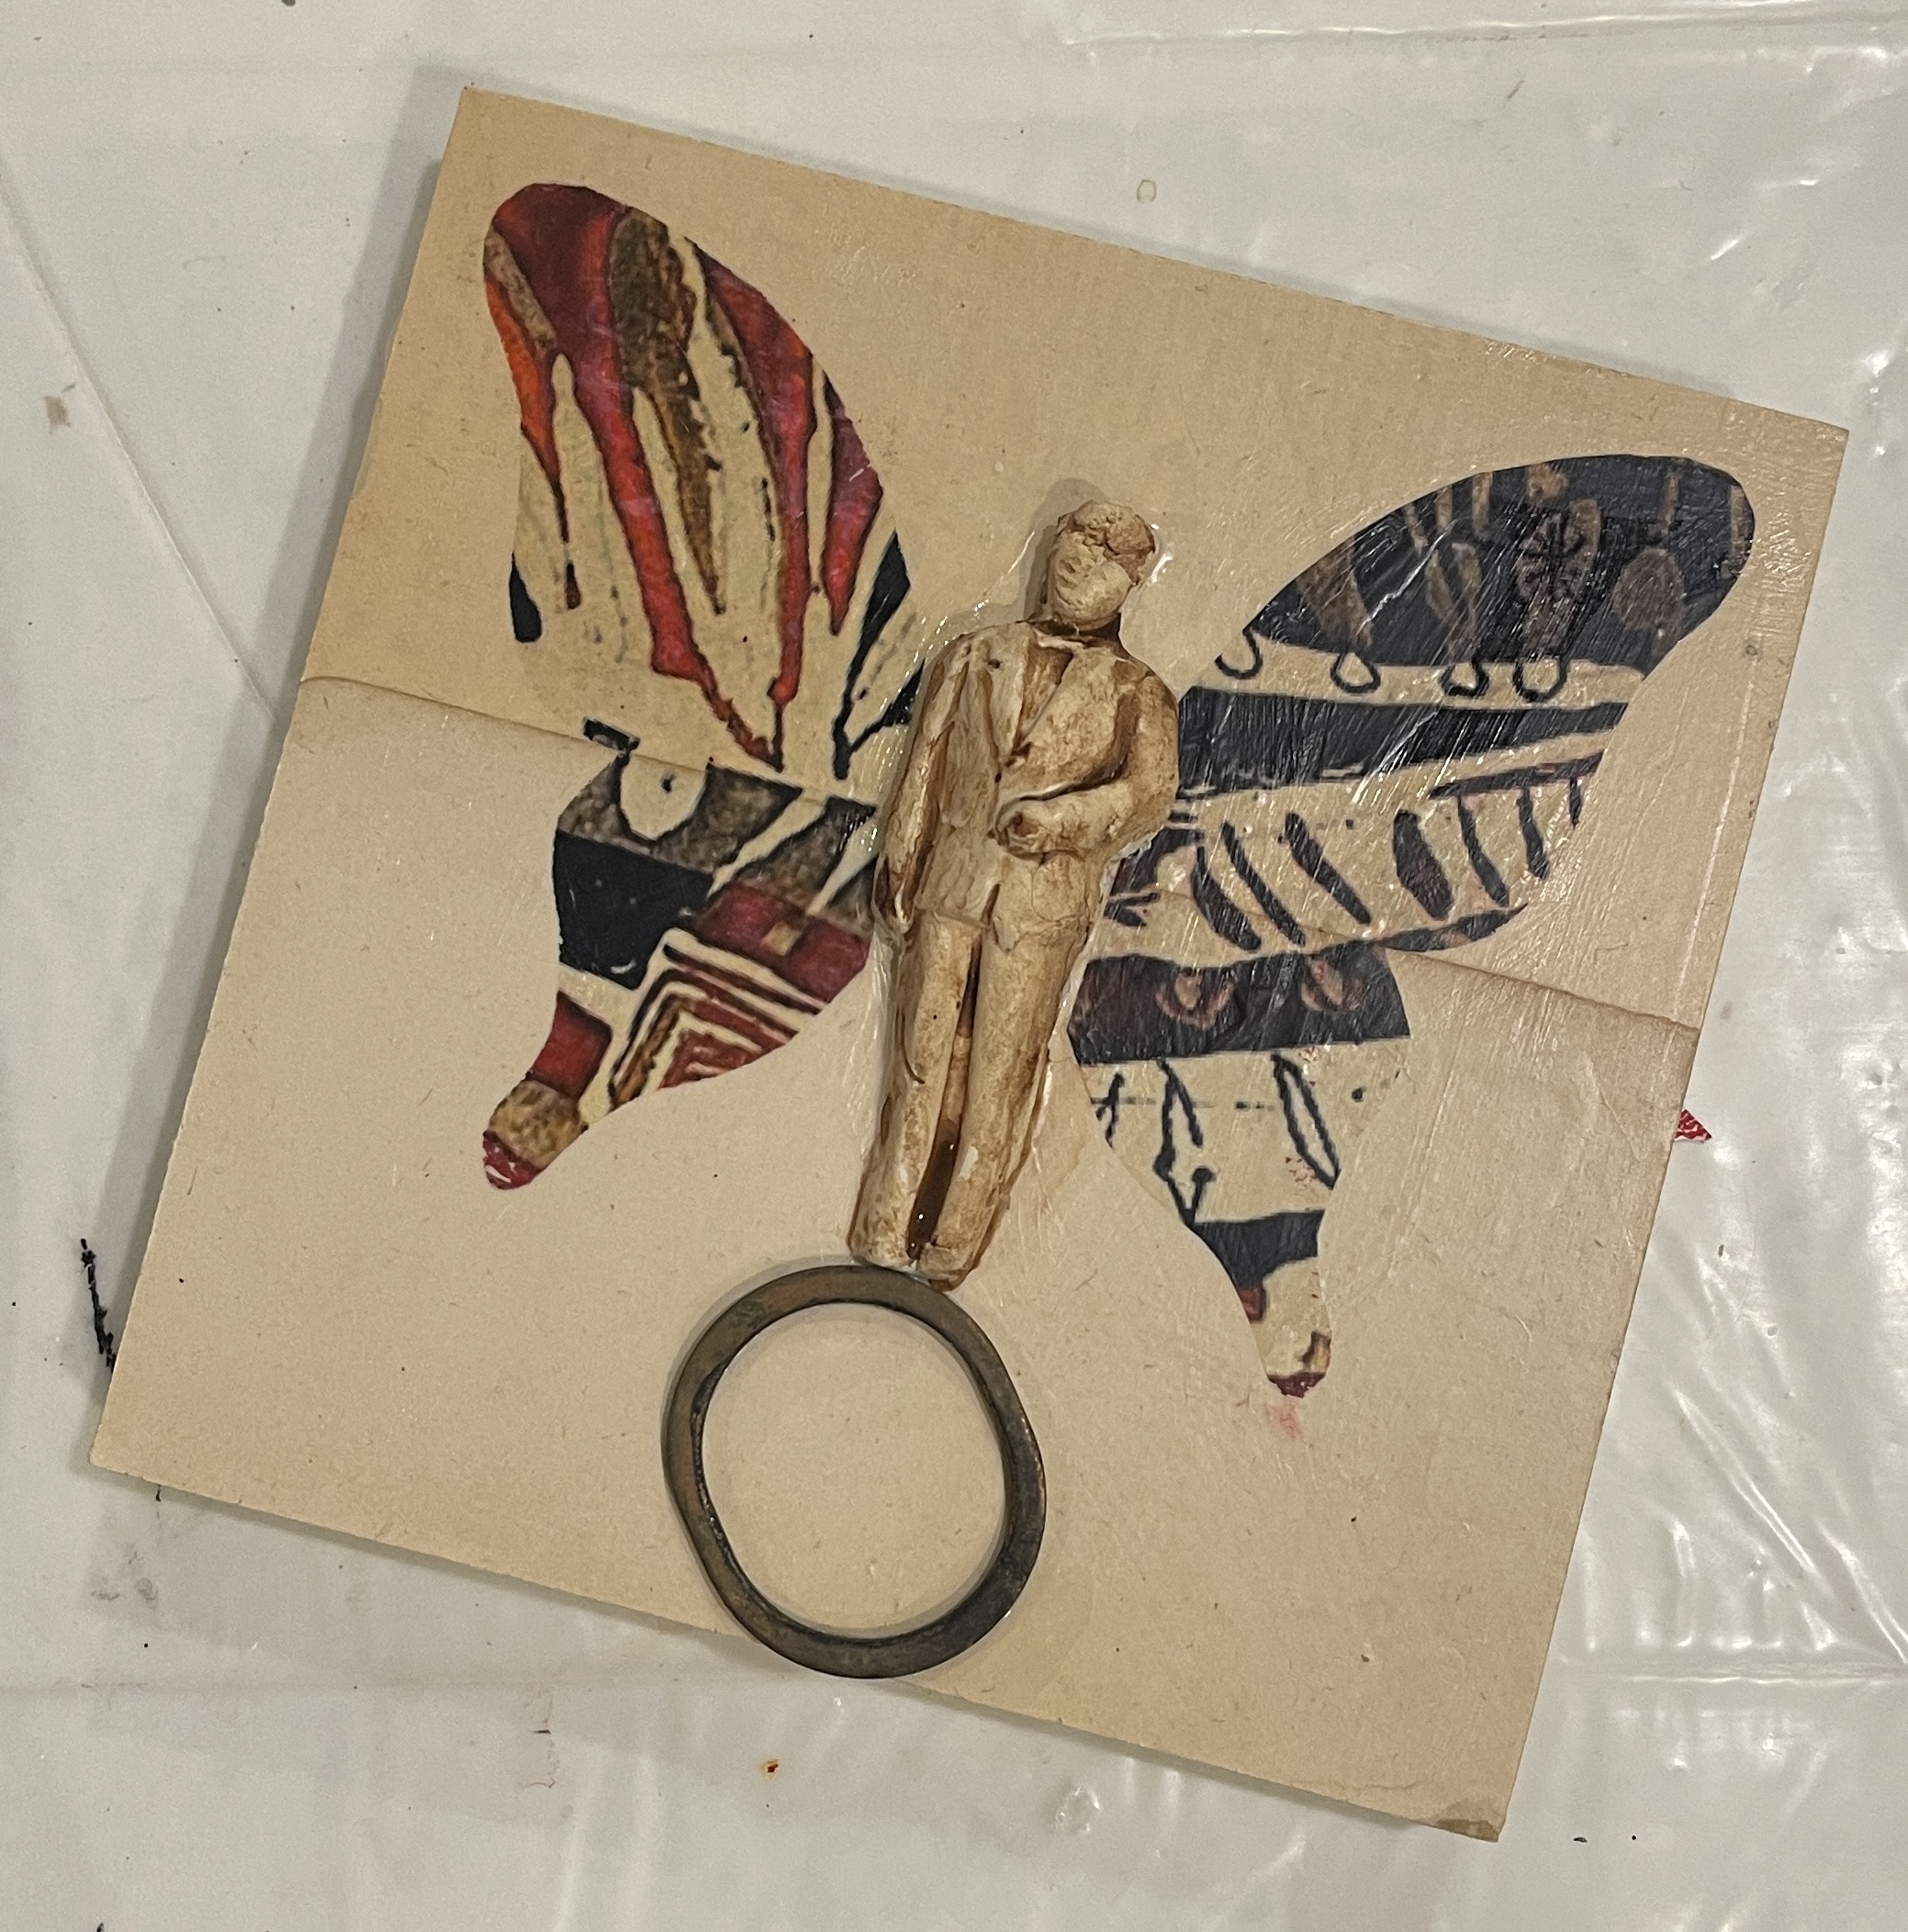
 Sometime simple is the best way to tell a story and, let's face it, all art tells a story. I just finished a big painting and had just enough time to do a small piece before I took off on vacation.

SUPPLIES

Creative Paperclay®
Waterslide Decal
Rust Metal Object
Wings
Fake Flower
Hand cut paper


I started by collaging old book pages with aged edges on my panel. Then I cast a man with Creative Paperclay®, letting it dry on the panel. Next, I gather collage elements and added the waterslide decal wings to the piece.


I wanted this piece to be about balance so the rusty metal ring was added.


After adding more collage details, I finished off the sides with a diamond pattern. This way it doesn't need to be framed.  I love doing these small simple pieces as it keeps me flexible and I never where it will lead me on my large pieces of art.

Dream in Color!

Darlene Olivia McElroy

darleneoliviamcelroy.com


Thursday, February 15, 2018

Mosaic HeART Journal


Hello Creative Friends! Jenn here with a new Creative Paperclay® project to share with you. This mosaic heART journal was so much fun to create.

For the tiles, I used both Creative Paperclay® Modeling Material and Delight® air dry modeling compound.
Additional supplies used:
Several rubber stamps in various patterns
Hot glue gun and glue
Clay shaping tools
Rolling pin
Cutting utensil
Acrylic paints in teal, fuschia, and green
White Gesso
Plain notebook or journal hardbound
paintbrushes

One of the many great things about Creative Paperclay® and Delight® is the amount of detail you can achieve by stamping into it. This is how the tiles are created. Using a rolling pin, roll out clay to desired thickness and cut into various sized tiles. Next, use rubber stamps to press into the clay and create the patterns.

Use a hot glue gun to adhere them to the cover of the journal. Roll out a long piece of clay to cover the outer binding. Press a pattern into this strip as well. Once all of the tiles are in place, allow the clay to dry overnight. Cover with white gesso and let dry.

Finally, paint the tiles using an array of bright acrylic paints as shown.

To add a little flair to my cover, I molded a heart using Creative Paperclay®, painted it to match, and adhered to the front!

Both Creative Paperclay® and Delight® are amazingly easy to work with and can be used for a wide variety of projects.

Thanks so much for viewing my post today! I hope it inspires you to get creative!


Delight® Air Dry Modeling Compound and Creative Paperclay® can be purchased in the online store here.

Creative Paperclay® products are also conveniently available at


Friday, May 12, 2017

Spooning with Creative Paperclay®

I am seeing art spoons in a lot of art shows so I decided to create one. For my inspiration I used Caroline Douglas's spoon. She is a friend and wonderful ceramic sculptor from Boulder, CO. These are great for decor and gifts. When I meet my friends for lunch we all have little baggies of art stuff to share. This would be great for the next time we get together.

SUPPLIES

Plastic spoon
Creative Paperclay®
Acrylic paint
Acrylic paint pens
Stamps

I was born with a plastic spoon in my mouth. Pete Townshend
Read more at: https://www.brainyquote.com/quotes/keywords/spoon.html
I was born with a plastic spoon in my mouth. Pete Townshend
Read more at: https://www.brainyquote.com/quotes/keywords/spoon.html

I was born with a plastic spoon in my mouth. Pete Townshend
Read more at: https://www.brainyquote.com/quotes/keywords/spoon.html


I covered the spoon with Creative Paperclay® then stamped it for texture. I cast the head with a silicone mold and added a cast butterfly that I had done at an earlier date. It is so easy to add dry clay objects into the wet clay.


With Caroline's piece on the left for color inspiration, I painted mine with acrylics and made the checkerboard pattern and dots with my paint pens. Definitely a fun piece to create.

Dream in color!

Darlene Olivia McElroy


Tuesday, April 11, 2017

Dry Clay, Wet Clay

I have bags full of cast Creative Paperclay® objects to use in future pieces of art. I love it's adhesive qualities and the fact that I can add fresh clay to dry clay pieces or embed dry cast objects into fresh clay.

SUPPLIES
Creative Paperclay®
Creative Paperclay® cast objects
Art surface
Glue
Stamps
Paint
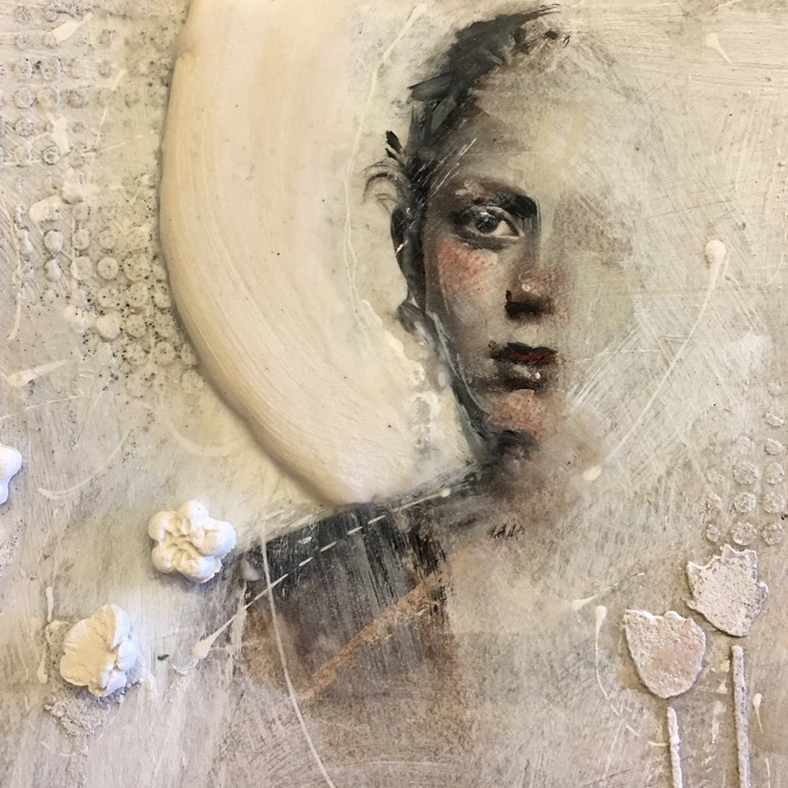
I had this painting started and wanted to addapply a halo with clay. While it was still damp I made the halo shape and smoothed it out.
I stamped into the halo with a rubber stamp then pushed the dry cast objects into the wet clay and glued the rest of the flowers to the surface with glue. Next thing will be to add paint but still at the stage where I am debating adding any more objects to the piece.

Dream in Color

Darlene Olivia McElroy

Tuesday, February 28, 2017

Holographic Foil & Creative Paperclay®

I wanted to make party decorations for a friend for either her gift ornaments or for the place settings.  I started by casting baby heads and shells from my collection of silicone molds. I only wanted partial baby faces so after casting I tore the top of the heads off. Am I cruel or what? Next, I let them dry overnight.

SUPPLIES
Creative Paperclay®
Gold Paint
Adhesive size
Holographic foil
E6000 glue


When the cast shapes were dry, I glued them together with E6000. I could have glued them together with a piece of clay but, as usual, I was in a hurry and E6000 sets quickly.


After painting them a matte gold acrylic by Holbein and letting the paint dry, I applied the adhesive size. This is a special glue made for metal leaf and foils. It goes on white and when it becomes clear, it is tacky and ready for the foil application. I prefer Wunda Size as it is water soluble.

As I am looking at these, I realize they look a little Mayan. All they need is big earrings. Always love it when I am surprised by something I had missed.


The holographic foil is then rubbed on to the tacky adhesive size. This is then lifted off. Because it has a very thin layer of plastic over it, the foil not used will remain attached to the plastic.

My apologies that this is so hard to photograph In person it looks great.

FYI. I get my holographic foils at Royal Design Studio. They have a great range of holographic and regular foils plus you can order it by the foot, yard or roll.

Dream in Color!

Darlene Olivia McElroy

Thursday, May 26, 2016

Going Baroque with Creative Paperclay®


There is magic in mixed media. Old objects get a new life and are given a new story. I have drawers full of cast objects, charms and beads that I use as finishing elements in my art. I find boxes with broken jewelry and odd stuff on my doorstep often. People in town know I use these second hand interesting things (S.H.I.T.) in my art. As a mixed media artist, you never throws ANYTHING away.

SUPPLIES
Creative Paperclay®
Stamps
Old jewelry
Beads
Stencil
Polymer medium

This piece started by laying out shapes of Paperclay on an old painted, cradled panel. I stamped into the clay then went through my drawers full of objects I had previously cast with left over pieces of Paperclay. After selecting the lucky pieces, I glued them down on the dry butterfly shape. Then I coated everything with polymer medium to seal the clay before painting it.


Then I started the painting process using several shapes of purple, gold and buff colored paints. I dry brushed the gold over the purple to pick up the highlights in the texture.


I went through my drawers full of small objects, jewelry, keys, and whatever that I keep in muffin tins. I always search these treasures to finish off a piece of art.


Now I add my small treasures to my art to embellish it. Some I painted just a little and, of course, I added some stencil work.

There is nothing like the pleasure of creating.

Dream in Color.

Darlene Olivia McElroy

Thursday, April 14, 2016

Layered Stencils with Creative Paperclay® Slurry


I had an old art panel with paint on it and wanted to try creating a raised fresco look on it. So out came the stencils, masking tape and Creative Paperclay® slurry. Slurry is a porridge like substance made from bits of Creative Paperclay® and water mixed together well.

SUPPLIES

Creative Paperclay®
Stencils
Masking Tape
Sand paper
Acrylic Paints
Art panel


I layered the stenciled slurry. Letting each stencil dry to the touch before layering another one. When all had dried thoroughly, I sanded it back to smooth out the edges. Then started adding more stencils, paint and collage elements.

Have fun with art & dream in color,

Darlene Olivia McElroy

Thursday, April 23, 2015

Create a Journal for You and Your Friends

Take an old book from a thrift store and turn it into a journal for yourself or for a gift. Simple and easy.

Supplies
Old book
Gesso
Paint
Creative Paperclay®
Stamps
Collage elements


I started by painting gesso on the interior pages. This adds a little weight to the pages as well as give you a great surface for journaling on. I let some of the text show through for interest.


Next, I added Creative Paperclay® on the cover of the old book and added texture and pattern by brayering stamping and stencils on the clay.


I added paint, metallic rubs and then glued on collage elements.

This is a great gift for all ages. Have fun.

—Darlene Olivia McElroy

Thursday, April 9, 2015

Recycle/Reclaim Your Art

Sometimes you have unfinished paintings or you have grown as an artist since you did the piece or there may be a million other reasons you don't like a piece. Or perhaps trade with a friend. So let's add paper clay. It may turn out great and/or be a wonderful learning experience.
SUPPLIES
Creative Paperclay®
Acrylic paints
Gold rub
Old painting or background

Find an old painting finished or not that you have hidden in your studio. Look at it and think about how you can improve upon it with Creative Paperclay®.
Roll out the paper clay onto your art. I like to dampen the surface slightly. I loved the fact that the piece has curved edges so it was easy to wrap the paper clay around the edge.
Stamp or brayer a texture plate onto the paper clay.
Add other embellishments made from the paper clay. Let dry. When dry, paint and add gold rub.

It will feel great to add life to an old painting. Have fun.

Darlene Olivia McElroy


Thursday, March 12, 2015

Give Me a Hand

I wanted to make an organic looking hand. It is actually a little creepy but I was thinking of New Orleans and all the voodoo shops when I was creating it.

SUPPLIES

Creative Paperclay®
Aluminum foil
Wood skewers
Encaustic Was
Raw umber acrylic paint


The easy part was to gather all the pieces for my armature as they were all in my kitchen.  I started with making a wad of aluminum foil for the palm area of the hand.


Next I pushed the trimmed skewers into the foil. I found that I had to trim the skewers a little more than I had originally.


Paper clay was applied to my armature. I did this in several steps. I would do one side, let it dry and do the other side. It made it easier to control plus it worked great as the new clay adheres to the dry clay well.

Finally I added a wash of raw umber paint. When dry I coated it with encaustic was.

Darlene Olivia McElroy

Thursday, February 26, 2015

Grunge Background Tip

 As a fine artist I am always trying to find ways to add texture to my art and usually practice on one of the many old pieces of art that are laying around the studio. I love the grunge line quality I got and the results even surprised me.

SUPPLIES
Creative Paperclay®
Acrylic paint
Wax paper
Brayer
Painted Panel (old)
 Matte medium
 
I started by mixing a navy blue acrylic paint into a slurry of Creative Paperclay® with my palette knife until it was well mixed. Since my surface was mainly orange and brown I decided to make my slurry color a cool color.


I roughly spread the colored slurry onto an old painting (on a panel) then laid wax paper over it and brayered it flat. I left the wax paper on until the slurry was almost dry then I made lines by scraping with my finger nail (because I am lazy). Finished it with a coat of matte medium. I will definitely be using this technique in a painting soon.

Darlene Olivia McElroy

Thursday, February 12, 2015

Give a Little of Your HeART

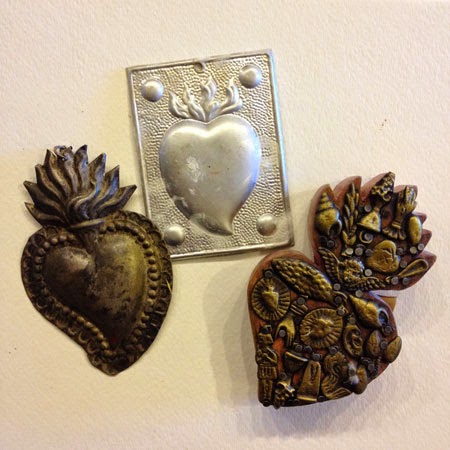
Since Valentine's Day is almost here, I decided to make a batch of hearts to hand out to my friends so they have a memento of how much I care. I made an assortment because all of my friends are different plus I enjoy the variety of textures and looks.

Supplies
Creative Paperclay®
Amazing Molding Putty
Assortment of hearts to cast
Acrylic paint
Gold & silver rub


I went through my collection of metal and wood hearts to find the ones that I wanted to work with.
I made molds with amazing molding putty with some of them. One of the metal hearts I just had to turn over to cast the clay in.

Then it was my usual painting and metallic rubs.

I finished by putting them in fabric gift bags to hand deliver them in.

Happy Valentine's Day!

Darlene Olivia McElroy

Thursday, January 22, 2015

Spring is Coming

I know spring's coming but not soon enough for me. I am like the bird in this assemblage, waiting for the first hints of the earth coming to life again. I like the idea of aging in a circle rather than on a continuous line. This piece was a case where so little was needed for the story to be complete.

Supplies
Creative Paperclay®
Acrylic Paint
Assemblage base


This assemblage consists of a broken ceramic bird, hurricane lamp's wick cover, and a twig from my yard glued together with resin clay.


It needed Creative Paperclay® buds and leaves to tell the full story. Not much, just a little. When dry, it was painted with acrylics.

It now sits on my desk waiting for spring.

Darlene Olivia McElroy
darleneoliviamcelroy.com

Thursday, December 11, 2014

Telling Stories in Clay


I was walking by a ceramic shop and saw some wonderful plaques and thought it would be fun to do a variation on them. It would be great to do a whole wall of these in a grid!!! So I decided I would do one on all the dogs who have shared my life and are no longer here. The O's and X's are for all the love Oso and I had for each other. He was my studio dog and the heartbeat beneath my work table. The trees are for the our walks, the round beads for all the places he had to stop and enjoy.

Supply List:
Creative PaperClay®
Mark Making Tools
Image
Acrylic Paint
Embellishments


I started by rolling out the clay on a masonite panel. Then I made marks in it and added clay embellishments which I also drew on before letting the clay dry. I really love the look of the raw clay. Once upon a time I was working towards a degree in ceramics but hated the hurry up and wait aspect of the media so ended up with a degree in painting. So now I only have to wait for the clay to dry and I can still paint.


I find it is always best to coat your clay with a matte acrylic medium when it is dry. After the medium dried I covered the whole tile with a matte black paint as I wanted the black to show up in the crevices when I did the final painted finish.


I added paint and started adding small beads, gold and silver rub and a button. I finished this off with a picture of Oso under a raised clear resin button shape.

My challenge to you is to make a happy memory for those you loved and still love.

Darlene Oliva McElroy