Wednesday, July 4, 2012

Num Num Monster by Edie

Last week in my Art of Healthy Living Group on Facebook, we were talking about hunger and intense cravings during weight loss. During that conversation it was said that at certain times, it is like a ‘num num monster’ takes over complete control of your mind and makes you eat whether you are hungry or not! Since I am using art as a means to work through the emotional side of my weight loss journey, I decided to create my num num monster out of Delight® clay in an attempt to regain the control it seems to steal from me on occasion.

You can view the full video tutorial below.


First, I created my basic monster shape using aluminum foil, then I rolled out my Delight® air dry modeling material, covered the entire body and set it aside to dry completely. Next, I began shaping the feet of my monster with Delight. I cut spaces between the toes and shaped them before using a cuticle pusher to create the toenails.


Once the body and feet were dry, I gave everything a coat of purple craft paint. Next, I used red and blue metallic craft paint and dabbed spots all over my monster’s body.


I used tacky glue and two small pieces of wire to attach the feet to the body. While the glue and paint were drying I started working on the mouth of my monster. I imagined my num num monster to look all cute and fluffy, until it’s opens it’s mouth! I shaped another piece of Delight® clay into a rounded triangle, then using some small tools, I placed individual teeth in my monster’s mouth. Delight® easily sticks to it’s self with a little bit of water, so I kept the mouth and the teeth moist while I worked.


Once the mouth was dry I painted the inside with metallic red and the outside with metallic peridot. Delight® is a bright white clay, so I didn’t have to fuss with painting those tiny, little teeth. I also gave my monster’s toenails a coat of the metallic peridot while I was at it. While that was drying, I began working on the next part of the project. I took an old, ratty, Halloween wig and cut a section of hair off the back off of the wig. I sprayed the hair with homemade, red spray ink then separated the clump of hair into smaller sections. Next, I took a couple of the smaller sections and sprayed them with homemade, blue spray ink. It helps to work the paint into the hair a little bit before it dries. Once the hair was dry, I used tacky glue to attach the mouth and sprigs of hair all over the monster.


 I’m very happy with the way my monster turned out and I feel like bringing that negative aspect of my weight loss journey to light will help give me a little more control over my cravings and unhealthy eating in the future.

If you would like support on your weight loss journey, feel free to join my Art of Healthy Living Group on Facebook.

You can always find great ideas and projects on the Creative Paperclay® blog.

 http://www.youtube.com/watch?v=CX8c14hF788&feature=youtu.be

Thursday, June 28, 2012

Quick Tip for Creative Paperclay®


Whenever you are using Paperclay in a mold, it is best to dust the mold with cornstarch before filling with Paperclay to keep it from sticking.

However, if you don’t have any cornstarch handy you can use baby powder instead. It smells good too! Hope this helps you the next time you use

Paperclay.


Barbara

Butterfly Kisses

I am a couple days behind my scheduled Creative PaperClay post, for that i apologize! Life is VERY busy right now with our 8 wk old puppy. And Yes I am completely in LOVE with her.

But as they say the show must go on....LOL

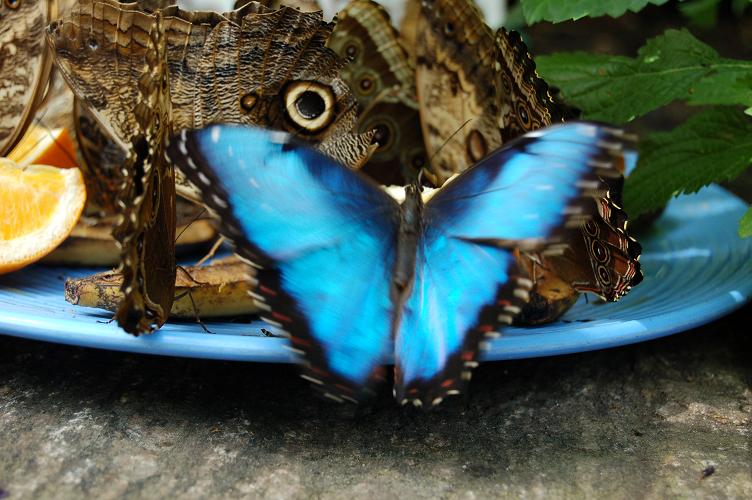
Today this tutorial is inspired by nature. A few months ago my family and I went to the Butterfly Conservatory here in Niagara Falls. (If you ever get a chance to go to a Butterfly exhibit please do so, its truly magical)

Here are a few gorgeous pictures that inspired me and perhaps inspire you.


They say Mother Nature never lies. How true, colors are perfectly matched and so pretty.

Today I am working with "Delight - AirDry Modeling Clay" Its abit different than "Creative PaperClay" ,
                                       
                                                     1. The color is snow white and it dries white.
                                                     2. Its is very lightweight.
                                                   
Its also similar!

                                                    1. It's an airdry clay. No firing, no baking is needed!
                                                    2. Takes paint, any paint, very well!


I did not take a picture of the beginning, but its rather simple, take a piece of clay and roll it into a ball. (Depends on how big you want your bowl to be will determine the size of the ball of clay)

Begin to mold it into a bowl. I took one of my old bowls to help me mold my clay around the bowl so that I could get the size right.

Once I got the size i wanted I took my favorite rubber stamp of a butterfly and stamp directly into the clay to leave an impression. I then painted it completely black.


I gathered a few fun supplies, some mica pearl ex powders , an old paintbrush. and some acrylic meadium.


I then began to layer the different pearl ex powders by mixing them with the acrylic medium.
****Sidenote - Acrylic medium can really be anything: elmers glue, golden gel medium, mod podge. Mica powders need something to make them stick to whatever you are painting them on, and if you can't afford Mica powders -  Use your old eye shadows! Create your own Mica Powders by mixing them with a little glitter!*****

When doing this kind of layering you either have to work fast or wait for each layer to dry!

And as always i love to embellish, "Delight" is really nice , I was able to put holes in it to hang the little leaves on it and it does not crack.


I initially made this for my workstation to put paperclips in it, to remind me of the beauty of nature, the grace of a butterfly and to remind me Mother Nature never lies! (grins) My mom had other ideas.....she took it home with her. LOL

Art on my friends,
ANg

Creative Paperclay Quick Tip for July

When you roll out your Creative Paperclay have you ever noticed that it tends to stick to your roller?  I've encountered this problem too.  I find it handy to keep a spray bottle of water on my work space.  When the paperclay starts to stick to the roller, simply spray your clay or roller with a little bit of water this keeps the clay from sticking.

Saturday, June 23, 2012

Creative Paperclay Fossils

I have been playing with Creative PaperClay for years. This month I had some of the mixture that I previously made into molding paste left over that I didn't want to go to waste. While thinking about how I could use it, I remembered something I made with my son years ago for a project.... FOSSILS!

After choosing which molds I wanted to use, I cut the tip off of the baggie that contained the watered down clay and squirted the mixture into molds. I let the clay dry for 2 days.

The top part of the clay dried but it was still very wet underneath so I gently pushed down the dry part and smeared (for lack of better word) the clay that came up through the cracks. Finally, by day 4 it was just where I wanted it to be. I pulled the pieces out and turned them over let the top finish drying overnight and were ready to be worked with.

When I did the project with my son, we got real sand and glued it on foamboard to make a realistic scene. I am using masking tape and some colored chalk on paper to give you idea and show what it looks like and what you can do.

The number of child projects you can use this for with are endless. You can coat these with 3D Crystal Lacquer and put them in one of those chalk balls you can make for your child to open up or you can hide them in your yard or the sand box for the little ones to find!!!!


Thursday, June 21, 2012

Tip time! - colouring it with re-inkers

Hi all....
Both products pictured here are from the same company and both are available from Zig Zag in New Zealand.

But whats so wonderful about this product is that you can add re-inkers for your stamping ink pads to the clay when it is wet!


I put on latex gloves first then took some delight clay and Creative Paperclay® added about 5-6 drops of re-inkers to each blob of clay and worked the colour into it until the clay was coloured....


Here is my end result...

I created one of those carved candle looks from clay.... 

I used the Creative Paperclay® as a base then added rolled out flat layers of the colours on top.... Green, Red and white on top.

Then carved with a knife bits out not taking the clay all away but rolling the cut parts or twisting the cut parts. Do a search in you-tube for candle carving to see how its done.


The best of all the "carved candle" will NOT melt down and leave a coloured mess but will last for a very long time all I have to do is replace the tealight candle that sits on the top.


So next time when you need some coloured clay - colour it yourself.


I finished off this piece with a coat of 3D Crystal Lacquer to make it look like wax.... So love the result! It also bought out the colours more in the clay....


Remember more re-inker the more brighter colour you will get but also the wetter the clay gets. Please use gloves or your hands will be stained for weeks!


All the best to everyone and happy crafting!


Debbie Buckland
artycrafty.wordpress.com

Tuesday, June 19, 2012

Edie's June Tip

Here is quick tip to keep in mind when working with Creative Paperclay® air dry modeling material... Creative Paperclay® and Delite® are both air dry clay and will generally dry with in 24 hours, depending on thickness. If you need to speed up the drying time for either, you can put them in an oven on 250 degrees. I lay mine on wax paper to keep it from getting any groves from the racks. Something to keep in mind - Delight® will PUFF UP like a marshmallow when placed in the oven, but Creative Paperclay will not puff. I made this mushroom by rolling out Delight® clay then stamping the mushroom image into it then cut around the image with an Xacto. I placed it in the oven and let the clay puff up, dry completely, then painted it with acrylic paints.