Hi all! I have been busy at my clay table this week flowing with ideas after a class with the wonderful Polymer Clay artist Carol Simmons. So while creating bracelets and earring components from my polymer clay canes I thought "Why not use the canes along with Paperclay in a design?" I ran downstairs to the studio and pulled out my materials and began to create.
Materials:
Creative Paperclay
Art Doll mold (www.bestflexiblemolds.com)
polymer clay canes (polymercreations4u@msn.com)
glass tile
straight blade
parchment paper or deli wrap (plastic wrap or wax paper can be used, but may leave a texture behind)
optional: inks, paints, powders, heat set crystals, beads, odds & ends, PrismaColor markers
I began this project by making a few doll blanks out of Creative Paperclay. Press a bit of clay into the art doll mold.
Slice off excess clay with a straight blade and then remove doll by flexing the mold (she should pop right out). Smooth any wrinkles or crinkles on the surface with your finger, give her a softer curve to the waist, round out any rough edges, then place her on the glass tile. If desired a face can be added to the doll using the same mold. (Note: If the face doesn't want to adhere to the body a bit of water on the back of the face will act as "glue" OR it can be attached later with tacky glue) Repeat process for additional dolls.
Being the impatient crafter that I am, I placed the glass tile in my oven and baked the dolls at 275 degrees for about 10-15 minutes. Let cool. Now the fun begins.
**If you are new to polymer clay, be sure to work on a glass surface, flexible cutting mat, or acrylic surface. DO NOT work directly on your good wood table or the finish will be "eaten"off!**
Polymer clay canes come in many different shapes and patterns. For this lesson I am using a square cane for its ease in matching designs. Polymer clay canes can be found on a variety of online sites....or you can come straight to me :-) You will need a clean straight edge blade for cutting (Note: If this is the blade you used for cutting your Paperclay [as I did] just rinse any excess Paperclay off the blade and dry thoroughly before cutting your polymer clay cane). Cut thin slices (number of slices will depend upon how large your cane is and how much of the art doll is covered).
Once cut, place the slices side by side to form a sheet of patterned clay. Cover with parchment paper and use your finger to rub over the seams, smoothing them together without disturbing the pattern or leaving fingerprints behind. Remove parchment paper and check to see if all the seams have come together. Use straight blade to remove clay from your work surface and place over baked Art Doll.
Smooth the clay around form, pressing any air bubbles out from underneath as you go. Once covered, carefully slice away excess clay (set aside for another use, if desired).
Place Art Doll into the oven and bake at 275 degrees for 20 minutes. Remove from oven and let cool.
I decided that a crown/hair was in order. I went to my stash of odds & ends and found the perfect piece: the flatten top off a Christmas ball! A bit of super glue to hold it in place works perfectly. the face can be left natural or colored with a bit of paint or alcohol ink or PrismaColor marker (Note: For this example I used the PrismaColor marker in Goldenrod).
Looking at the back (compared to the front) it looks very unfinished. I have a couple of easy fixes for this: 1) Trace around the original art doll shape on a piece of scrapbook paper. Cut out the shape and glue in place when the doll is completed. OR 2) cover the back with a thin layer of polymer clay and rebake. If using this choice, cover the back of the art doll with a bit of tacky glue BEFORE adding the clay backing...this will be much less frustrating than trying to affix the clay to bare Paperclay :-)
And you are finished! That is unless you are a possessed artist like me. If you fall into that category drill a couple of holes in the shoulder area and add beaded arms OR drill a hole at the bottom and add multiple fibers OR draw on a face (if you haven't used the face cabochon) OR....as you can see I can get a bit carried away!
Have fun creating! And CLAY ON!!
Showing posts with label Paperclay®. Show all posts
Wednesday, August 7, 2013
Saturday, September 22, 2012
Steampunk Earrings with Creative Paperclay
I am a bit into Steampunk this week. Some different addictive sites have me all a buzz about it and ideas flowing like crazy. So I thought....I am going to do a pair of earrings! And then my mind went a bit crazy! Now they are beautiful and light and awesome earrings but, as most of you know, when your mind starts....you are from one end to another of things to do.
Here is what I did. I used Creative Paperclay and stamped a Steampunk image on it. I then cut it out using a lid of a bottle to have circle shape. I added holes where I would want to add hook and hangings when dry.
Once it was dry I then painted all black and did a bit of a wipe off and dab with a paper towel to give a bit of texture. I then took a bit of gold paint and dry brushed it on. I wanted the outlines of the stamp I stamped to be highlighted. The back I painted black and stamped the stamp in gold ink on it. I then glued on a few pieces of old clocks and watches as a collage type feel on the front. I hung a few coordinating beads from the 3 holes on the bottom and added the earring wires. I love the way they came out and had a blast making them!
Friday, March 23, 2012
Yooper Trolls™
By Amanda Marks
I have been making these since 1996 I can honestly say I haven't thought about them in 15 years. I found an old box of slides and was going through them and found my Yooper Trolls™. I decided to revisit them with Creative Paperclay®.
Step 1: Tin foil Base
Step 2: Cover in Clay
Step 3: Add Eyes
Step 4: Add Nose
Step 5: Add Mouth
Step 6: Add Ears, Legs and Arms
Step 7: Add Hands and Feet
Step 8: Add Butt
Step 9: Add Hair and Facial Hair with a Modified Needle Tool
Step 10: Allow to Dry. Paint and Add to a Base.
Sunday, January 15, 2012
Creative Paperclay® Heart pendant
With Valentines on its way my head is filled with hearts so this month I'm going to create an easy but very pretty Heart pendant using Creative Paperclay®.
Material list:
Creative Paperclay®
wire - for the bail
tool to stamp in your texture
acrylic paints
1. Make a paperclay ball, about the size of a walnut. Actually, the amount of clay you use really depends on the size you want your finished piece so play around. If you use too much simply make the ball smaller and reshate again.
2. Start shaping the clay into a heart. I first roll the ball in my hands to form a cone shape and then squish and moosh the clay into a heart shape. This is play time so have fun and don't worry if your heart isn't a perfectly shaped heart. I kinda like the wonky look, I think it gives the pendant more character.
3. Insert your wire bail into the top of your pendant. Since mine is a wonky heart I inserted the bail so the heart will hang at an angle.
4. Next we stamp in our texture. I used a leather stamping tool for my texture but you can use whatever you have handy. Stamp the texture deep enough to make it look like it's inside the heart, not on the surface of the heart.
5. Once you get the look you like let the pendant completely dry. What? We're done? Yep, how easy is this! :)
6. After it dries completely you can paint it . I started by painting the entire pendant black. I then dry-brushed metalic gold and red. That gives the pendant an aged look that I love. After the paint dried I sprayed a couple of layers of polyurathane on it to protect the paint. All that's left to do is sting it on a cord or ribbon and you have a beautiful heart to wear.
Thursday, January 5, 2012
Alice in Wonderland Canvas
Hi everyone, Debbie here.
First a warning: this post is LONG!
But it brings you not one but 5 tutorials!
These 5 tutorials brings you a one big finished project!
This project is for my Son's preschool. They have looked after both my children while I worked part time and now my last is off to school! I can't believe my little man is 5yrs old this month! New Zealand school year starts Feb - Dec with 4 four terms broken up in 8-10 week lots. Holidays in between. I know its all complicated aye. lol
So are you ready?
This is the finished project: Canvas measures 15" high and 30" long
You will need:
1. gesso canvas if second hand
2. Sand between dryed layers of gesso I did 2 layers
3. Sequence your story book pages
First a warning: this post is LONG!
But it brings you not one but 5 tutorials!
These 5 tutorials brings you a one big finished project!
This project is for my Son's preschool. They have looked after both my children while I worked part time and now my last is off to school! I can't believe my little man is 5yrs old this month! New Zealand school year starts Feb - Dec with 4 four terms broken up in 8-10 week lots. Holidays in between. I know its all complicated aye. lol
So are you ready?
This is the finished project: Canvas measures 15" high and 30" long
You will need:
- Large Canvas (I found a free canvas. Already painted on So I had to prep it with gesso)
- Gesso
- Paint brushes different sizes
- Creative Paperclay®
- Shaping tools
- Glue
- Paints
- old story book pages
1. gesso canvas if second hand2. Sand between dryed layers of gesso I did 2 layers
3. Sequence your story book pages
4. Plan and sketch your layout
Now for the Creative Paperclay® Pieces:
How to make the bottle
How to make the Rose
How to make the Hat
how to make the Toad tool
How to make the Watch:
Good time to plan where to stick the embellishments.....
Once pieces are dry Paint up your pieces to the colour you desire.... (click on following images for larger views.)
Stick pieces with liquid glue to the canvas.... I find PVA, Aleene's Glue or Elmars Glue good.
Congrats you have finished the canvas!!!
Well done for reading the whole post and I thank you for sticking with me through it.
Here are the close ups of the canvas...
Have a crafty day!
Check out my blog: artycrafty.wordpress.comThursday, December 15, 2011
Steampunk Christmas with Viva Las Vegas Stamps
I'm really not much of a stamp user so this month's tutorial was a bit of a challenge for me. I decided to create a Christmas card with a bit of a Steampunk look. I love just about anything Steampunk and Viva Las Vegas Stamps has Steampunk stamps that are fantastic! I'm using Item 16006 Plate 1273 and Creative Paperclay®.
(Note - This card was painted with metallics and metallic paint is impossible to take pictures of. The background color is a light gold, not brown. The ornaments are copper, silver and gold.)
Materials:
Viva Las Vegas Stamps Item 16006 Plate 1273
Creative Paperclay®.
Acrylic paints
Water color paper cut to size 5" x 7"
1. I first rolled out my paperclay to about 1/4" thick. I then used my stamps and pressed them into the clay to make tiny gear ornaments for my card. Then I cut out each stamped clay piece with an exacto knife. Let these "ornaments" dry.
2. While the clay was drying I painted a Christmas tree on my water color paper using thinned out acrylic paints. You can paint whatever you want using colors you like. I wanted to stay with a metal look so I first washed the paper with a very thinned out light gold. While the paper was still damp I painted the tree using 3 shades of green. (Actually, I just jabbed and splashed the brush around on the paper till I got a tree shape I liked)
3. I wanted to use the stamps to actually stamp gears onto the tree so I painted the surface of the stamps with my metalic paints and stamped them onto the paper. The gold was a bit light but the copper worked nicely.
4. Once the clay ornaments were dry I painted them and then glued them onto the tree.
I hope you enjoyed this quick little crafting idea using Viva Las Vegas Stamps in a little bit different way.
Monday, December 5, 2011
Golden Christmas Bowl
Hi! Its Me Debbie again.
I don't know about you but I love gold at Christmas. I wish everything twinkled and shone and there was real gold and silver and gems everywhere. But unfortunately that is just not a reality for most of us little people.....
But wait! Lets fake it and make a golden bowl out of Creative Paperclay®!
Please note: this bowl cannot be washed in water. It cannot be put in the dishwasher.
You will need:
I don't know about you but I love gold at Christmas. I wish everything twinkled and shone and there was real gold and silver and gems everywhere. But unfortunately that is just not a reality for most of us little people.....
But wait! Lets fake it and make a golden bowl out of Creative Paperclay®!
Please note: this bowl cannot be washed in water. It cannot be put in the dishwasher.
You will need:
- Time
- 1 and half blocks of 8oz Creative Paperclay®
- Gold and Burnt Umber Acrylic Paint
- rubber stamps by Viva Las Vagas Stamps (I used unmounted "Three Wise Men" and "Decorative Frieze")
- Clear embossing powder with heat gun and Versamark Pad.
![]() |
| Decorative Frieze |
Three Wisemen |
Now to show you how. A video in side form. Hope you don't mind. ;) Thanks for watching.
Wednesday, November 23, 2011
It Would Take a Man 600 Years...
By Amanda Marks
If you did not get the quote you have never seen the movie Shawshank Redemption with Tim Robbins and Morgan Freeman (highly recommended if you have not seen it). Christmas is just around the corner and I have been working frantically on Christmas gifts for friends and family which leads me to this design team project. I can not guarantee that there won't be Shawshank quotes throughout this posts.
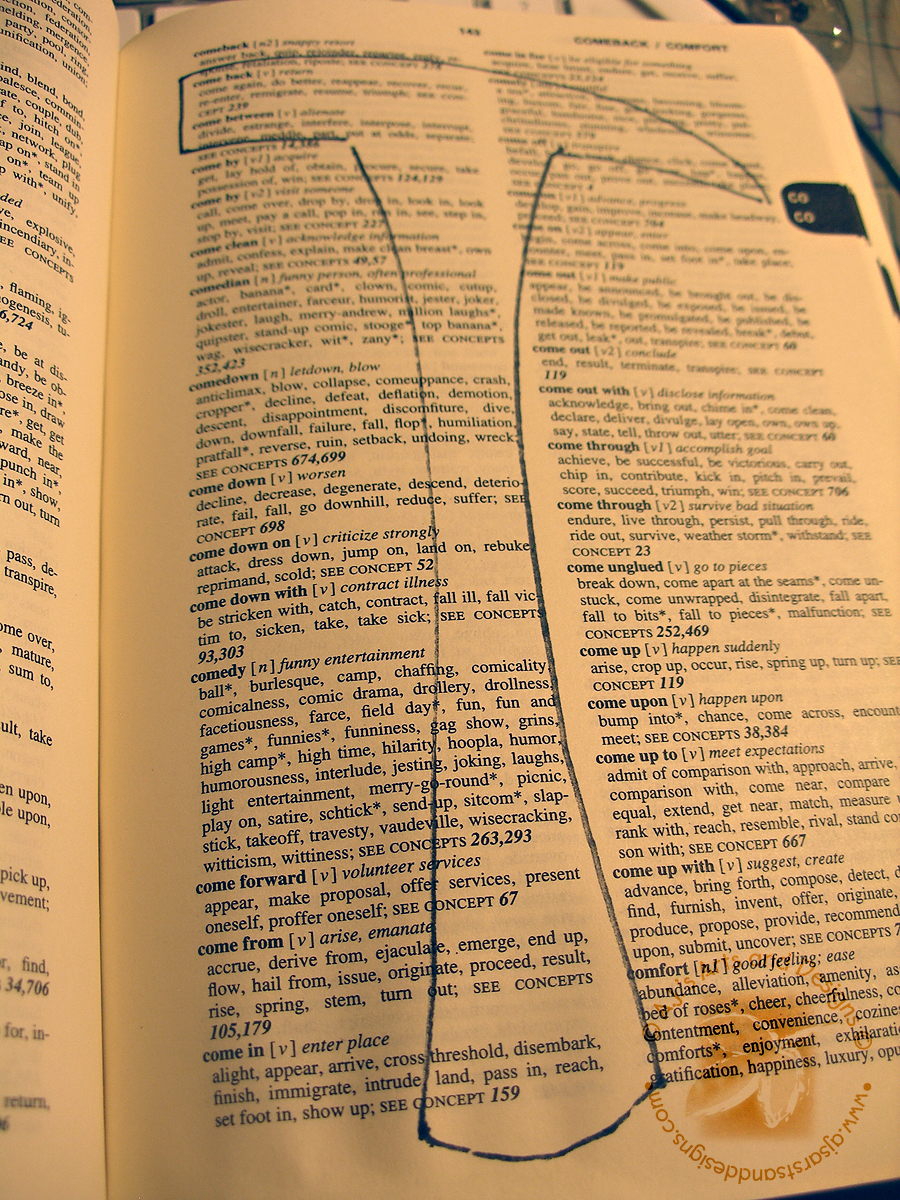
What do you get for guy friend who has everything? My husband said it would be cool if you could replicate something from a movie. The wheels instantly started turning because I have already made him the TIME Man of the Year Mirror from The Big Lebowski. My husband started to quote Shawshank, which is not uncommon in my house and I knew I had to make the "Bible" with the rock hammer cut out. Don't worry I did not cut a Bible (my husband would not let me buy a bible to cut up). So I had to go to plan B which was taking an old Thesaurus and cutting the shape of a rock hammer into the Thesaurus. I had no idea that cutting the same shape into repeated pages would be this time consuming (I went through 6 Exacto Knife Blades). It took me close to 3 hours to cut all of the pages I needed. I will say disposing of my evidence was much easier than toting it out to the yard a handful at a time.
Since the rock hammer would not work without the altered "bible" the pictures of the "Faux" Bible are first.
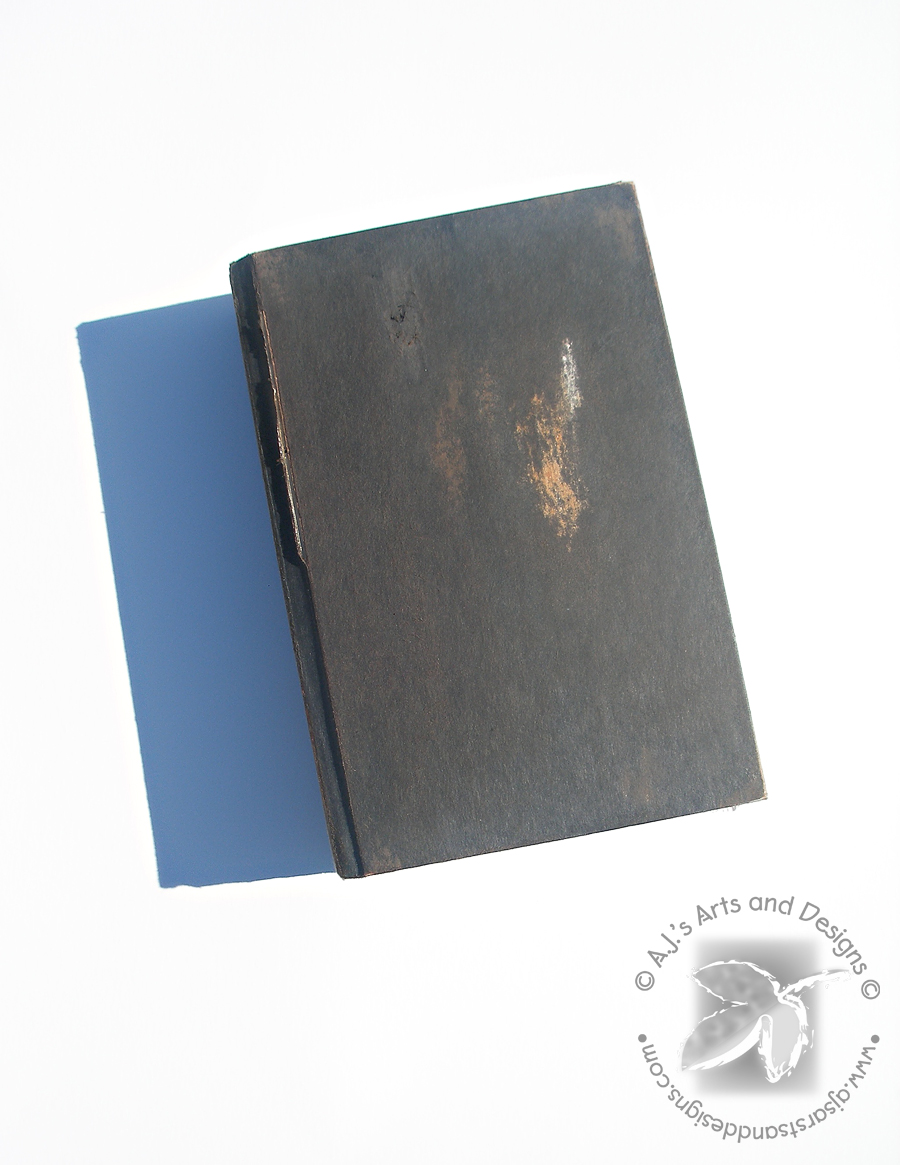
The Thesaurus as you can see I spilled coffee on it when I was in college so it was well used.
I distressed the book with sand paper and paint. I added a little Tim Holtz Tea Dye Ink to the outside to really age the book cover.
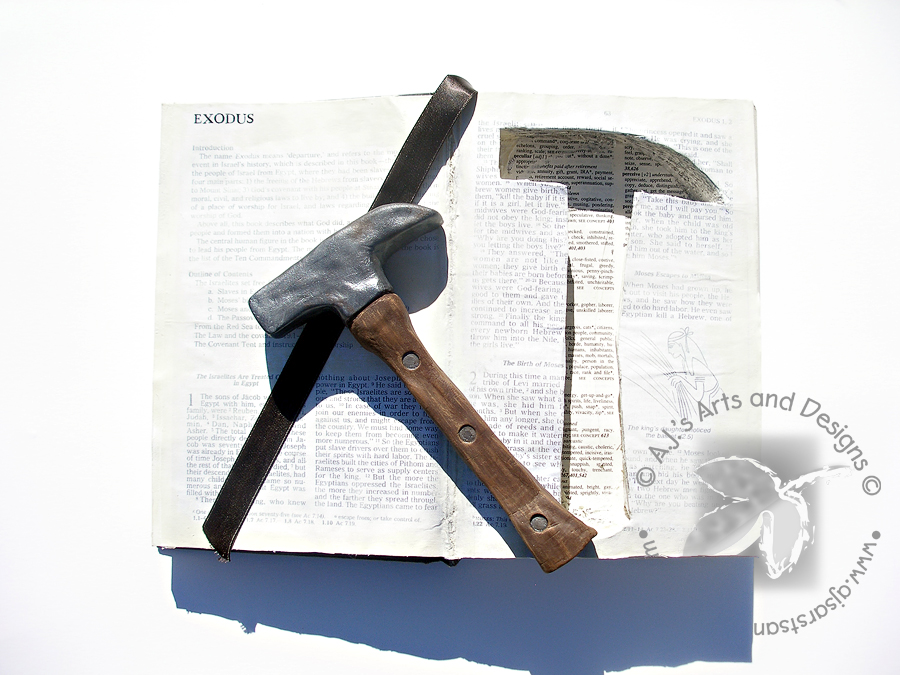
I needed a rock hammer to go on the inside of the book and removable but not change the weight of the book. What better way to show off the versatility of Creative Paperclay® Modeling Material than to make a rock hammer for my book (I am hoping the people at Creative Paperclay® are Shawshank fans). The rock hammer was actually really easy took more time to dry than to create and paint. I also forged the inside message Andy wrote to the Warden (I am actually quite proud of that) because honestly it would not work with out that message.
Materials:
Styrofoam (I used flower Styrofoam)
Dowel Rod
Exacto Knife
Sharpie® Marker
Aluminum Foil
Creative Paperclay® Modeling Material
Fondant Roller
Sculpting Tool
End of an unsharpened pencil
Paint
1. Cut foam in shape of a rock hammer. If you use the template for the book keep in mind the foam should be at least 1/4" smaller than the template.
2. Cut dowel to fit in book and also have about 1" inside the foam. Push dowel inside the foam.
3. Cover the foam and dowel with tinfoil. This will help adhere the clay to the base without seperation.
4. Roll out clay. Cover the base with clay. Refine add detail - to recreate the nails in the rock hammer take an unsharpened pencil end and push down, repeat on the other side trying to line up as closely as possible. Allow to dry for 24 hours.
5. Paint rock hammer to resemble the rock hammer in the movie.
I guess really you do need one of these in order for it to work...
If you did not get the quote you have never seen the movie Shawshank Redemption with Tim Robbins and Morgan Freeman (highly recommended if you have not seen it). Christmas is just around the corner and I have been working frantically on Christmas gifts for friends and family which leads me to this design team project. I can not guarantee that there won't be Shawshank quotes throughout this posts.
What do you get for guy friend who has everything? My husband said it would be cool if you could replicate something from a movie. The wheels instantly started turning because I have already made him the TIME Man of the Year Mirror from The Big Lebowski. My husband started to quote Shawshank, which is not uncommon in my house and I knew I had to make the "Bible" with the rock hammer cut out. Don't worry I did not cut a Bible (my husband would not let me buy a bible to cut up). So I had to go to plan B which was taking an old Thesaurus and cutting the shape of a rock hammer into the Thesaurus. I had no idea that cutting the same shape into repeated pages would be this time consuming (I went through 6 Exacto Knife Blades). It took me close to 3 hours to cut all of the pages I needed. I will say disposing of my evidence was much easier than toting it out to the yard a handful at a time.
Since the rock hammer would not work without the altered "bible" the pictures of the "Faux" Bible are first.
![]() |
| Not mine but what I wanted mine to look like. |
Three hours worth of work and a huge mess.
I distressed the book with sand paper and paint. I added a little Tim Holtz Tea Dye Ink to the outside to really age the book cover.
I needed a rock hammer to go on the inside of the book and removable but not change the weight of the book. What better way to show off the versatility of Creative Paperclay® Modeling Material than to make a rock hammer for my book (I am hoping the people at Creative Paperclay® are Shawshank fans). The rock hammer was actually really easy took more time to dry than to create and paint. I also forged the inside message Andy wrote to the Warden (I am actually quite proud of that) because honestly it would not work with out that message.
![]() |
| Once again not mine but my inspiration |
Materials:
Styrofoam (I used flower Styrofoam)
Dowel Rod
Exacto Knife
Sharpie® Marker
Aluminum Foil
Creative Paperclay® Modeling Material
Fondant Roller
Sculpting Tool
End of an unsharpened pencil
Paint
1. Cut foam in shape of a rock hammer. If you use the template for the book keep in mind the foam should be at least 1/4" smaller than the template.
2. Cut dowel to fit in book and also have about 1" inside the foam. Push dowel inside the foam.
3. Cover the foam and dowel with tinfoil. This will help adhere the clay to the base without seperation.
4. Roll out clay. Cover the base with clay. Refine add detail - to recreate the nails in the rock hammer take an unsharpened pencil end and push down, repeat on the other side trying to line up as closely as possible. Allow to dry for 24 hours.
5. Paint rock hammer to resemble the rock hammer in the movie.
I guess really you do need one of these in order for it to work...
Subscribe to:
Posts (Atom)