Traditionally, red oxide paint is used under the gold colored metal leaf and a celedon green is used under the silver leaf. Copper looks great over a burnt umber but really pops when laid over a turquoise blue. The reason you pay attention to the underlying color is because it will show through if your coverage is not solid. These colors make the metal leaf look richer.
SUPPLIES
Creative Paperclay® collage elements
Metal leaf (use your favorite color)
Water based adhesive size
A painting to work one
Soft gel or Modge Podge for glue
Golden's MSA varnish
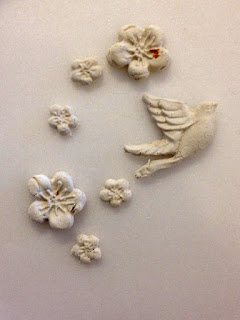
Start with making your Creative Paperclay® collage elements. Fondant molds were used here to great my garden elements.
Since I am going to apply gold colored metal leaf, I painted the collage elements with a red oxide paint.
Next, I applied the water based adhesive size. This is a glue made for metal leaf. It goes on white and when it turns clear and it tacky to the touch, it is ready to apply the leaf.
Note: My students always ask if they could just use glue or Modge Podge and the answer is no. Neither of them get tacky. You can use spray adhesive as an alternative but in this case it would be more awkward to use.
When the adhesive size is clear and tacky, you can apply the metal leaf. Here I am using Simple Leaf which is a paper backed metal leaf and easier to use. I lay it over the object and rub it down onto the object. Repeat the process if you do not like the underlying color to show.
Apply a little soft gel or Modge Podge to the back of the element and glue down to your art. All metal leaf will tarnish except for the silver. I spray Golden's MSA varnish to prevent the tarnishing and to seal the surface.
Not only do the metal leafed collage elements add bling, they also add texture.
Dream in Color and Play all Day!
Darlene Olivia McElroy


1 comment:
Beautiful job!
Post a Comment