Tuesday, April 29, 2014

How to create a Creative Paperclay® 2 parts art doll hands by Gloriann Irizarry


Hola Amigos is Gloriann Irizarry with April's happy crafting tip.

This time I will show you how to create a seamless removable arm.
Having removable arm makes the Molding process and casting the final piece a lot easier.

Materials

Recycle a grocery bag

Scissors

Your Creative Paperclay® Art doll


Sculpting hands single hands are a lot easier than sculpting them attached to the figure .
Specially if you are going to make a mold. Been able to have a seamless removable arts will make the mold making process so much easier. 


To do a seamless removable arm  by cutting a small square out of the grocery bag.


Make sure the square size fit and cover the whole arm or body portion you want to be able to separate. 
Add a light coat of water with a paint brush to adhere the grocery bag to the piece.


Now dry fit the arm and using a paint brush add some clay around the area to create a seamless arm.


Make sure the arm is place on the position you want the final arm to look.


Repeat the process on the next arm


Let the piece dry overnight.


Once dry you can gently removed the arm and take the plastic out.


Take the entire plastic out. It will peel nicely to reveal a 2 part sculpt


All you need to do is sand  the arm and you will have a 2 part sculpt that can be easy put apart for you to mold it easier.  

I use this technique a lot with my Ball Joint Dolls (BJD) it helps to make molds for porcelain or ceramics out of my Creative Paperclay® sculpts masters.

I hope this inspire you so feel free to leave a question or comments below.

Have a bless day and happy crafting my friends!


Sincerely 

Friday, April 25, 2014

Silent Wind Chimes

I love wind chimes and outdoor mobiles, so I thought, "Why not make a set of wind chimes out of Creative Paperclay modeling material?"

I started by rolling out a thin piece of clay, then cutting an 8" circle from it. I used a plate as my template, laying it on top of the rolled out clay and trimming away the excess with a craft knife. I used a handle-less teacup as a mold for the dome of the chimes. The cup had an indentation on the bottom that I didn't want on my finished piece, so I filled it with its own circle of clay. So that this insert would adhere to the piece of clay for the dome, I scored both the clay insert and the clay circle that I would use for the dome, and liberally coated each with slip. [You can learn more about slip from this blog tip.]

Next, I covered the up-turned teacup with my 8" circle of clay. I had to remove some of the excess and gently smooth out the clay. I give it a smoother finished (and help reduce sanding) I coated the dome with a layer of slip. Next, I pierced holes in the top and sides for attaching the dangles.


For the dangles, I rolled out a piece of clay, cut it approximately 5"x7", and sandwiched it between the leaves of an embossing folder. I used a rolling pin with gentle pressure to emboss the clay. I cut the embossed clay pieces about 1.5" wide (some a bit narrower) and between 3" and 5" long. Again, I pierced holes for attaching the dangles to the dome. I let these dry overnight, and was pleasantly surprised with the curves and twists that occurred naturally during the drying process.


For the center dangle, I coiled a 3/8" wide piece of clay around a soda straw, and pierced hanging holes at the top and bottom. 


When the pieces were completely dry and sanded, I used acrylic paints to paint each of the dangles. 

Color palette for dangles

When the embossed pieces where dry, I thinly coated them with raw umber paint, and quickly rubbed it off, leaving them with a weathered, antiqued appearance. Lastly, I coated all the pieces—dangles and dome—with two coats of PPA Gloss by USArtQuest.

Painted dangles

The final step was to assemble the pieces. I added a crystal to the bottom of the center, coiled dangle, and used fishing line to attached the dangles to the dome. I love the way the crystal catches the light, and casts rainbows of color!! 

I couldn't wait to hang them and enjoy the lovely wind chime sounds. But, wait. What's that I hear? Nothing. The dangles are moving, but, alas, no sound. :) I hadn't considered that the clay just wasn't the right medium for producing sound. So now instead of wind chimes, I have a brightly colored outdoor mobile!!

Finished silent wind chimes :)

Here's a quick video of my mobile in action.


Thursday, April 24, 2014

Disco Ball Inspired Earrings

Hello out there in Creative Paperclay® Modeling Material Land! It's Susan from TheBoredZombie.com with a fun and quick jewelry project.


Supplies:
Creative Paperclay® Modeling Material
Pasta Machine and Cookie Cutter (optional)
120 4mm Hot Fix Crystals
Hot Fix Crystal Applicator
Black acrylic paint
Jewelry Head Pins and Earring Hooks

Instructions:
To get started, You need two balls of clay as close to the same size as possible. There's lots of ways to achieve this, but I leaned on one of my favorite polymer tricks. I put a nice sized piece of Creative Paperclay® Modeling Material in a sandwich bag. I left the top of the bag open then pushed it through my pasta machine on the largest setting starting at the bottom of the bag. This created one large sheet at roughly the same thickness all the way across. I cut off the side of the bag to access the clay without changing its shape and used a cookie cutter to get two equal pieces.

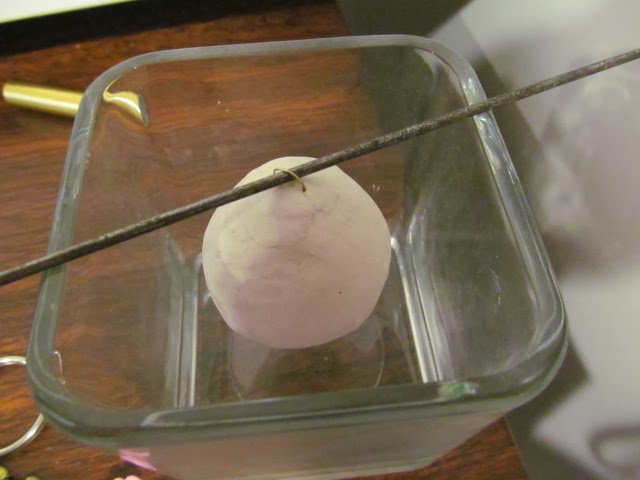
After you've used my method or your favorite way of measuring out your clay, make two balls and push a jewelry head pin though the center of each stopping before the wide part of the pin pushes into the clay. Getting it straight though the middle can be a bit tricky. I find it easier to stand the pin straight up and push the clay ball onto the pin rather than pushing the pin into the ball. If you don't get it on your first try - take out the pin, re-roll your ball and try again! If your pin isn't straight, you're earrings wont hang straight either.
I baked my two clay balls at 200 degrees for 30 minutes. This DOES not complete cure them. If you don't wait for your clay to dry overnight or longer at this step, handle your earring balls carefully. If you pinch too hard, you will damage the round shape you worked so hard for.  Baking does dry them just enough to add the crystals and color if you're in a hurry like me. Before I started adding the crystals, I put a plumb line around the base of the ball. I used a round cutter and placed the ball just inside then traced around the edge of the cutter. You could use a small rubber band or measure the same distance from the base of the head pin all the way around.
I used a Hot Fix Applicator to add to my Hot Fix crystals. One at a time, I added them on my plumb line all the way around the base of the ball. Normally, I would suggest an alternate way to handle this, but really, in this case, the applicator is going to the most effective (and safe!) way of adding the crystals. Another option could be to purchase crystals that are not Hot Fix and use hot glue or jewelry glue instead.
Now it is just a matter of adding crystals until the ball is covered in them. I decided to leave a fair amount of space between my crystals. You may want to put them so close you can't see the clay under them or even further apart than I did. It all comes down to the effect you're trying to acheive.
Since Disco Balls have a bit of black in them, I wanted to make the color around the crystals black. This technique uses acrylic craft paint - you could make it any color you wanted! I created a very liquid wash by adding acrylic paint to a cup of water. I stirred it around until the water was a nice black color and dipped my earring in it.

Special Notes about dipping:
  • Be VERY VERY VERY (did I get enough VERYS?) quick about it. Do not leave your earring in there more than a second. The clay will dissolve if you linger!
  • Immediately after you dip it, roll it around on a paper towel to get any excess water away from the clay and off of the crystals.
  • Use a warm or hot blow dryer to dry the paint to prepare the clay for a second dipping
  • To deepen the color, repeat  - dip, roll, blow dry - as many times as required. 
You'll notice my earrings have not been finished - the head pin needs to be clipped and turned and a hook added so I can wear them! Here's the thing, I learned the hard way that it is a bad idea to attempt to bend the head pin before the clay is completely cured. In my case, the headpin busted right out of my earring and I had to make another! Right now there is a pair happily drying away and I'm leaving them alone until they are nice and solid. As soon as they are all dry and I can turn the pins, I'll update this post with the new pictures and final finishing instructions.

UPDATE: The earrings are all finished!

To finish them up, Use a rounded pair of pliers. Turn the top of the headpin into a nearly closed loop. Hang the earring hook on your nearly closed loop, then make it a completely closed loop.

See more including me wearing them on this post at TheBoredZombie.com!

Thanks so much for stopping by today! I love to hear from you. Leave a comment here or email directly susandowenby@gmail.com.

Tuesday, April 22, 2014

"Frightful" Halloween Mirror

Welcome to my Halloween Blog Hop entry.  I wracked my brain for an idea that would capture the attention of visitors and have them running for materials!  This project is super easy to do and uses both Creative Paperclay and Delight Air Dry Modeling Compound plus odds and ends from my studio.  I hope you enjoy it...


I began with a 6" floral craft ring from www.diybangles.com.  It was painted with black metallic acrylic paint (2 coats) and set aside to dry.  Next, use a sponge brush to paint silver paint onto bubble wrap.  Immediately press the black ring onto the bubble wrap and press.  Peel away the bubble wrap to reveal a cool pattern.  Set aside to dry.


While the paint was drying, I conditioned a bit of Creative PaperClay and flattened it using an acrylic roller (about 1/8"-1/4" thick).  It looked rather plain...AHA, texture!!  I found a cool swirly texture in a drawer and pressed it onto the clay.  Perfect!  Letters were cut using a Wilton Alphabet Cookie Cutter Set (letters are about 2" each).  After cutting letters out, I placed them onto a glass tile for baking (Please note: I am NOT a patient person when it comes to creating!  Once an idea pops into my head, I MUST get it done!  for those who are of the patient sort, you can set the letters aside to airdry [about 24hrs])

At the same time, I covered a small glass Christmas ball with a layer of PaperClay and popped it into the oven to bake/dry.  To keep the ball from getting a flat spot, it is suspended on a metal knitting needle and propped across a glass vase.  All pieces are baked at 275 degrees for about 10-15 minutes.  Let cool before moving forward.  (Please note:  Do not be surprised if the clay covered Christmas ball has cracks and don't stress about them.  They will disappear in the next step).


Time to pull out the Delight Air Dry and transform the clay covered ball into a ghost.   Roll a large ball (about 1/6th of the package).  Begin to flatten with your fingers.  Use the acrylic roller and your work surface to enlarge the circle evenly.  Once the circle is about 1/8" thick.  Drape over the Christmas ball, arranging the ghostly folds as you go.  Be sure to press the loop on top through the clay.  Create dents for eyes (to be painted when dry).  Either hang by loop to dry or prop on a small cookie cutter.
(Note:  Delight Air Dry clay is best left to air dry...if put into the oven to dry quickly it will puff)

Create a few Zombie fingers from more Delight Clay.  Roll a log for each finger.  Use a marker cap to impress fingernails in each.  Create knuckle lines by rolling with a needle tool.  Use a bit of tacky glue to attach fingers to the painted ring.  Let dry in place and then paint/color fingers.

Glue Letters in place with a bit of tacky glue.  Paint or ink to color (I used Ancient Page Pine dye inkpad to color this version).


add a screw eye

Sunday, April 20, 2014

On The Go Art Tote - Diane's Tip

Hello creative friends, 
Diane here, back this month for a quick Spring & Summer tip with creative Paperclay®


If you are like our family, we're always on the go during the warmer months.  Fishing & camping trips is a big deal to us and we go as often as we can.
I love to create and so do my grandkids. And just because were up in the mountains, doesn't stop us from creating.

I like to keep a  "On The Go- Art Tote" handy.


 I'm also one of those pack light type of gals, so my kit is very light and basic, but satisfies the creative desire quite well.

Here are some of my suggestions for a handy Art Tote

- I first find a nifty bag to put my supplies in. A favorite is those plastic zippered bags that you get when you purchase sheets or curtains sets.  But anything will do.

- I gather tools such as, toothpicks, paintbrush coffee stir stick or Popsicle
 sticks.

- A small roll of masking tape and a couple folded up sheets of tissue paper or newspaper, ( this is for armatures if needed ).

- I always throw in at least 3 Ziploc quart size baggies. this is great to store your un-used clay  and also for gathering natures treasures to sculpt on such as, pine-cones, leaves, sticks or rocks.

- A small package of hand wipes.

- A small bottled water and a small plastic container for holding water.

- And of course, your Creative Paperclay®

Simply place your items in the bag, zip her up and keep close to the camping gear. 

You will always be ready to create wherever the road takes you this summer!


I would like to say thank you for all you creatives support this past 6 months. This is my last post here at the CPC blog, as I will move forward to fulfill other obligations.
It has been such an honor and pleasure to be here each month and participate with you and the amazing design team.

Wishing you all the best on your creative journey :)

Hugs,
~Diane

Friday, April 18, 2014

Welcome, Baby Card by Rachel Whetzel

Welcome!! This month, I wanted to share a card I made for my soon to be grandbaby! She is my second, and knowing what I already know about how special these babies of the grandest are, I decided to make her a card to let her know just how special she is already.
WHAT YOU'LL NEED to make your own Card:
  • A card that you can repurpose, or a new card to layer onto
  • Creative Paperclay®
  • Paints. I use Folk Art acrylic craft paints.
  • Paint brushes and toothpick
  • Scissors
  • Large circle punch (I used Fiskars) 
  • Washi Tape (I got mine at Gauche Alchemy) 
  • Ribbon and RicRack (Thrifted) 
  • Patterned papers (October Afternoon) 
  • Glue. I use Crafter's Pick : The Ultimate
  • Typewriter or computer connected to a printer
To begin, I placed a ball of Creative Paperclay® onto a piece of paper, and rolled it flat. I put the clay onto paper, so that I could pick it up and manipulate it while it was still wet without trouble. Next, I made teeny footprints on the clay using two different sized paint brush ends, and a toothpick with the very end broken off, and sanded down.
Next, I cut a heart shape out of paper, and laid it over my Creative Paperclay® as a template for cutting the clay into the same shape.

While the clay was drying, I got to work repurposing an old card that I would not be using as it was. (This is one of my favorite things to do. Create new cards using old cards as the base.)
I painted the heart, and used my Pebbles Inc. pastels to shade the feet. then I layered some patterned paper over the heart, with a hole punched out so the feet would show through. Then I layered the heart over the patterned papers, and washi. I used some ric rack and ribbon to add more layers to the card.
I added the sentiment 'precious one...' on the outside of the card by typing the words using a vintage typewriter, and cutting the words into strips to be glued down.
On the inside of the card, I wrote 'we have only just met, and already you have left prints on my heart.' I had so much fun designing this custom card for my newest grand baby! She is already loved, and it makes me happy to have created something so special so easily with my trusty Creative Paperclay®!
Thanks for reading! If you'd like to keep up with me, (see new grandbaby pics!!) and more of what I'm up to, I'd also love it if you'd visit MY BLOG and Subscribe! You can also find me on FACEBOOK!

Thursday, April 17, 2014

Creative PaperClay® April Tip making tiny hands by LuLu Lancaster


Creating tiny hands with Creative PaperClay® can be achieved relatively easily with some patience.

Hello again this is LuLu Lancaster with a simple tip to make long slender fingers with Creative PaperClay®
I start with a cotton covered Millinery wire. This gives the clay something to grab onto.

Shape a simple hand. My dolls all have 4 fingers ;) you can make more or less.

I mix up a slurry of Creative PaperClay® and water. You want it the consistency of a runny pudding.

Take the wire hand and dip it in the slurry. Using an old paintbrush wipe off the excess until you can see the individual digits.


Put your tiny hands in a piece of styrofoam to dry.


Once they have dried repeat the process. You will need to repeat this dip brush and dry about 10-15 times to get a good build up and the hands to start looking like hands :)


thanks so much for following along I hope you have found this little tip useful and Happy Hands!
LuLu