Tuesday, March 31, 2015

Faux Pottery

Hi all, glad you came to visit today! This is Donna from Memes Art Place! I love pottery, I love the funky shapes and shiny surfaces. I thought I think we can do this with Creative Paperclay®. In fact I thought heck lets try!

Wouldn't this look cute with some cute little yellow flowers!

Supplies needed:
Creative Paperclay®
Acrylic paints
Saran wrap
Varnish High Gloss
Roller to roll out Creative Paperclay®
Brushes
Sandits
Sandpaper

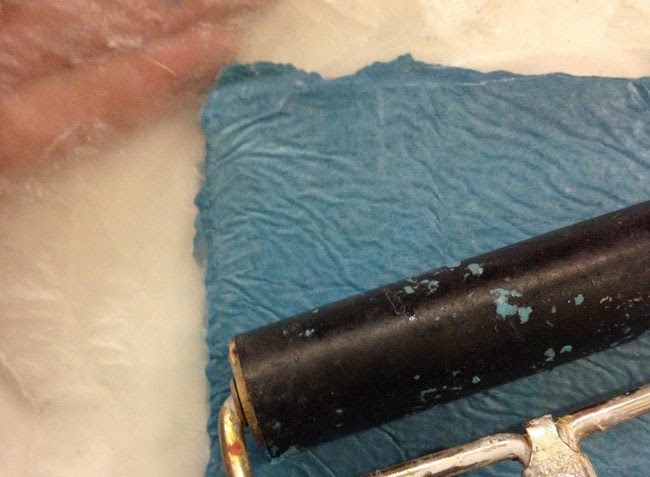
Roll out Creative Paperclay. I put Saran wrap over so that it does not stick to my roller.

You will need to add plastic around bottle or whatever else you may be covering so it does not stick to the item.
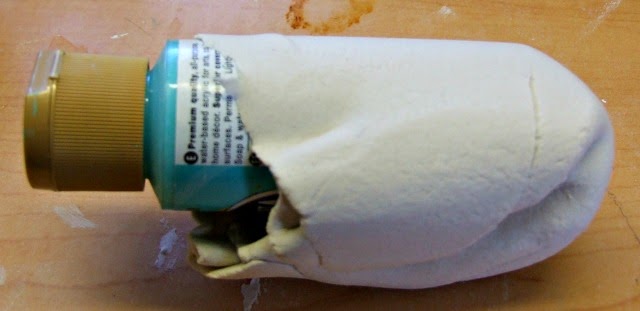
I utilized the paint bottles to roll out once on bottles.
Once you get it to the point it is nicely wrapped around the bottle, you can then start to shape your vase. I love the funky look!
I made four different styles.
You will let these set for a few days and then twist the paint bottles out. Take plastic out if it does not come out with bottles. If inside of vases are not dry, let dry before sanding.
This post is a two for one....project and tip!
This tip is one of the best I have been able to give. Read below!

I received these in the mail and this project is absolutely perfect for these! These Sandits made sanding in my funky curves a BREEZE! I am SOLD on these! They fit inside of the curves and under the edges of these funky vases. This saved me so much time and gave me a nice smooth finish that I don't think I could have achived as fast as I did or as clean as they came out!
They come in different grit sizes and are on both ends of the stick.
I used these also on a paper project and they worked beautiful! Got into a little area and sanded the paper right off! Easy!
On to our finished projects.
 I love the bright reds and the high gloss finish.
 Love the daisy flower on this one. My Grand daughter has claimed it as hers!


Last one is one that I liked the ripped curled edges and decided to try some staining and adding some metallic gold just for fun! 

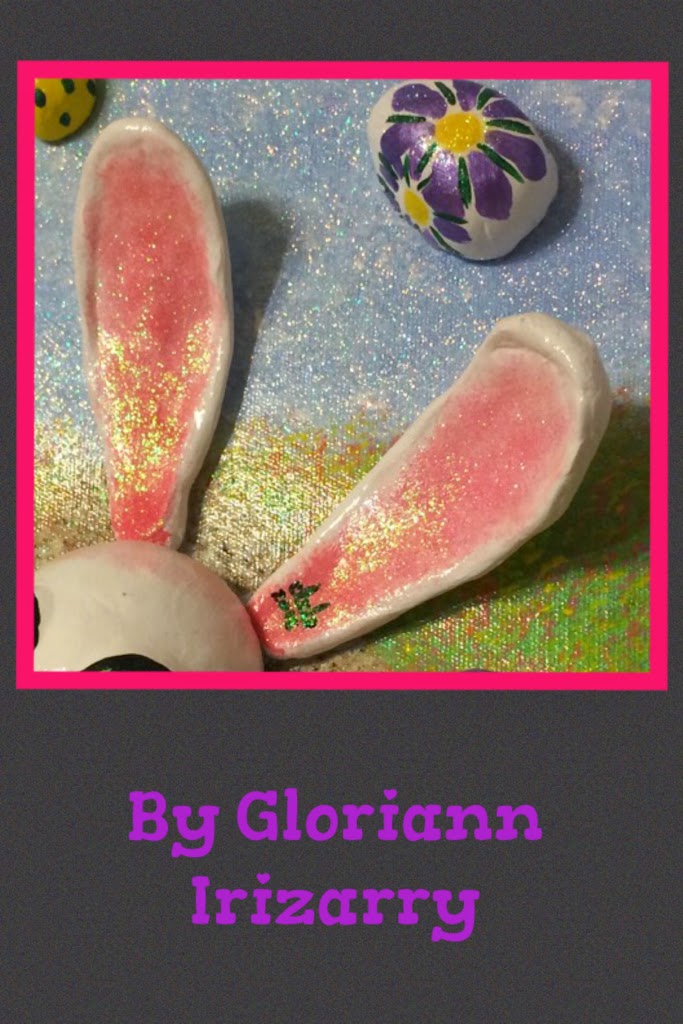
If you get started now.....I could see these in pastels and Easter grass for a cute addition to your Easter table!

I am so glad you were able to stop by and visit the Creative Paperclay® blog today! Keep checking back as all of our team have awesome tips and projects!


Friday, March 27, 2015

Grunge Surface with Creative Paperclay®

As a fine artist I am always trying to find ways to add texture to my art and usually practice on one of the many old pieces of art that are laying around the studio. I love the grunge line quality I got and the results even surprised me.

SUPPLIES
Creative Paperclay®
Acrylic paint
Wax paper
Brayer
Painted Panel (old)
 Matte medium


I started by mixing a navy blue acrylic paint into a slurry of Creative Paperclay® with my palette knife until it was well mixed. Since my surface was mainly orange and brown I decided to make my slurry color a cool color.


I roughly spread the colored slurry onto an old painting (on a panel) then laid wax paper over it and brayered it flat. I left the wax paper on until the slurry was almost dry then I made lines by scraping with my finger nail (because I am lazy). Finished it with a coat of matte medium. I will definitely be using this technique in a painting soon.

Darlene Olivia McElroy

Colouring Clay

Hi, it's Ann from the Creative Paperclay® Design team and the blog AnnMakes (at http://annmakes.blogspot.com).  My tip for you today is about colouring your air drying Creative Paperclay® Modelling Material.


When working with Creative Paperclay® and embedding items I like to make sure that the parts of the clay that will show up and around the edges of the items blend in with the rest of the piece.  One way I have found this to work is by colouring the Creative Paperclay® in advance.  I measure how much of the Modelling Material I will need for my project and then I add a generous amount of acrylic paint in the desired colour to the clay.  I knead until the colour is well mixed.  I found that a little paint will give a light colour and more paint gives, well, more colour!  Also the amount of kneading will dictate how well distributed the colour gets.  I like to achieve a marble look by kneading it moderately.  I have also found that adding paint to the air drying Creative Paperclay® gives me a bit more time to manipulate it.


Try it out, you may enjoy the process and the outcome too!

Thanks for stopping by today.  Please, come visit my blog for other handy dandy tips and tutorials. (http://annmakes.blogspot.com)

Tuesday, March 24, 2015

Gloriann's Montly Creative Paperclay Tip

How to secure glitter to your Creative Paperclay Proyect.


The weather is changing and the new warmer season is starting to show.
Well I have to apologize for the delay this weather cause to my monthly tip.
 
Thinking of spring brings warm and shinning skies to my mind and nothing more fitting than give you a few pointers on how I secure the glitter to my 3D Wall Art.  
 
I love how secure this method is so I don't end up with tons of glitter all over the place.


Choose your favorite Sealer
Matte
Gloss
Or extra Thick


Just make sure is of a higher quality
 
 
Select your favorite Glitter.
Fine
Shape
or regular
 
 
Simple. Spray plenty sealer all over the dry paint and let it get tacky.

 
Once the sealer is tacky sprinkle the glitter were you want it to be.

 
Any shape, color or size and let it dry.
 
 
You can use fake snow glitter to add more texture.
If you want it to have a more thick texture you can repeat the process in layers until you like the result. Make sure the sealer is completely dry in between.
 
 
Add glitter to accent pieces only to give the canvas a more appealing look.  


Or simply add to  your Creative Paperclay figure to give it a magical appearance. To tell you the truth the possibilities are endless. 
 
Once your satisfy with the glittery results just seal the piece once more to make sure all the small glitter particles are secured to the art and will not fly off when you are cleaning the dust off your project. 
 
I do apologize for the delay of the post and I guarantee you there are more tips and trick coming up next month so please stay tune .


I hope you have fun with this tutorial and feel free to have any questions join our
 
Sincerely


Monday, March 23, 2015

Shari's Tip of the Month

Good Morning!

Today I wanted to show you a few tips when adding Creative Paperclay® to a pre-made paper mache' piece.


Paper Mache' Bunny


 Break off small pieces of clay and press it between your fingers making it very thin.


Add the clay to the paper mache' by pressing it on the piece and smoothing it out with a very small amount of water. Make sure to always have water on hand when working with Creative Paperclay®.

You will also need a damp rag or paper towel to keep your fingertips clean. If your fingertips are not clean when attaching the clay it will stick to the clay on your finger instead of the piece.


Once dry you are ready to use your creativity and finish any way you want.


I hope these tips were helpful. Now go and enjoy creating a one of a kind piece made by you!

Shari


I have been creating art for as long as I can remember. I studied graphic design in Portland, Oregon before moving to Denton, Texas and putting all my focus on creating mixed media art. In addition to being on the Creative Paperclay design team, I am a contributor for the Robin's Nest Design Team, an article writer for Mixed Media Art, and a blogger for DecoArt.
I strongly believe in giving back. I volunteer at Scrap Denton Creative Reuse Center where I teach workshops, art camps, and perform art demos. I am very passionate about mixed media art and enjoy helping and watching others discover their creativity. 


Join me on my creative journey at My Altered life on Facebook and over at  My Altered Life blog

Friday, March 20, 2015

Kid's Project: Easter Egg Necklace

This is an easy-peasy project for kids of all ages. With a little help from the grown-up, even the youngest artists can create a OOAK Easter egg necklace.

Chloe and I used Creative Paperclay® to make several small eggs. Try to get them as smooth as possible when forming them in your hands, but don't be too concerned with small surface imperfections. They will magically disappear later in the process :)

After the eggs were formed, I inserted an eye hook in the narrow end of the clay egg.

Egg and eye hook
Inserting eye hook
Egg with eye hook inserted

Next, the eggs were set aside to dry. As the eggs dry, they may shrink a bit and the eye hook might loosen. If this happen, just use liquid adhesive to hold it in place and reinsert it. Allow the adhesive to dry thoroughly.

Now, to take care of those surface blemishes. We painted the eggs with slip to achieve a smooth, finished surface. Allow the slip to dry, then paint your eggs. We didn't even have to sand the eggs. The slip left a magically smooth surface.

The last step is to add the eggs to a chain, and enjoy!!
Finished Easter egg necklace

Carole

Chloe

Table Cell Table Cell

Thursday, March 19, 2015

"Reach For The Stars" by Linda Hess

Those of you who follow my posts know that I teach art in at a local Catholic School.  Every year the school has an auction to raise money for "extras" that the school and/or teachers may need/want/wish for.  I have been given the job of creating a piece with each of my classes to be auctioned off during the event.  One of the pieces that I am creating wit a class is called "Reach For The Stars".  I will be creating it with the 8th graders who shall leave us soon and venture on to high school and beyond.  It will incorporate tracings of each student's hands and part of the arms that they will decorate.  The piece will be framed in a 24"x36" wood frame tat I plan to inscribe with inspirational sayings that I found online (of course).

With that piece stuck in my head (I am very excited to get started on it!), I thought why not create a smaller version with a bit of dimension?  Immediately a vision began to form and I ran to the studio for some clay....

If you know me, you know that my studio is filled with every kind of clay imaginable.  For this project I grabbed my Creative PaperClay, a straight blade, a small bowl of water, and my Sculpey Etch & Pearl tool (http://www.sculpey.com/product/sculpey-etch-n-pearl/).  I pulled off a bit of the Creative PaperClay and went to work.
1) Roll a 1" ball of clay in your hands.  Pinch the ball into a paddle shape and flatten slightly. 
2) Use straight blade to cut a thumb line and 3 finger lines.  This will give you 5 rough fingers.
3) Roll each "finger" until smooth and rounded.  Clay can be easily manipulated at this point.  If it begins to dry and you can't seem to get the cracks out, dip your finger into the bowl of water ad smooth over cracks.
4) Position fingers to form "reaching" hand.  Shape hand and wrist. 
5) Add fingernails using the "Etch & Pearl" tool as shown.
6) Wasn't that easy?!  Now create a few more.  Arrange the hands in a staggered line.  Once happy with the look, cut a straight edge. 
7)  If you have followed my posts for any amount of time you know that this is where I get impatient, so into the oven the hands will go....bake at 275 degrees for about 20-30 minutes.
 
Once cooled it is time to put the piece together (wasn't that fast?!).  I took the back off a frame (5"x7") and got rid of the glass (you can reuse it for something else like I do OR pitch it).  From my stash of scrapbook papers I found a great paper from Murdock Country Creations (www.murdockcountrycreations.com [turquoise #PSO42] ).  I cut it to fit the back and glued it on using my favorite "The Ultimate" glue from Crafter's Pick (www.crafterspick.com)
 
Next I painted the cooled hands with a variety of acrylic paints.  Don't they look nice? 
Hmmm, I think they may need manicures...perfect. 
A beaded trim from my stash (I think Expo, International, but not positive) attached to the top edge adds a bit of bling and the illusion of stars.
Place the backing into the open frame.  Position the hands and glue in place.  Print off chosen saying or use a rubber stamped saying.  To get a organic look, tear the edges towards you rather than cutting.  Glue in place. 
THERE!!  All done.

I hope you have enjoyed this tutorial.  See you next time.