Friday, February 27, 2015

Tip Time

Have you ever had your Creative Paperclay® get stuck inside a mould?  Here is a quick tip for next time.
Hi, it's Ann, one day I was working with some Creative Paperclay® modelling material and a small flower mould with very pointy flower petals.  The mould makes beautiful flowers and usually releases very well, except for this one project I was working on.  So, I reached for what I had on hand which was some talc powder.  The same kind used on babies bottoms.  I found that by applying a very very light dusting of powder into the sharp crevices of the mould I was able to pop out the Creative Paperclay® without losing any of the flower's details.


Just a quick tip that can save you lots of aggravation and time.  I hope that this is of help to you.

Thank you for stopping by.  Please come visit my blog sometime at Annmakes.blogspot.com.

Savings code for February is Two20.  Creative Paperclay® modelling material.

Thursday, February 26, 2015

Grunge Background Tip

 As a fine artist I am always trying to find ways to add texture to my art and usually practice on one of the many old pieces of art that are laying around the studio. I love the grunge line quality I got and the results even surprised me.

SUPPLIES
Creative Paperclay®
Acrylic paint
Wax paper
Brayer
Painted Panel (old)
 Matte medium
 
I started by mixing a navy blue acrylic paint into a slurry of Creative Paperclay® with my palette knife until it was well mixed. Since my surface was mainly orange and brown I decided to make my slurry color a cool color.


I roughly spread the colored slurry onto an old painting (on a panel) then laid wax paper over it and brayered it flat. I left the wax paper on until the slurry was almost dry then I made lines by scraping with my finger nail (because I am lazy). Finished it with a coat of matte medium. I will definitely be using this technique in a painting soon.

Darlene Olivia McElroy

Image Transfers on Creative Paperclay® Slab

I love transfers, wrote a book on transfers (Image Transfer Workshop) and it is my favorite thing to do so I had to try it on Creative Paperclay®. It works great!!! The texture is porous enough to take the transfer well. Just make sure that the clay is thoroughly dry and fairly flat. The one I did here has rough edges which is my preference but you can spend more time and get a more perfect transfer. Great for shrines, mobiles or ???
You can draw or paint on top of the finished transfer or even sand it back in areas.


Supplies

Black & white or color toner image
(must have good contrast-soft prints won't work well)
Chartpak colorless blender
Creative Paperclay®
Colored pencils (if desired)

 Step 1 - Lay your toner image face down on your flat disk of Creative Paperclay® and apply the Chartpak colorless blender to it liberally. Best to do this process in small areas at a time.
Step 2 - Burnish in all directions, apply the blender & burnish again. Continue steps 1 and 2 until you have done the whole area.

If you burnish only in one direction, the strokes will show. I use the end of my blender pen to burnish as it is already in my hand and ready to go.
Check periodically to see how it is transfering.

Try it and post your projects to the blog. We would love to see them.

Have fun!

Darlene Olivia McElroy
darleneoliviamcelroy.com


Tuesday, February 24, 2015

February helpful tip

 
Wow I can not believe it but  February is almost gone and this winter sure has been a very interesting.
Now today I want to answer a very often ask question.
 
What tools are required to work  Creative Paperclay®?
 
I will answer it but I want to let everyone know that working the Creative Paperclay®
 it is different for everyone. Some artist develop their own techniques while other create 
and make their own tools to work with.
 Now if you are new to this wonderful sculpting medium don't be afraid. This article will guide
you and soon you will see your self grow and learning  what will work and what will not.
I will show you the tools I favor , but remember  every artist is different and have their own  techniques. That is why these are to be use  not instructions , but more of a guide so you can see what you like and will practice you will  learn how to make it your own.


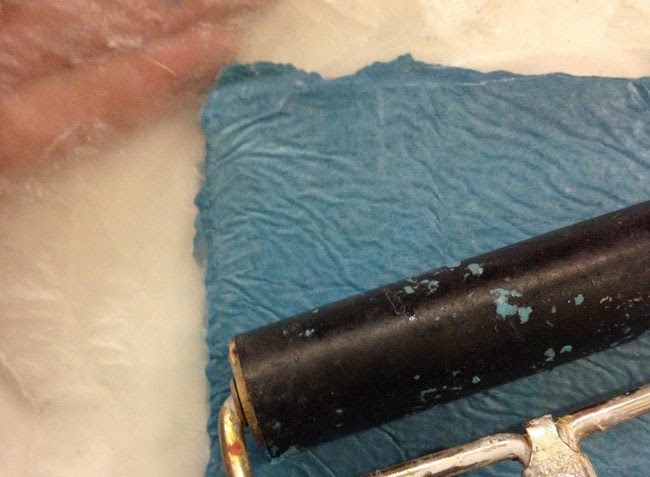
 A roller pin I found this one at the baker section, scissors  and water bottle mist.
 
 
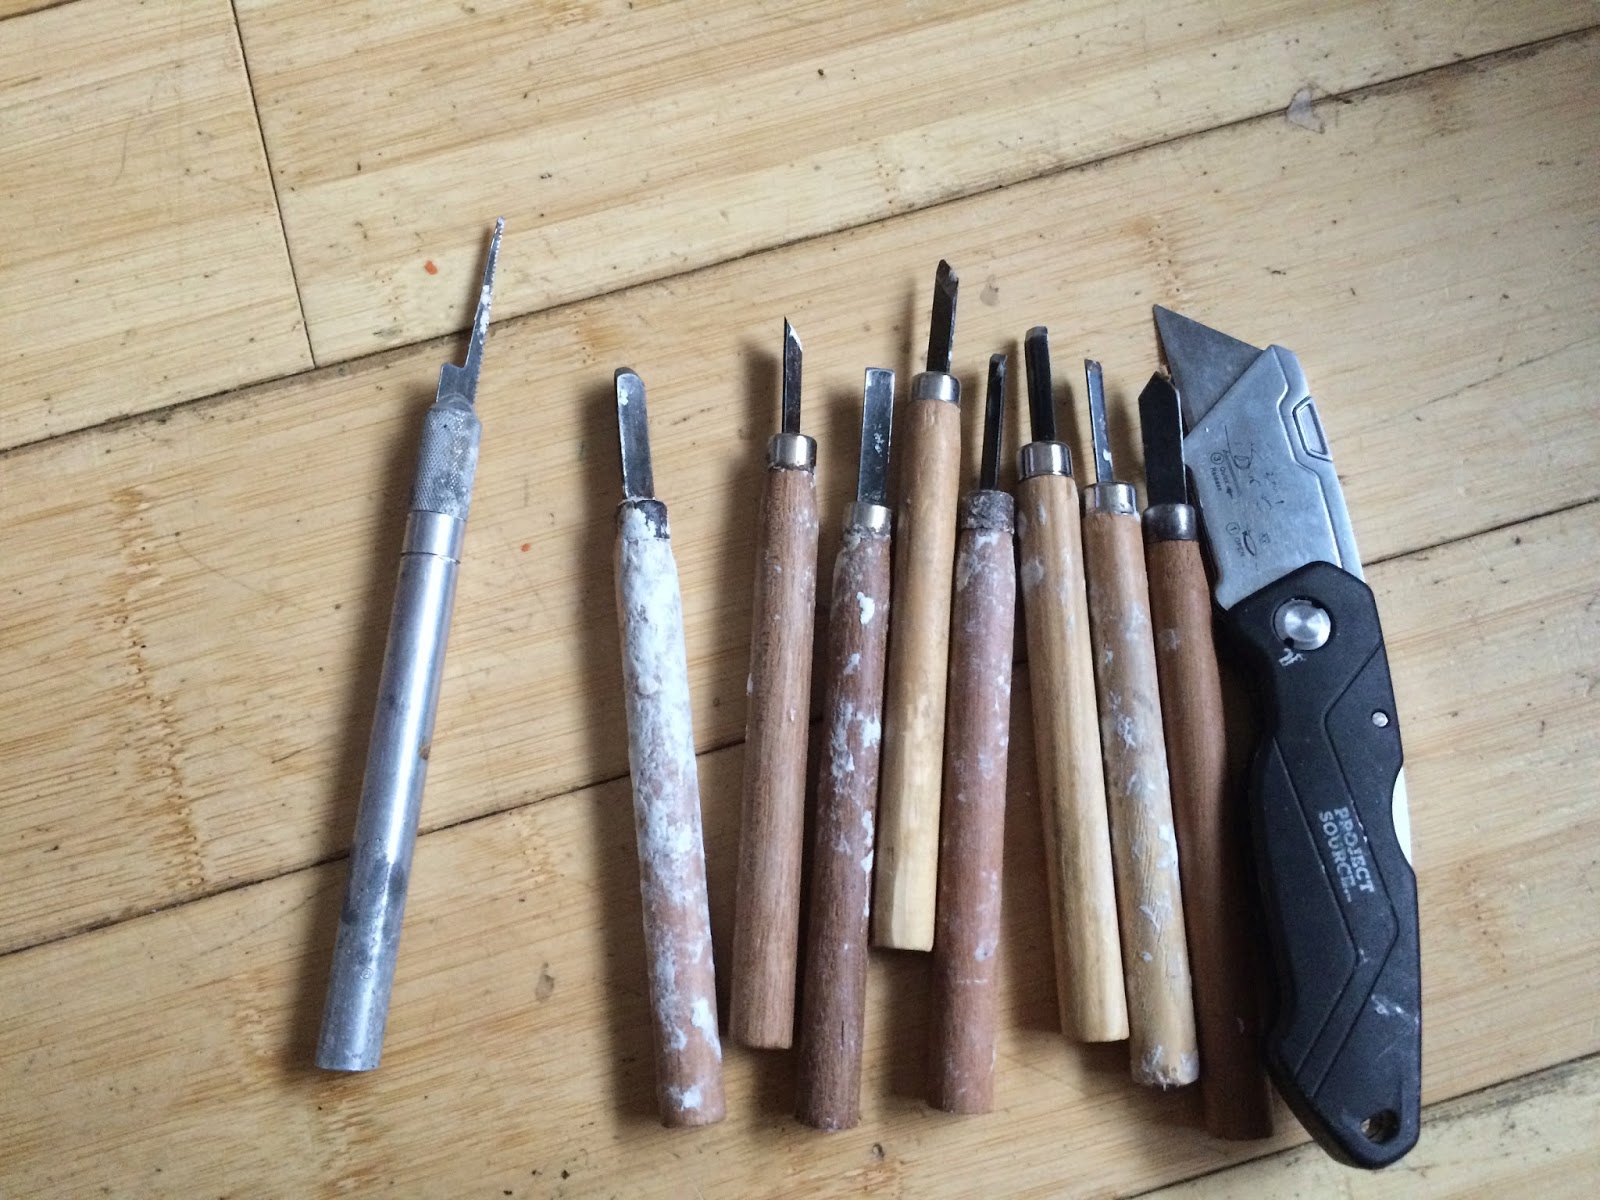
Xacto Knifes, wood carving tool and heavy cutter.
 

 One of my favorite Xacto blades is this one is serrated

 
Rubber wipe away tool I found these at Hardy's Hobbies Studio

 
Aluminum Foil
 
 
White, grey or black primer.To seal the final piece. I like to used it if you want a nice clean 
painted surface. If you prime it will allow the acrylic paint to cover in less coats. Will also
help to prevent  the paint from falling off once it dries.


Copper, aluminum or stainless steel wires for armature making.
 
 
 Paper or painters tape. These is very useful to create armatures.

 
Flat wash paint brushes I use these to sculpt and soften the wet clay mix. A little water and this brush makes wonderful clean surfaces that will required less sanding once the piece dries.
 

 Now this bags are very useful and I love to keep them on hand. work good for storage your wet clay or pieces your working on. I like to have many sizes available. 


Now those are some of my must have in my studio If you have any questions or will like any more ideas how to use the Creative Paperclay Q&A  join us at facebook .
I hope this gives you an idea of the most commonly used tools.
 
Feel free to experiment and enjoy working with this one of a kind Creative Paperclay® Material
 
 
Have a bless day
Sincerely Gloriann Irizarry

Monday, February 23, 2015

Shari's Tip of the Month

Hi!,

Today I have a short tip for a short month.

I am going to show you a trick I use to help my stamped images look beautiful. This also helps your stamps be easier to clean when you are done.

I have been testing some intricate stamps on Creative Paperclay®. The problem I was having was that the clay was sticking to the stamps once I removed it. The image was compromised as well.


So when using a stamp whether is intricate or not sprinkle a very small amount of cornstarch on it before using it. Use a dry brush to remove any excess. You can use this trick on your rolling pin too.

Thanks for stopping by!

Shari 


I have been creating art for as long as I can remember. I studied graphic design in Portland, Oregon before moving to Denton, Texas and putting all my focus on creating mixed media art. In addition to being on the Creative Paperclay design team, I am a contributor for the Robin's Nest Design Team, an article writer for Mixed Media Art, and a blogger for DecoArt.
I strongly believe in giving back. I volunteer at Scrap Denton Creative Reuse Center where I teach workshops, art camps, and perform art demos. I am very passionate about mixed media art and enjoy helping and watching others discover their creativity.

Friday, February 20, 2015

Kid's Project: Creative Paperclay® Leprechaun

All our Valentine's are done and delivered. Now, moving on to St. Patrick's Day. Chloe and I created a cute leprechaun to hang in our kitchen.

We started by making the individual pieces that we'd need—two legs and arms, a body, and a head. We used cookie cutters for the body and head. The arms and legs were long snakes of clay. We shaped the hand ends of the arms to form a cone. We flattened one end of the legs to form a foot.

Before our leprechaun was set aside to dry, I pierced five holes on the body piece where the head, arms, and legs would be attached. I also pierced holes through the tops of each arm and leg, and one at the bottom of the head for attaching to the body.

We decided that he needed something more to give him a bit of character, so we made hair and a beard using the clay extruder.

When the pieces were thoroughly dry and before painting, I coated each piece with an acrylic medium to seal them.

Chloe painted the green body, legs, and arms while I did the head, hair, and beard. Painting tip: Don't overwork the paint. Two thin coats are much better than one thick one.

When the paint was dry, we moved on to assembly. Depending on the age of the child you're working with, this could be an adult job, as it was in our case. Chloe handed me pieces and jump rings, but I did the assembly work. Assembly tip: When opening jump rings, use two pair of pliers—one is each hand—to grasp the jump ring on either side of the opening and use a twisting motion to open the ring.

A bit of a haircut and googly eyes completed the face. Here he is!! Hanging in our kitchen.

And here's Chloe admiring her work.


Carole

Chloe

Table Cell Table Cell

Thursday, February 19, 2015

Imprinting on Creative Paperclay

Hi all, it's Donna from Memes Art Place.

It is tip day.

Did you know that you can imprint on Creative Paperclay?

You CAN!

You can use so many things.

Here is how you can do it....

Roll out your Creative Paperclay, then lay some plastic wrap over the top. Now lay your texture over
the top of the plastic wrap and roll over the top of it.
Remove your texture and the plastic wrap and enjoy!

What to use.......
How about some...

Lace
Heavy textured paper
Texture wallpapers
Wire
Metal sheets with patterns
Stamps


When you go to the thrift store find a textured bowl that you could mold Creative Paperclay over.
Once dried, paint it and give as a gift!

Think of the possibilities!

I hope you find this helpful!

If you have any questions you can ask any of us here!
Thank you for stopping by and keep coming back for more projects and tips!


Tuesday, February 17, 2015

Saving extra clay - Tori's tip for February

Hi all, it's Tori West and it's time for my Tuesday Tip post for the month.  One of the things I like to do with both Creative Paperclay® modeling material and Delight ™ Air Dry Modeling Compound is mix paint or other materials into the clay.


My tip is to let you know that making a bit of extra clay could save you a lot of trouble later on in the project.  Every time I color clay I make a little extra and store it in an airtight container.  I also write the "formula" for my mixtures down, but in truth, the odds of getting an EXACT match after the clay has dried is slim...so, save a bit, and if during the drying process your project cracks or you notice an area that needs a bit of touch-up, you'll be glad you did!

I like to use prescription bottles to store my extra mixtures in, they'll keep for quite a long time.  In order to keep track of what's in the bottle, I take a bit of the clay and press it onto the top of the bottle.  If I end up with lots of bottles of extra clay, I'll sometimes mix them together for a project that I'm going to paint - or, come up with a project that uses the colors I've got!

Thanks for visiting the blog, I hope you find this tip useful in your own artistic endeavors.


I'd love for you to join me for more projects & art adventures on my personal blog
Find me on Facebook, or peruse & ponder pics with me on Pinterest
Connect on Google+ or see what new creations I may have on Etsy


Monday, February 16, 2015

Golden Lips 

I found this mold at the local scrapbook store and I had to have it. I used a stamp and an embossing folder to add more texture. After I finished making impressions, I applied two covers of gesso on the project. I then painted it with multisurface paint and used Chalkboard spray paint. I finish the project by lighting with Inka Gold and Gold Leaf Rub and Buff.


Tip: Use a little water on your paperclay before applying to your main project. 


Sunday, February 15, 2015

Altered Birthday Idea -

If you love altered projects - or projects made out of something you normally would throw away, then today's project is for you!  I love taking things I would normally throw away, and create something fun out of!  Lets get started in this fun - altered coffee can gift container!  

Supply list:  
Coffee can - (or other type of can the same size)
1 sheet 12 x 12 paper
1 sheet 8.5 x 11 paper
Creative Paperclay product (1/3 of a package)
Balloon template 
Bakers Twine
Xacto knife
White, medium blue and dark blue paint

Directions:  
  Flatten out the Creative Paperclay product 

Using a scrapbook template - cut out your balloons, I used 10 for this example. 

Using your fingers and water, smooth out the clay pieces on the top, bottom, and all around the balloons.  Set aside on a cooking pay such as a cookie sheet.  Bake at 250 for 20 - 25 minutes - turn over halfway.

Paint each of the balloons using 3 different colors.  Add Bakers Twine to the bottom of the balloon for the string, using hot glue!  

Cut your sheets of cardstock/paper in half from top to bottom.  Cut enough off the top so you can fold into the inside of the can approximately 1.5 - 2".  Add the paper around the can gluing the bottom first, and then the sides of the paper.  

Add the balloon's, and then glue the strings to the bottom of the can!  

This project can be made up ahead of time, purchasing the items you need to go in it as you go!  Add a quick card with it- and you are done!  I hope you have enjoyed my project today - easy enough to start out with, totally customizable to any birthday person, and fun on top of it all!  
Lynda Jeffs
Creative Paperclay Design Team

Friday, February 13, 2015

Flower Necklace

Ann here with a necklace I made using Creative Paperclay® modelling material.  I like using this product to make very light weight jewelry.  Working with Creative Paperclay® is so fun and versatile, it lends itself well to making heavy looking objects but that are so light.  It is a great material to work with as an artist and crafter.


To make this necklace I used:
Creative Paperclay® modeling material
Silicone holds of flowers
a repurposed chain from an old necklace
9 jump rings
1 eye pin
Enamel paints (nail polish)
Jewelry pliers


1.  Knead small amounts of Creative Paperclay® and roll into small pea sized balls, and squish into silicone mould.  Let sit for a few minutes.


2.  Bend and coax flowers out of mould before they completely dry and let them air dry over night.


3.  Sand, file, and cut off any extras.


4.  Using some more very small pea sizes of Creative Paperclay® modelling material to adhere eye pin to larger flower and jump rings to smaller flowers.
(Remember to add a jump ring to the eye pin of the larger flower)


5.  Paint dry flowers with a couple coats of paint and then a coat off sealer. Let dry.

6.  Using wire cutting pliers cut the chain in 3 parts.

7.  Attach jump rings to the cut ends of the chain.  Attach flowers to chain.


I hope you are inspired to try making jewelry with Creative Paperclay®.  To see more of my projects and how to's please visit my blog:  http://annmakes.blogspot.com

Thank you for stopping by.

Thursday, February 12, 2015

Give a Little of Your HeART

Since Valentine's Day is almost here, I decided to make a batch of hearts to hand out to my friends so they have a memento of how much I care. I made an assortment because all of my friends are different plus I enjoy the variety of textures and looks.

Supplies
Creative Paperclay®
Amazing Molding Putty
Assortment of hearts to cast
Acrylic paint
Gold & silver rub


I went through my collection of metal and wood hearts to find the ones that I wanted to work with.
I made molds with amazing molding putty with some of them. One of the metal hearts I just had to turn over to cast the clay in.

Then it was my usual painting and metallic rubs.

I finished by putting them in fabric gift bags to hand deliver them in.

Happy Valentine's Day!

Darlene Olivia McElroy