Monday, September 25, 2017

Make Jewelry Charms with Creative Paperclay®

Hi Friends:  Creative Paperclay® can be used to make great lightweight charms for your home-made jewelry pieces.  Just roll the clay, stamp into it with your favorite stamp sets, then cut with cookie cutters or metal clay cutters to create charms / pendants to use on necklaces, earrings, or bracelets. Once dry, you can paint them to match your favorite outfits or to give as gifts.

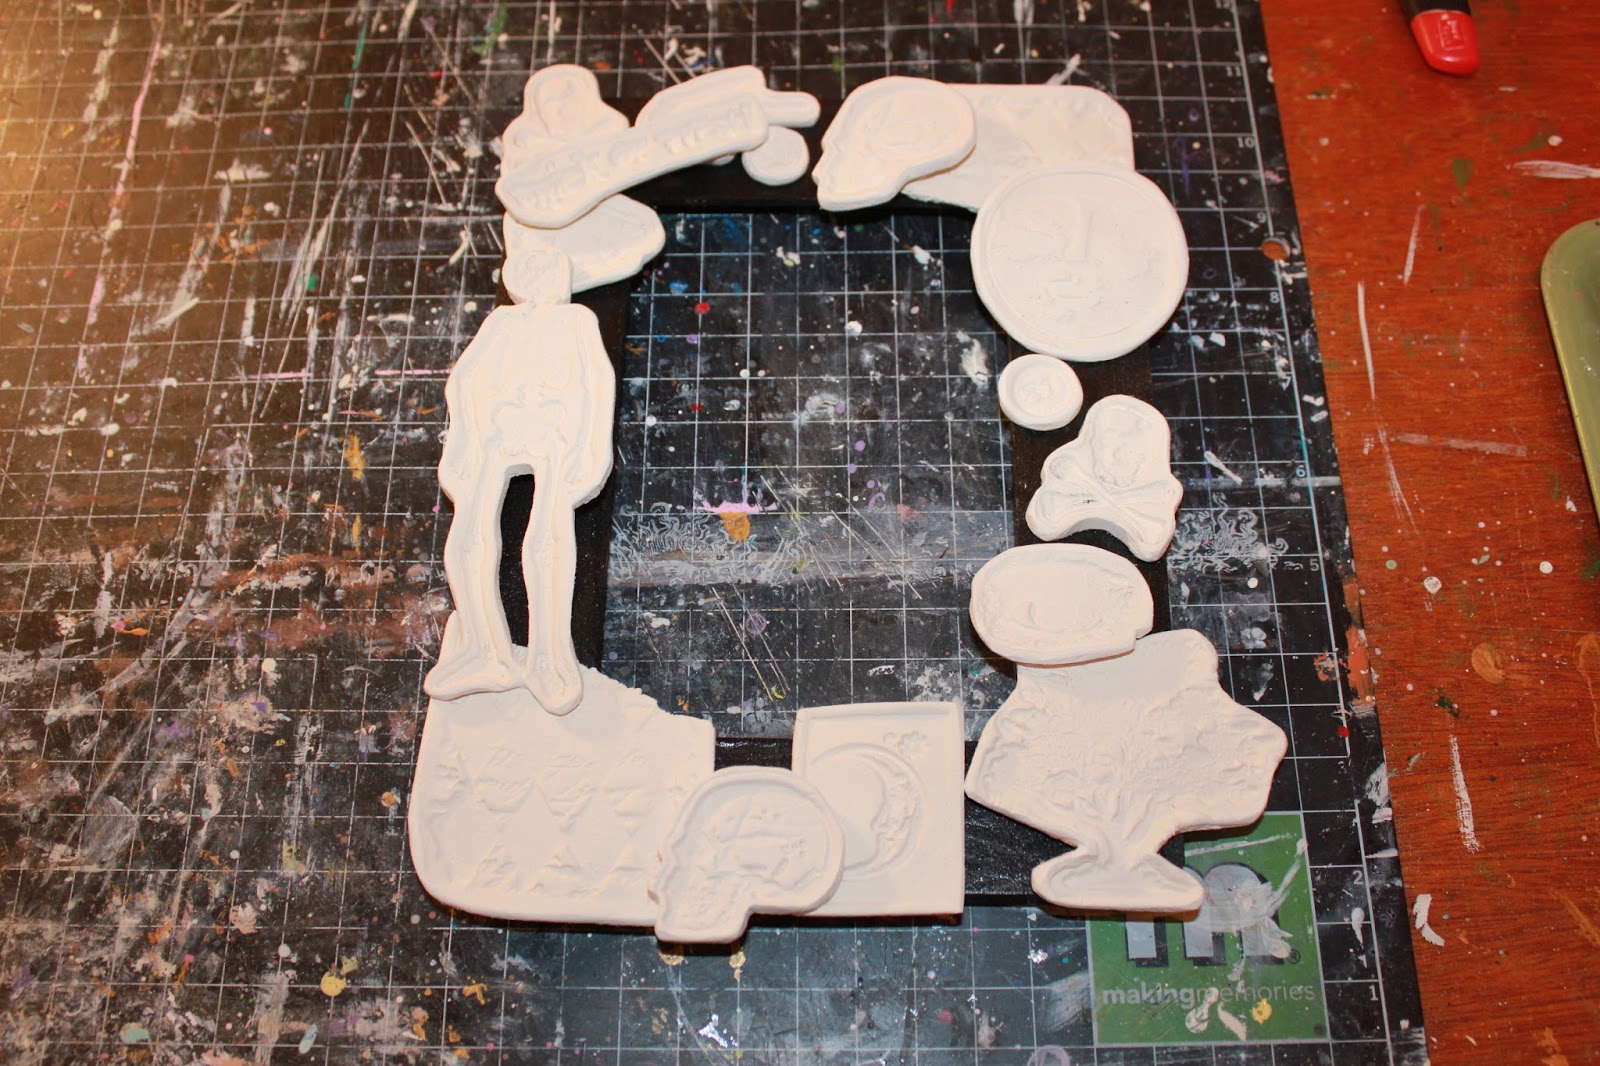
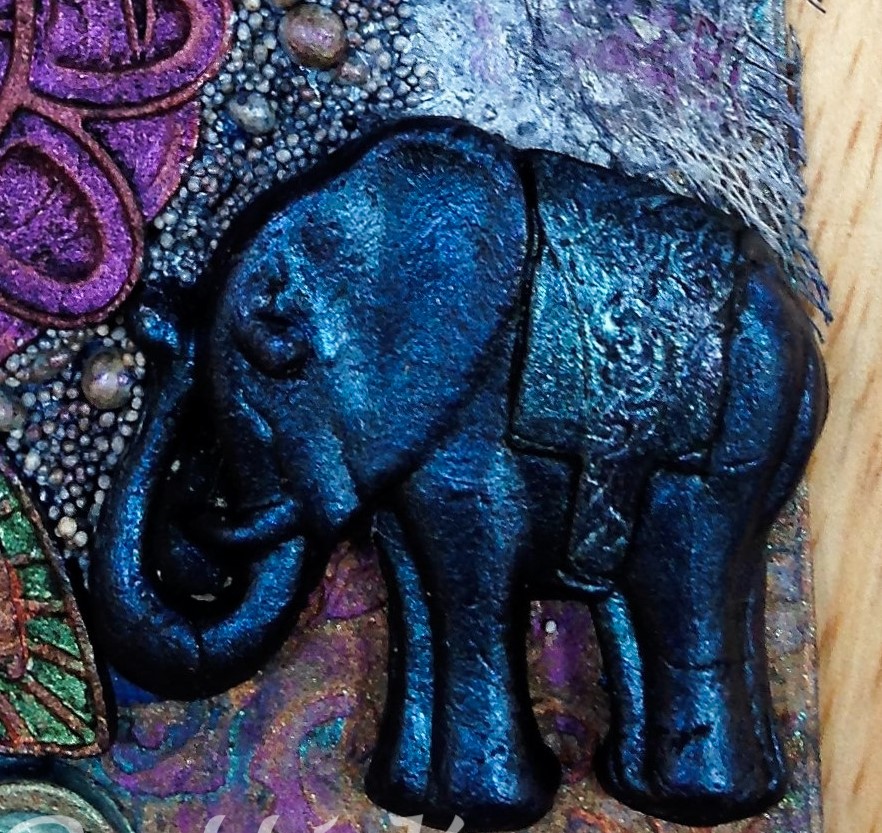
Here are some pictures of the jewelry pieces that I made using Creative Paperclay® charms:


The beads on this last one didn't photograph very well - they are lovely iridescent purple/blue beads that really work well with the purple in the charms.

Please see my video tutorial for full instructions for this project:


Supply List:
Creative Paperclay® Modeling Material
Prima Marketing Art Alchemy Acrylic Paint, Opal Magic Yellow-Blue (Amazon)
PrimaMarketing Art Alchemy Acrylic Paint, Opal Magic Violet-Green (Amazon)
Prima Marketing Art Alchemy-Sparks-Fairy Wings (Amazon)
Prima Marketing Art Alchemy-Sparks-Iris Potion  (Amazon) 
Prima Marketing Art Alchemy-Sparks-Magical Pond  (Amazon)
Prima Marketing Art Alchemy-Sparks-Mermaid Sparkle (Amazon)
Prima Marketing Art Alchemy - Metallique Wax - White Gold (SSS)
PrimaMarketing Art Alchemy-Metallique Wax-Brushed Iron (Amazon)
PrimaMarketing Art Alchemy-Metallique Wax-Old Silver (Amazon)
Prima Marketing Art Alchemy-Metallique Wax-Vintage Gold (Amazon)
Liquitex Gesso - White (Amazon)
Prima Marketing Art Alchemy-Metallique Wax-Aged Brass (Amazon)
Studio 71 Black Gesso (JoAnn)Darice 1MM Black Leather Cord (Amazon)
Darice Necklace Kit 1MM Light Brown (Amazon)
Darice 1 inch Silver Fish Hook Earrings (Amazon)
Darice 1 inch Gold Fish Hook Earrings (Amazon)
Beadalon Stringing Wire 19-Strand .015-Inch (Amazon)
Bead Landing 9MM Silver Jump Rings (Michaels)
Bead Landing Assorted Gold Jump Rings (Michaels)
Premo Diamond Metal Cutters (Sculpey)
Premo Circle Metal Cutters (Sculpey)
Faber-Castell Glaze (Amazon)
Versamark Ink Pad (SSS)
Blue Moon Metal Bead Strands - Gold and Silver
Vintage Rose Garden background stamp from Quick Cards Made Easy
Stampendous Tiled Quad Cube stamp
Other:  misc. beads and jewelry findings from my stash


I hope you enjoyed my projects and learned some new ways to use Creative Paperclay® to make charms for your jewelry creations. Thank you so much for stopping by the blog today. Have a great, creative day! -Patti

Friday, September 22, 2017

Creative Paperclay® Calavera Art

Time to get ready for the holidays starting with Halloween and Day of the Dead. I started by rolling out Creative Paperclay® on a masonite panel then laying a stencil over it and brayering it so the pattern would show well. Then a cast skull was glued to it with soft gel. The edges were then trimmed and smoothed with a small amount of water on my fingers then allowed to dry.

SUPPLIES
Creative Paperclay®
Soft Gel Gloss
Black and buff acrylic paint
Jewelry parts
Fake Flower
Black paint was applied to the surface and allowed to dry before a wash of buff paint was applied. This was followed by gluing jewelry parts and fake flower pedals down.

This would look great on the top of an ofrenda.


If you are going to create an ofrenda for Day of the Dead, here is the 3 level layout. This can all be miniaturized by creating the different ofrenda elements with the paper clay such as fruit, sweets and bottles. Be careful though. One year I made faux chocolates for a heart shape box using the clay and my husband tried to eat one.

Dream in Color!

Darlene Olivia McElroy

Tuesday, September 19, 2017

September's Tip..... Creating Butter Slime with Delight Air Dry Modeling Compound.... by Cindy Porter

Hi Creative Paperclay® fans, it's Cindy here, I am excited to share with you my tip for September... Did you know that you can use Delight Air Dry Modeling Compound to make Butter Slime...  What is Butter Slime I hear you ask... well it's the latest craze sweeping through the pre-teens  and young teens age bracket... I couldn't really see what all the fuss was about, but I will confess once I had made some it is quite satisfying to just squish and stretch, quite good for the stress levels I think... lol.
Supplies:
Delight Air Dry Modeling Compound
Clear Glue: I used slime glue (available here in Australia) but Elmers Clear Glue is also great
Bowl
Slime Activator: either 1 cup warm water with 1 teaspoon of Borax(Bi-Carb Soda) or Contact Lens Solution 


Now onto a little video on how to make the Slime.... enjoy


thank you for stopping by and joining me here today,  I hope you or your kids/grandkids, nieces or nephews will have fun trying out this Slime recipe...

Till next time 
Happy Creating 

xC


Sunday, September 17, 2017

Making Spooky Spell Bottles with Creative Paperclay®


HELLO! Halloween is just around the corner so I thought what better to make than a Halloween craft? I love creepy crafts, don't you?

HalloweenHalloween

These spell bottles are so easy to make and you can decorate them any way you choose. Here is the list of supplies:

Empty bottles and jars

Acrylic paints
Golden Acrylic:

Sculpting tools
Paint brushes
water

Part 1

  1. First you cover the bottle with paper clay, taking care to push down firmly so no air is trapped. Let that dry. 
  2. When it is dry you add all the decorations such as the words and the eyeball, using some PVA glue of course.
  3. Put that aside to dry.


You can watch the video below to see how I did this.


Part 2


Now its time to paint!
  1. Apply a coat of gesso. This seals the clay so it doesn't absorb all the paint.
  2. Paint the bottles in whatever color you choose.
  3. Apply a wash of black paint and a wash of red paint.
  4. Wipe off.
  5. Keep going until you are satisfied. 
  6. Paint the eye on the Frog Eyes Bottle. I also added some brown stain and green paint to this one.
  7. When dry, varnish.
  8. Add any other embellishments you choose.


You can see how I painted my bottles in the video below.


I do hope you enjoyed this tutorial. Thanks for stopping by!

Suzette


Friday, September 15, 2017

Halloween Picture Frame

ImagiMeri's Creations
presents:
A Halloween Picture Frame

Hello Lovely People,
I'm late with my post as I lost my computer last week and all my images.  I had to re-do my project and then silly me, I forgot to post it.

To those on the team posting for Friday the 15th, I apologize for adding my post in at the last minute.

This month I'm creating a cool stamped/indented decorated dollar store frame.  Supplies used are:

Dollar store frame
Creative PaperClay
Knives
Roller
Stamps
Black, gray and off-white acrylic paint
Metallic paste/paint in violet and yellow/green
Hot glue
Sandpaper

Here are the basic supplies I used and they are listed above, too
First I painted the dollar store frame black, set it aside to dry
and continued on to the clay.
I rolled out my clay to an 1/8th of an inch, as this is my
preferred thickness for crafting.
I proceeded to stamp various images in the clay
Using a knife I cut around each shape, leaving about an
1/8th of an inch border.
More stamping
I then placed the pieces I cut out on a tray and baked them
in a 250 degree oven, turning them over once, during the
45 minute bake time.
I then "trimmed" off all rough edges using an X-acto knife.
Using a small square of sandpaper I sanded around all the
edges of each piece for a cleaner look.
I found a placement for the pieces that I liked.
I then "hot-glued" all the pieces down onto the frame.
Using gray acrylic paint I created a wash by adding
water to the paint.  I then coated all the pieces in
the gray wash.
Using "off-white" acrylic paint, I created another
wash by adding water.  I then went over the pieces
again after doing the gray.
Using the black acrylic paint I created
yet another wash by adding water.  This
created contrast so that the details of the
stamping could be seen.
I then added the violet and yellow/green metallic
paste/paints for highlights.
I inserted a picture of my grandson and voila
it's a really cool picture frame for Halloween.
I hope you enjoy this tutorial and I look forward to hearing from you if you try this.

Hugs,
Meri

Monday, September 11, 2017

Elephant Wonder Tag Featuring Creative Paperclay®

Hi Friends:  Did you know that you can make your own Creative Paperclay® molds from favorite objects that you have around the house?  It's really easy with a product called ImPRESSive Re-Usable Putty.  The Creative Paperclay® design team was given the opportunity to try using this reusable putty with our paperclay.  It was great!  I chose to create a mold of a favorite elephant pin that belonged to my mom.  I followed the directions on the package to prepare the putty, then pressed the elephant pin into the clay, let it harden using the package directions, then removed the pin.  I created this great elephant mold that I can use any time I want.  And, if I decide that I want to make a mold of something else, all I have to do is reuse the putty with another charm/item that I choose.

Once your mold is ready, you can use Creative Paperclay® to make a clay embellishment to use on your projects.  Here's a project that uses my elephant mold with other Wilton molds to make this fun tag:


Here are some detail photos of the cast elephant and flowers, along with the sentiments that I used:


Here's the original pin and the mold that I created:


Directions: Please see my video tutorial for full instructions for how I created the mold and the tag.  I do have to confess that, in the middle of filming the tag project, I spilled a large amount of ink on my craft table.  So the final background colors changed a bit during the filming. LOL.  But, I decided to make the best of the happy (?) accident and just go with the change in the colors.


Supply List:
Lindy's Stamp Gang Sprays (Amazon):  Brushed Nickel, Opal Sea Oats, Afternoon Delight Denim
Liquitex Matte Super Heavy Gel Medium (Amazon) Liquitex Professional Clear Gesso (Amazon)
Prima Marketing Art Alchemy-Antique Brilliance Amethyst Magic (Amazon)
Prima Marketing Art Alchemy-Antique Brilliance Lucky Emerald (Amazon)
Prima Marketing Art Alchemy-Antique Brilliance Mystic Turquoise (Amazon)
Prima Marketing Art Alchemy-Metallique Wax-Rich Copper (Amazon)
Prima Marketing Art Alchemy-Opal Magic Wax-Turquoise Satin (Amazon)
Ranger Adirondack Metallics Acrylic Paint Dabbers, Silver (Amazon)
Tim Holtz Small Talk Stickers (Amazon)
Studio 71 Black Gesso (JoAnn)
Wilton Doilies
Basic Grey Out of Print 6X6 paper pad
Other:  cheesecloth, fibers

I hope you enjoyed my project and learned how to use homemade molds in your projects. Thank you so much for stopping by the blog today. Have a great, creative day! -Patti


Friday, September 8, 2017

Shrine with Mica Flakes & Metal Leaf

I am researching info for an article and class on shrines. That inspired me to create one with Creative Paperclay®. I always roll out my clay between layers of wax paper and also let them dry on it. It won't warp this way. I texturized it with a homemade stamp.

SUPPLIES
Creative Paperclay®
Cast objects
Mica Flakes
Acrylic Paints
Stamps
Salt
Metal Leaf and Adhesive size


 I sprinkled the mica flakes on to the clay and rolled it in. The edges are left rough.


Next I stamped into the clay and added a cast Buddha. When dry, I sealed it with polymer medium.


A metallic gold wash was added. When dry a burnt umber stain was applied and the alphabet letters were added. The white liquid over the Buddha is adhesive size for the metal leaf. It goes on white. When it turns clear it is ready to use.


I applied the metal leaf and decided I wanted more on the top and bottom for balance. On the Buddha I added a burnt umber stain then I added a floater on the back so it can be hung on a wall with a bit of a shadow.

Dream in Color!

Darlene Olivia McElroy


Thursday, September 7, 2017

How To Make Some Amazing Embellishments With Impressive Putty and Creative Paperclay Delight®

Hello, Friends and fans of Creative Paperclay®!! My name is Jenn and today I want to show you how you can combine this two wonderful and versatile products. I will be showing you how to make some amazing embellishments with Impressive Putty and Creative Paperclay Delight®!!
In the picture above you can see that I used the Impressive Putty and a wooden cutout to create a mold. You may ask. "why didn't she just use the wooden piece?" The answer is simple, I wanted something thinner and lighter. By creating a mold I was able to then use the mold and Delight® to make a much lighter, flexible and cuttable embellishment!
Now I can cut this into exactly what I want and use it on my project. This stuff is true to its name, Impressive for sure! I love it and I am sure you will too!


 Clay Products Used:

Others Products Needed:
Black gesso
acrylics


The next embellishment is a frame. I am a thrift store lover and recently found these beautiful vintage Victorian frames. Again, they are bulky and heavy and I really wanted a lighter more flexible frame for my project. In the next few pictures, you can see the process of creating the mold with Impressive Putty and then molding it using Delight®.
Push the putty with a medium pressure to ensure that it is evenly distributed. Trim outer and inner excess putty. Place the molded piece into your freezer for 15-20 minutes. You can leave it in longer if it does not feel like it will pull easily from metal.

One of the greatest things I have found using Impressive Putty is its ability to pick up such great details as shown here.
Just look at all the amazing, intricate details it picks up!

Roll out some Delight® air dry modeling compound and work it into a flat strip. Next, press it into the mold and allow it to sit for a few minutes.
Pull the modeling compound gently from the mold. Next, trim unwanted edges with small sharp scissors and allow your frame to dry. There are all those wonderful details again!


 Once your frame is dry apply a coat of black gesso to front and back. Let this dry.


Now you can use an array of gold tone acrylics and paints to decorate your frame and bring it to life!

I hope you have enjoyed my tutorial! For all of your Creative Paperclay® be sure to visit the website here.
For your Impressive Putty shop here. Available in 4 convenient sizes for all of your molding needs!
Delight® is also available at Michael's, Hobby Lobby, and Joann's.
Thanks So Much for viewing!!
Jenn