Friday, October 23, 2020

Bottle Tree Seed Pod Sculpture


Hello and happy Friday everyone! Cinnamon here and I am going to show
you how I created this piece I call  "They Didn't Know that We Were Seeds" 
which was inspired by a Mexican proverb. This is one of the smallest
pieces that I've made, I'll show you how I created this with the steps below:

Supplies: 

Creative Paperclay®

Masking tape
Bottle Tree Seed Pods
Cardboard
Exacto Knife
Sand paper
E600 Craft Glue
Aleene's Tacky Glue
Acrylic paint
Sealer, Varnish


I had these pods hanging around my studio that a family member
 gave me after coming back from vacation. They come from a tree
that is native to Australia and is known as Queensland bottle tree. 
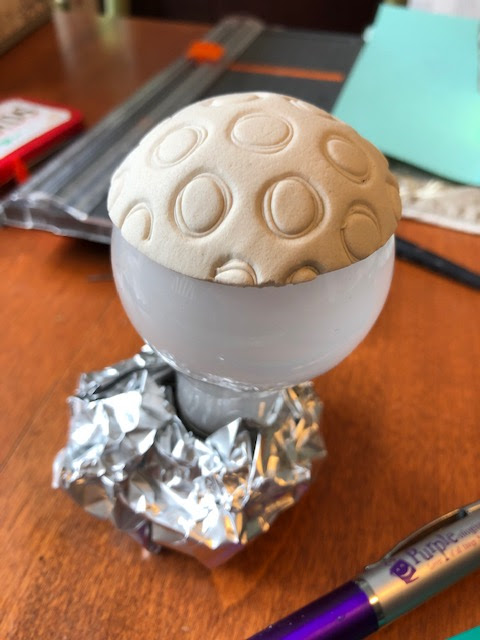
I started out by getting a piece of cardboard and folding it to a size that
 would fit inside the seed pod. I covered it with masking tape and clay. 


After getting the rough shape of the piece, sit it aside and 
allow it to dry for around 24 hours. Make sure that it fits in 
the pod with a bit of room at the top and the bottom.


After allowing it to dry begin to work on the face and build 
up the features. This will be a gradual build up and 
break down process, so you need a little patience.


When you are satisfied, sit the piece aside again to dry
before building up the rest and allow it to dry again.


After letting the piece dry, begin to carve into the piece with a 
razor or exacto knife to better define the shape of the face 
and features. Add more to finish out the shape of the clay 
if it still needs more work and allow it to dry again. Continue 
this process until you are happy with how the face comes out.


Once you are done, you can begin to paint the piece with your choice of paint.  


I am using a magnifying glass here so that I could see the lips
better. I didn't want to mess them up because they're so tiny! 
(I also thought it would make the photo 10% cooler, and it did! :)


I am using some wool here for the hair. I decided to put two
 long braids on the doll so I braided the hair in advance so
 that I could glue the braids on later.


I am using Aleene's Tacky glue here so that I could get the hair to stick
to the piece quickly. This glue grabs on to whatever you are gluing
 fast so that you don't have to spend a long time holding the pieces together.


I have panted the eyelashes with a tiny brush to make the strokes
 look like real lashes. I'm not good at putting lashes on my 
pieces, and especially not in this micro size!


With every piece that you add to the doll, be sure that she still 
fits in the pod. She can easily become to big for it when you 
start dressing her, so take note of how big you are working.


I am now wrapping a piece of fabric around her to dress her. 
Again, make sure that it still fits in the pod here!


Wikipedia Image, Public Domain

Wiki image Public Domain

(This is what the pods look like hanging in the tree)


I decided to use corn kernels to resemble the seeds from the plant.
I am using the Aleene's Tacky glue here to get them in place.


I felt that the kernels were a bit too yellow, so I put a light coat
 of brown paint over them to tone  them down.


After getting the kernels in order I moved on to putting the 
doll in place. I went with the E6000 glue here to get a better 
hold of her since she was bigger. I left the bottom kernels off
so that I can glue them after placing the doll.


After the doll has been placed, you can move on to placing the last few kernels.


Thank you all once again for stopping by, and I hope that you enjoyed 
today's tutorial! You can find Creative Paperclay® at the following 

See more of my work at Melandolly.com, catch updates on 
my Instagram page and here is a link to my shop!


Make sure you go out and VOTE 
if you didn't already!


Wednesday, October 14, 2020

Circular Texture Pin by Linda Hess


 Inspiration is all around us.  I mention that because this tutorial was inspired by my love of texture and ways to bring multiples together in an artistic way.  I hope you enjoy this.  As always, it is easy peasy lemon squeezy to do. 😄

Materials:

Creative PaperClay

a non-porous work surface

a roller (I used an acrylic roller, but a dedicated rolling pin would also work)

a circle cutter (mine is 2" round, but any size will work)

a knife or blade

texture sheets, stamps, mesh...the sky is the limit!

lightbulbs (the good, old fashioned kind) 

foil

Procedure: Part1

1)  Open the package of Creative PaperClay, pull off a bit, and place it on the work surface.  Rewrap the remainder of the package tightly in plastic wrap OR in a Ziploc baggie, squeezing the air out before sealing.  Using the acrylic roller, flatten the clay on your work surface to an even thickness

HINT: If you roll the clay between 2 popsicle sticks, then the final sheet of clay will have a uniform thickness.

2)  Use a circle cutter (mine is 2" round) to cut a few circles from the clay sheet.


3) Press texture into the clay circle.  The texture sheet will distort the circle slightly, depending upon texture used, so be sure to recut the circle to maintain uniformity in size.  Repeat with a variety of textures on the remainder of circles.


4) Gently lift each circle off your work surface.  Place onto the curved surface of a light bulb and press into place using the palm of your hand.  Repeat with each circle.  Let dry in place overnight OR (if you are an impatient sort) bake for 10-15 minutes @ 275 degrees.  

NOTE: You may have noticed in one of the pictures that I created a base for my lightbulb with a piece of foil.  This can be easily created by lightly crumpling a piece of foil, wrapping it around the lightbulb base, and flattening the bottom on your work surface.  It allows the clay circle to remain upright to dry rather than the possibility of a flat spot should it roll on the table.


That's it!  The first part is done.  After the textured circles have dried completely, pop them off the lightbulbs and continue on...


Procedure: Part 2

Materials:

Creative PaperClay

knife, blade, or Exacto knife

plastic paint palette 

assorted wires (aluminum 10g and Funwire 20g shown)

knitting or darning needle

scissors or wire cutters

Step 1) Use the knife, straight blade, or Exacto knife to cut each circle into 2 or 3 pieces.  If cutting is difficult, rock the tool back and forth to "saw" through the dried clay.  Rough edges can be carefully shaved away.  NOTE: Keep any shavings in the paint palette until later.  Arrange pieces, mixing textures, as shown above.

Step 2) There are 2 different ways to put the pieces together.  The first way is to roll a ball of Creative PaperClay (from the part set aside in plastic wrap or Ziploc), flatten the bottom slightly, and then arrange components on top of the ball.  Once you are happy with the arrangement, remove each piece, rub tacky glue on the inside, and place it back on top of the ball to dry.


The second way to put the components together is to (once again) roll a ball of Creative PaperClay, but instead of leaving it rounded, flatten the clay into a disc about 1/8-1/4" thick.  The disc can then be flattened inside of the cut, textured pieces.


Bet you thought we were done!  No way!  Now it is time to add some embellishments. 
 
Step 3) Again, there are options.  The first is to use a thick, aluminum wire (super easy to bend) to fill any channels or create another visual component.  Cut a piece of the wire longer than the length you will need.  Bend each end in and curve the wire, as shown below.

Curve the wire component and place it as desired.  Don't get frustrated if you need to rework the curve a few times.  Press everything together and set aside to dry as you work on the others.
NOTE: For this wire option, I used the first way to put together components (a solid ball behind the pieces).  The solid ball will give a better grip to the larger wire.

The second way to add wire is to use Funwire (or telephone wire).  Again, Funwire is easy to manipulate.  For this option, wrap the wire around a knitting needle, creating a tight coil.  Continue wrapping until the wire coil is longer than the space in which you would like to place it.  Leave the ends loose (see left photo).  These ends can be embedded into the back of the component.  


For this example, I used the hollowed back construction.  With that construction, I placed the piece on top of a lightbulb (smaller diameter than the initial one used) to dry.  Placing it on the lightbulb will also help to hold the wire in place (see below).


Step 4) Remember the shavings that were set aside in the paint palette?  Add water (a few drops at a time) to the shavings.  Allow the clay to soak up the water before pressing the mixture together to form a paste (add more water if needed).  You want the paste to be the consistency of tacky glue.

Use this paste to backfill any areas where there may be large cracks between the clay and wire components.  I am a big fan of using my finger for this process.  I usually press the mixture in with one finger and then wipe away excess with another.  If the paste smooths out any texture, use a fingernail or a toothpick or a turkey lacer to remove the paste and reveal the texture again.  Once you are happy with the piece's connections and look, set it aside to dry one final time.
NOTE:  It should not take as long to dry this time since you have applied such a thin layer.

Step 5) Almost done!!  Roll one final piece of Creative PaperClay into a thin sheet.  Cut 1 circle (same size as before) for each pin.  Press the domed component on top of the circle. NOTE:  I do this on top of a piece of paper or waxed paper so it will not stick to my work surface.
Cut or smooth away any clay that squishes out past the edges.  Allow the piece to dry flat overnight OR quick dry by popping the piece into the oven (250-275 degrees) for about 15 minutes.

Procedure: Part 3

Materials:
Plaid paints in choice of colors (I used Folk Art Multi-Surface Metallics in #2966 Bright Gold, #6310 Malachite, #6313 Tanzanite, and #6308 Garnet)
Small paintbrush
Bar Pinbacks
Superglue

1) Use the paintbrush to paint each section of the domed pin with one layer of your chosen colors, making sure to get down into the embedded textures.  Once the first layer dries, a second layer in an alternate color can be rubbed gently over the surface.  I used Tanzanite, Garnet, and Malachite to paint the first layer, then rubbed bright gold over the top.   Be sure to wipe away any paint that may cover the wires. 
2) Use super glue to attach a bar pin to the back of each pin.  
ENJOY 😁