Supplies:
Creative Paperclay Air Dry Modeling Material
3 Small canvas boards (these are 3X5)
Acrylic Paints (for this I used Art Anthology Coloration Sprays, DecoArt Metallic Lustre, and Folk Art Color Shift)
White and Black gesso
Molds
Rhinestones
Embossing powders (clear)
Black Archival ink
Tim Holtz Big Chat Sentiment Stickers
Heat Tool
Brushes
Here is how it was made:
First, apply a good coat of white gesso to your canvas boards. Let dry or dry with your heat tool.
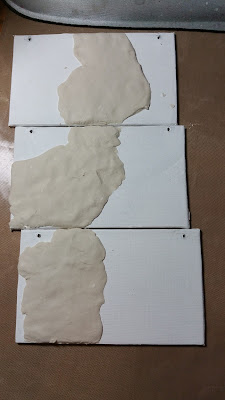
Next lay a thin layer of Paperclay Air Dry Modeling Material using light adhesive. You want to be sure the adhesive does not get too thick because it will delay the drying process. For this part, you can adhere in whatever shape and size you like according to your desired outcome.
For this part I pressed a fondant mold with a wavy shape into the clay to create my pattern. Line your canvas up before pressing clay so that it will be cohesive in the end.
**Tip** You could also press your favorite stamp designs rather than using a mold for this step.
Let this dry at least overnight..Very Important
Once dry molded parts were brushed with black gesso and dried. Now you can add some color. For my project I chose spray inks. These are Art Anthology Colorations Sprays in Waimea Bay and Siesta Key. Spray Water to this and move ink around. Use your heat tool in between
In this step I applied Deco Art Brilliant Turquoise Metallic Lustre with my finger. Just dab some with index finger and lightly rub over the textured shape area of canvas. You can add as many ink colors as you would like.
Now, using Delight air dry modeling compound I molded my faces using a silicone mold. Let the surface dry. I then applied black gesso to them and let them dry.
**Tip** You can dry the Delight air dry modeling compound surface by using heat tool however, do lightly so you do not burn it.
For final touches, the faces were painted with Folk Art Color Shift Acrylic paint in Purple Flash. Sentiment stickers are from Tim Holtz Big Chat.Lastly, I brushed edges all around canvas boards lightly with a sponge using black archival ink.
Thank you for joining me for this tutorial! I'll be back soon with more creative ideas for you!
**Jenn DuBell


7 comments:
Beautiful! I love the colours.
Very pretty project with great directions!
fabulous project, gorgeous colours
Love this cute idea and the blues are amazing. ❤️
What a neat idea, great project.
What a great project! I thought it was polymer clay when I first looked at it.
Post a Comment