

Here is what you will need:
- Steel wire, 18 gauge and 22 gauge
- Pliers
- Creative Paperclay®
- Newspaper
- Masking tape
- Sand paper
- Wool
- Acrylic paint
- Sealer, Varnish
- E600 Craft Glue
- Reference photos for elephants, donkeys and horses

I first started this project out by manipulating the 18 gauge wire and turning it into a rough frame for the piece. I needed the wire to be sturdy enough to be able to support all the added weight of the elephant.

I began to bulk out the body with newspaper and masking tape, in addition to building up a neck for the donkey half of the creature.
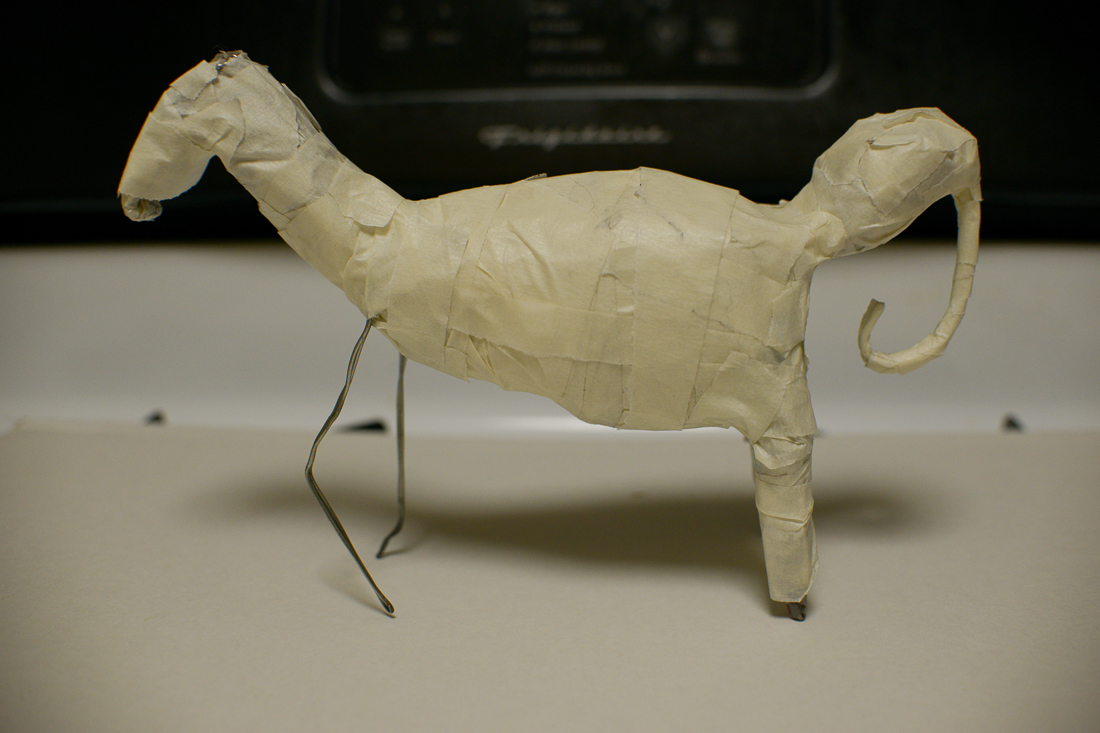
After studying my reference photos, I created the head for the elephant half. I made sure to keep it lower to the shoulders of the piece for accuracy.

I didn't want to fuss too much with the positioning of the ears and tusk at this stage so I decided to work on them separately with wire connecting them in the middle and attach them later. This way it would be much easier for me to figure out where they looked best after the piece has all of it's meat on it's bones.


Once I was done with working out the shape for the ears, I put them aside and started adding clay on the body of the creature. I bulked up the legs for the elephant and tried to go light on the legs for the donkey.

I had to study both the photos for a donkey and a horse to make sure that I wasn't sculpting a horse. They are very similar but there are small characteristics that stand out such as the short stubby neck, shorter legs and large ears that donkeys have in comparison to horses.


After things were all smoothed out, I applied a few coats of paint to the piece until I was happy with the color. There is no reason why I painted the whole piece grey here, I was just playing with paint application.


I sprayed this piece with a varnish at this stage and here is what it looks like. I wish I would have turned both neck so that they would be facing the camera :D

See more of my work at Melandolly.com and be sure to catch updates on my Instagram page


At this stage where I'm satisfied with how the body looks for both animals, I begin to work out the placement of the ears. For the elephant, I carved a little indent where the wire could rest for the ears and put some e6000 glue to secure them to the head and used masking tape to keep them in place. For the tusk, I had wire protruding from the top of them and just stuck them into some moist clay that I put on the sides of the elephant's trunk. I then covered the tusk with more clay and let it dry in place. For the donkey, I placed the ears in the same way that I did for the elephant. I concealed the wire by covering it with clay. After allowing the piece to fully dry, I began the process of smoothing out the clay with sanding paper.

After things were all smoothed out, I applied a few coats of paint to the piece until I was happy with the color. There is no reason why I painted the whole piece grey here, I was just playing with paint application.

With the donkey, I wanted to place a few tufts of hair on to the top of it's head. I used some wool here and Aleene's Tacky glue to attach the hair.


I sprayed this piece with a varnish at this stage and here is what it looks like. I wish I would have turned both neck so that they would be facing the camera :D

Thank you for stopping by, and I hope that you all enjoyed today's tutorial! You can find Creative Paperclay® at the following retailers Creative Paperclay® Online Store, Michael's, Amazon, Joann's
See more of my work at Melandolly.com and be sure to catch updates on my Instagram page

4 comments:
That's a little bit scary but, these are some scary times. Yeah, get out there and vote!
That is so clever Cinnamon! I love it!
Thank you Barbara! I wish I would have sculpted their heads turned to face the camera! It was so hard to photograph :D
Post a Comment