

Hello everyone! My name is Cinnamon Willis and I am going to walk you through the steps on how I created this mended broken heart sculpture. With Valentine's Day quickly approaching, I decided to create a broken heart for those who may be in need of some healing at this time. The gold split in the heart was inspired by the Japanese art of Kintsugi where broken pottery is repaired with lacquer that is dusted with powdered gold to join the pieces back together. These repair lines become a beautiful reminder of the item's resilience, the same can be said about the heart and the scars that are left on it by others. The scars will only add to your brilliance, learn from them, and wear them with pride.
Supplies:
- Creative Paperclay®
- Wooden skewer
- Masking Tape
- Newspaper
- Acrylic paint
- Pencil
- Sanding paper
- Exacto Knife
- Aleene's Original Tacky Glue


I began this piece by balling up newspaper and taping it around my skewer. I start on one side of the heart and then get to work on the other side. I tape them together and wrap them until they begin to resemble the rough shape of a heart.


Once the shape of the newspaper is as close as I can get it to a heart, I began my first thin coat of paperclay around it. I allowed the clay to dry for about 24 hours and I begin to add more clay with a little dab of water until it gets to the shape that I would like it to be for the heart.

After allowing the second coat of clay to dry, I map out with a pencil where I would like for the split to be for my broken heart. I used a pencil because I always struggle with making zig zagged lines, it usually takes me a few tries.
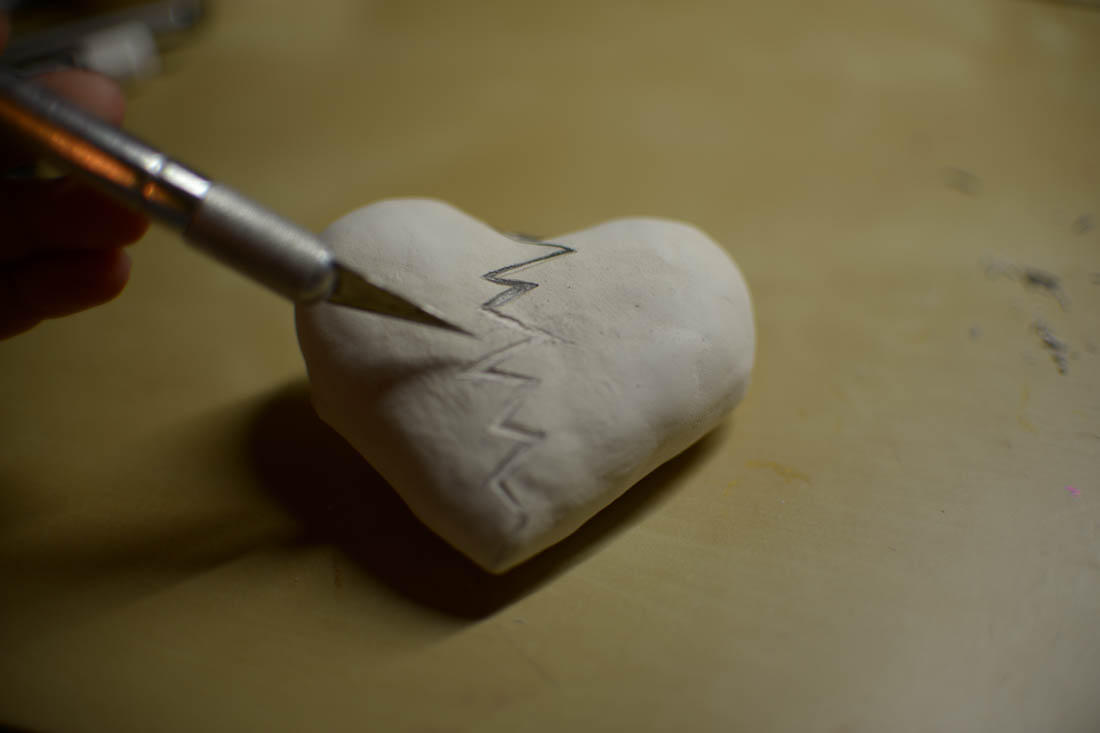

I am just cutting out my lines with my excato knife here, a utility knife can work as well.

After the lines were cut out, I began to sculpt the front and back end of the arrow. I didn't do as much sanding down with this piece because I wanted the heart to be a little rough looking as if it had a rough journey. I also put a little bit of glue on both ends of the arrow where they join with the heart to keep it in place.


I painted the heart black so that I could blotch some red paint on it with a sponge as shown here. I didn't want the heart to have an even bright red coat of paint, I wanted it to look weathered.

I used gold paint here for the break in the heart to mimic that of the Kintsugi technique that I mentioned above.

I took a piece of nylon and tied it onto both ends of the arrow so that I could hang it on a nail. I sealed it with varnish so that the paint wouldn't chip off.

Here's the piece in it's new home on one of my walls with two of my favorite masks.
Thank you all once again for stopping by, and I hope that you enjoyed today's tutorial! You can find Creative Paperclay® at the following retailers Creative Paperclay® Online Store, Michael's, Amazon, Joann's.


5 comments:
What a lovely project! Could you carve the “crack” while the final layer of clay is still damp?
Thank you Linda, you sure can carve the clay while it's damp! I just feel like I have more control over it once it dries when I'm adding in all of my details.
I really like it! Clever!
Thanks Barbara!
I love this Cinnamon.
Post a Comment