

I introduced the students to foil armatures and Creative PaperClay to start the session. With a variety of ability levels, I was pleased to see all of them take to the project so easily. We began with sketches of what each envisioned for individual scenes. After that, it was time to get to work!
I handed them each a large piece of foil. I demoed how to scrunch the foil (carefully) into the basic tree trunk shape.


I encouraged them to create the shape slowly. Foil can be compacted more as the desired shape emerges. They excited got to work on their trees.


Now the fun part: Covering the armature in Creative PaperClay. I showed them how easy it is to use, flattening pieces with my fingers or a rolling pin.


 Soon we had 4 amazing haunted trees! A couple of the students also created accessories for their scenes from the PaperClay: a tombstone, a creepy hand coming out of the tree, a tiny mouse friend. All were set aside to dry until the next class.
The plan was to paint the trees and then start on accessories for the scene, but all decided to work on polymer pieces before painting. I have to admit it was a great decision on their parts, because when we finally painted the trees and glued them to ceramic tile bases the scenes were able to come to life!
Let the painting commence...


Once the trees and accessories were painted it was time to begin to put scenes together (goodie!!).
Pieces were positioned and glued. Some (notice the swing) were hung in place.
 Do you see Hannah's mouse? Such teeny tiny details created from the Paperclay!
 Check out the swirly detail in Nia's tree! She designed many of the swirls with open centers to hang pieces.
 Isabelle had to have a swing (one of our engineering challenges). I think it worked out great!
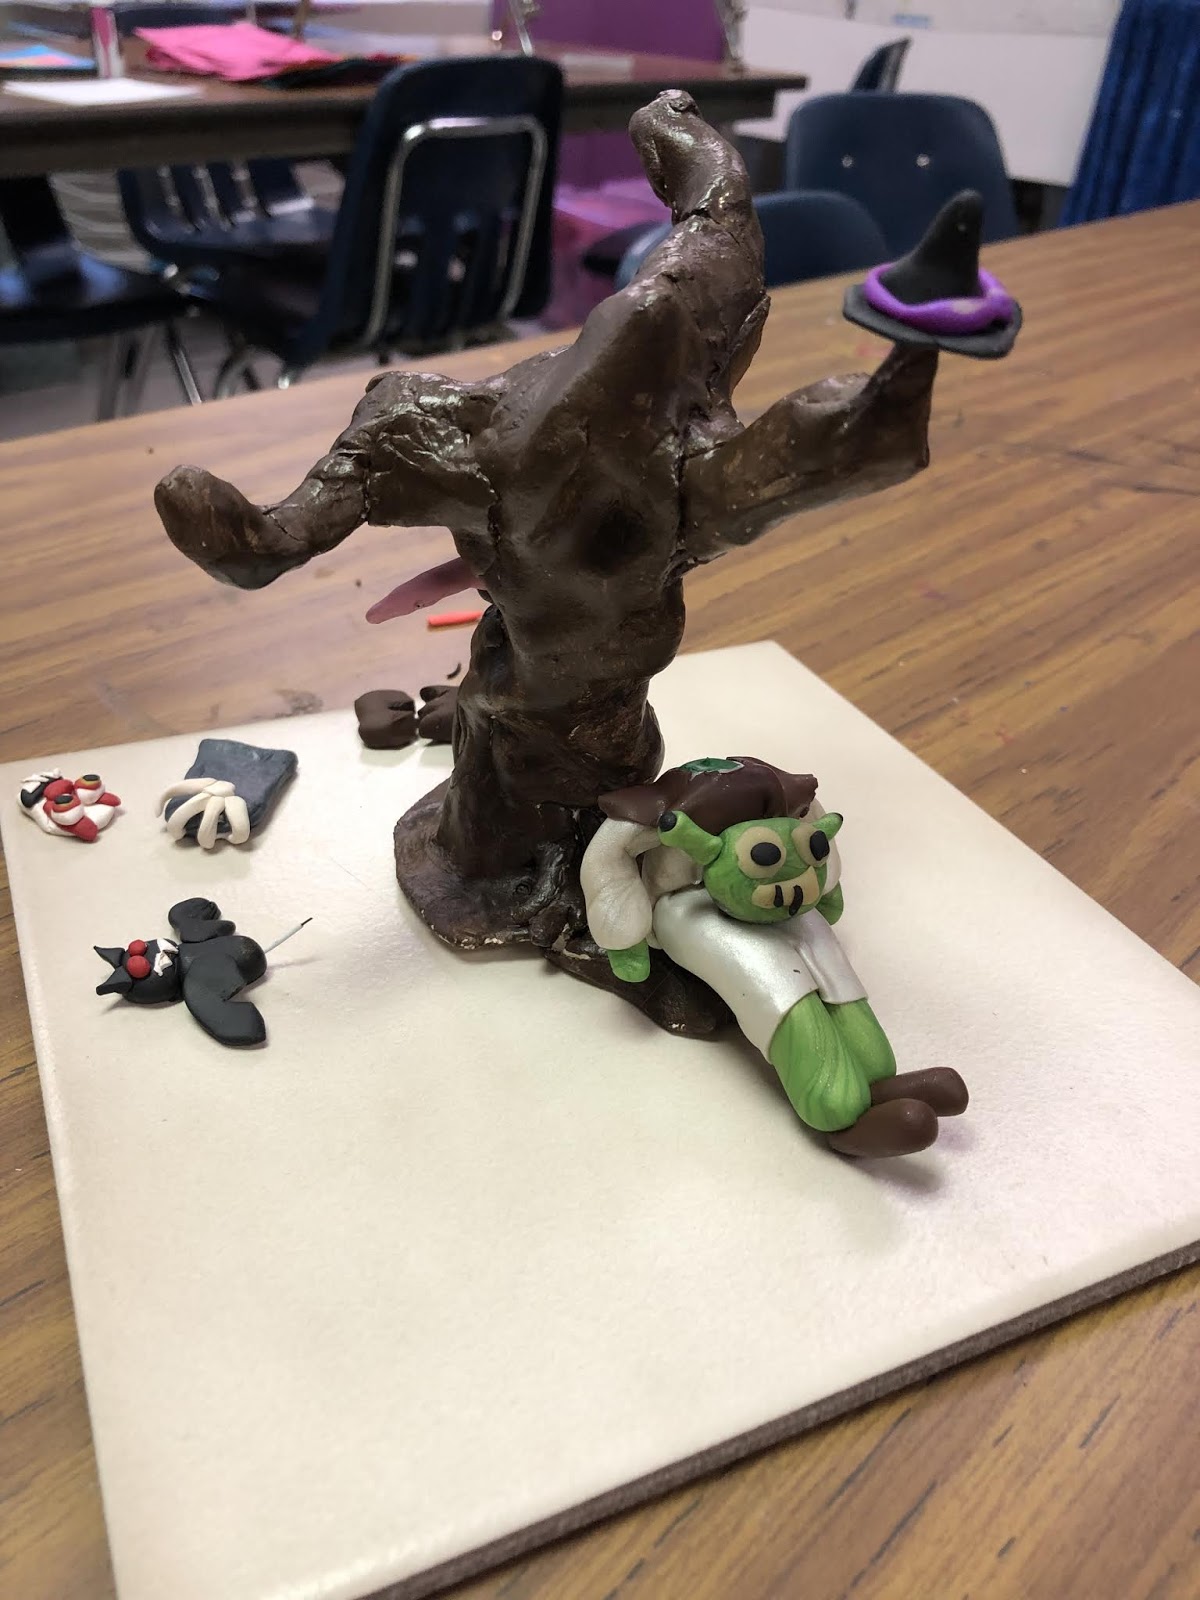
 Peter still wants to add a few touches. His tombstone needs to be glued in place, but first, he wanted to create a hill type base for it (back to the Creative PaperClay). I hope you can see the creepy hand reaching out of the tree towards Shrek!
I was so excited to watch the excitement as the original sketches came to life! All but one looked and decided a few more touches are needed. I am super excited about what they accomplished. I can hardly wait to see what these talented students come up with next!


Once the trees and accessories were painted it was time to begin to put scenes together (goodie!!).
Pieces were positioned and glued. Some (notice the swing) were hung in place.
Do you see Hannah's mouse? Such teeny tiny details created from the Paperclay! Check out the swirly detail in Nia's tree! She designed many of the swirls with open centers to hang pieces. Isabelle had to have a swing (one of our engineering challenges). I think it worked out great! Peter still wants to add a few touches. His tombstone needs to be glued in place, but first, he wanted to create a hill type base for it (back to the Creative PaperClay). I hope you can see the creepy hand reaching out of the tree towards Shrek!
I was so excited to watch the excitement as the original sketches came to life! All but one looked and decided a few more touches are needed. I am super excited about what they accomplished. I can hardly wait to see what these talented students come up with next!
2 comments:
So cute and accessible to all!
Awwww that's so sweet! Paperclay is so great and so fun to use. Great for everyone! My favorite medium that's for sure!
Post a Comment