Supplies Needed:
Creative Paperclay
rolling utensil
piece of cotton fabric for texturing
craft glue
2" Styrofoam ball
paper drinking straw
1 piece of floral wire
1 decorative paper napkin
string for hanger and hat
black permanent pen
orange permanent marker
pink permanent marker
gauze type fabric or raffia
makeup sponge
ArtDeco products for painting
Decou-Page
Gesso
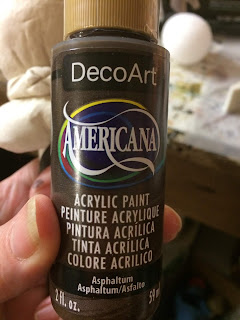
Asphaltum paint
blue for neck
Antique White
Crackle Glaze
Antiquing cream in black and raw umber
To begin with roll out paperclay
You want a circle sort of shape and it should bee about 1/8" thick
next lay out piece of fabric
lay clay circle on fabric and roll over it again
this give you a fabric texture
Put glue on top of Styrofoam ball
Lay paperclay on ball with texture on the outside
gently wrap around ball
Notice you sort of have gather spots at the bottom
this is a good thing
Push straw into bottom of ornament
roll out a piece of clay about 2" x 8"
add to the bottom of the head...sort of gathering it with your fingers
roll out a snake
Make a snake fold in half
twist to make rope for the neck
attach rope with glue
make small ball press on rope and mark with X this makes it look like a knot
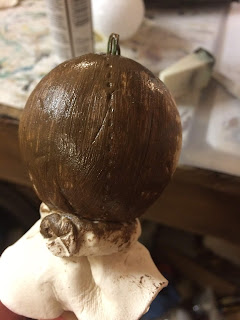
Mark stitching up center of face
floral wire
wrap around a pencil
clip ends of wire to make a hanger for ornament
press into top of head dab of glue
Gesso head
let dry
Paint entire piece Asphaltum
Let Dry
Using makeup sponge
sponge antique white on to entire piece
when it dries...use permanent maker and make two circles
for cheeks and a triangle nose
outline with permanent black pen
let dry....
Coat entire piece using crackle glaze
let dry and you will see cracks appear
(I usually wait for several hours)
Paint entire piece with antiquing cream
let dry...using a damp cloth wipe off excess
leaving in cracks
Making Hat
cut two circles from your napkin
remove the back layer of napkin off
paint decou-page on backs of both circles
sandwich together
arrange on head let dry...it will remove after dry
once hat is dry sponge black antiquing cream on edges of hat to cover up
any white areas
I used a gauze type fabric for hair but raffia works great too
glue hair in place
glue hat in place and run needle thru the hanger which is under hat
pull thread and tie a hanger
Glue gauze or raffia under the head around the straw
Hope you enjoy making him....Happy Fall


7 comments:
Very cute scarecrow and detailed tutorial!
so cute! I love mixed media designs
Very Cute and looks like fun to do.
Great seasonal project
Adorable scarecrow Sherry!
Question regarding gesso step: The instructions state to "let dry." Does this mean to let both the paper clay and the gesso dry? Thank you!
He's adorable!
Post a Comment