
Hello and happy Holidays everyone! Cinnamon here and I am
going to show you how I created this spring base sculpture. I chose to
leave the piece as is but you could easily use the spring to put a skirt over
it for the doll to appear to be standing on it's own, or use this to turn your
doll into a tree topper. This can can come in handy in many different ways!
The tools that I used are listed below.
Supplies:
Creative Paperclay®
Masking tape
Creative Paperclay®
Masking tape
Pliers
16 gauge steel wire
Thin wire roughly 20-22 gauge
Cardstock paper or cardboard
Sand paper
Wooden Skewers
E6000 Craft Glue
E6000 Craft Glue
Acrylic paint (optional)
Sealer, Varnish
Sealer, Varnish

Begin by getting your piece of cardstock and skewer prepared.
Cut the paper or cardboard down to the size that you would like to
make your torso. Get your skewer and poke it through the middle
Make sure that it sits in the middle of where the shoulders are going
to be. Get your masking tape and secure the paper to the skewer.


Start adding your paperclay to the torso. Get a second skewer and
plot out where your holes are going to be for you to run the wire
through after the piece dries. You would want to make these tunnels
before the clay sets and one should be in the middle where the waist
would be and at the top where the shoulders are. The best way is to
build up the torso around the second skewer
and carefully slide it out before it dries.

This is the first rough layer of clay. Keep in mind that whatever weight
you add to the front of the piece would have to be matched in the back
as well for it to stay in balance on the spring. The holes are on the side
on the top and in the middle of the torso which is not easily seen here.
Set this aside and allow it to dry which would roughly be 24 hours.


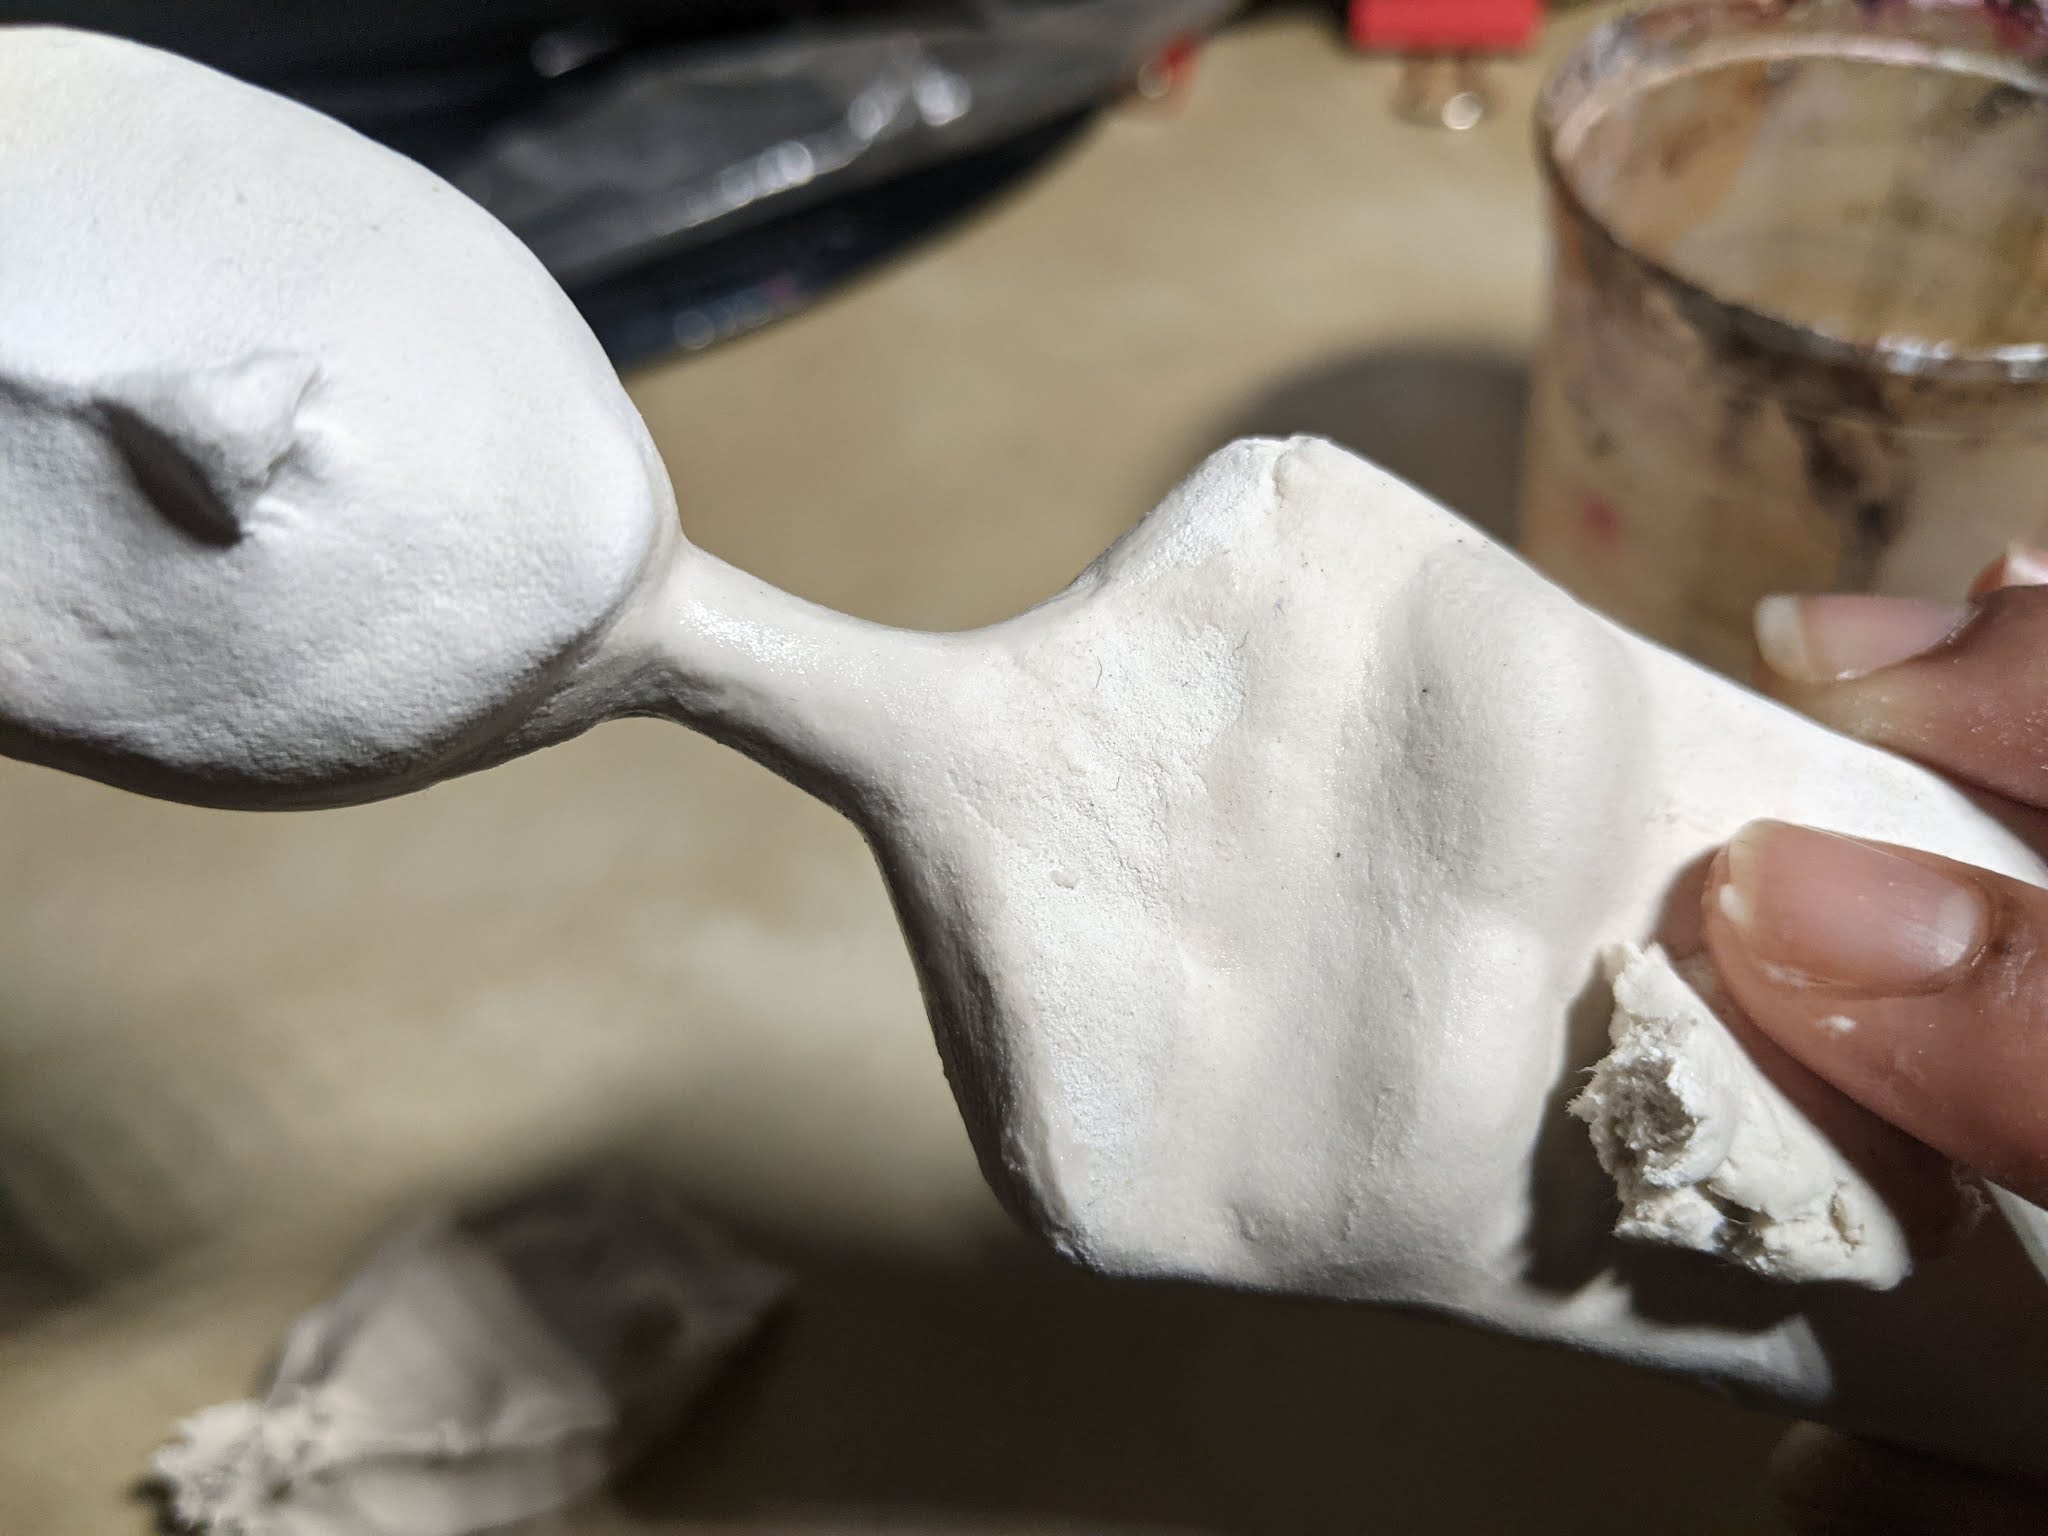
Using another skewer for sizing purposes, begin creating the head for this
piece. I used a small piece of tissue paper so that the head is lightweight.
It is important for the head to not be top heavy so that the piece
can be in good balance with the body. Take a small piece of
masking tape to wrap it around the tissue to secure it in place.
Put the clay on top of the piece of paper while it is on the skewer.
You will want to keep the front and the back of equal in the amount they
protrude so that one side won't be heavier then the other. This is important
to maintain the center of balance for the piece. Set the head aside to dry.


When the head and the body are dry, try fitting the head on the skewer
of the body to make sure that it fits the way that you would like it to. If
it looks good, take your e6000 glue and glue it on to the skewer. Set it
aside to dry overnight.
Take your piece after the glue dries and cover up where the head
and the neck meets with the clay. This would be the time to build
up other pieces of your sculpture that you would like to fix.

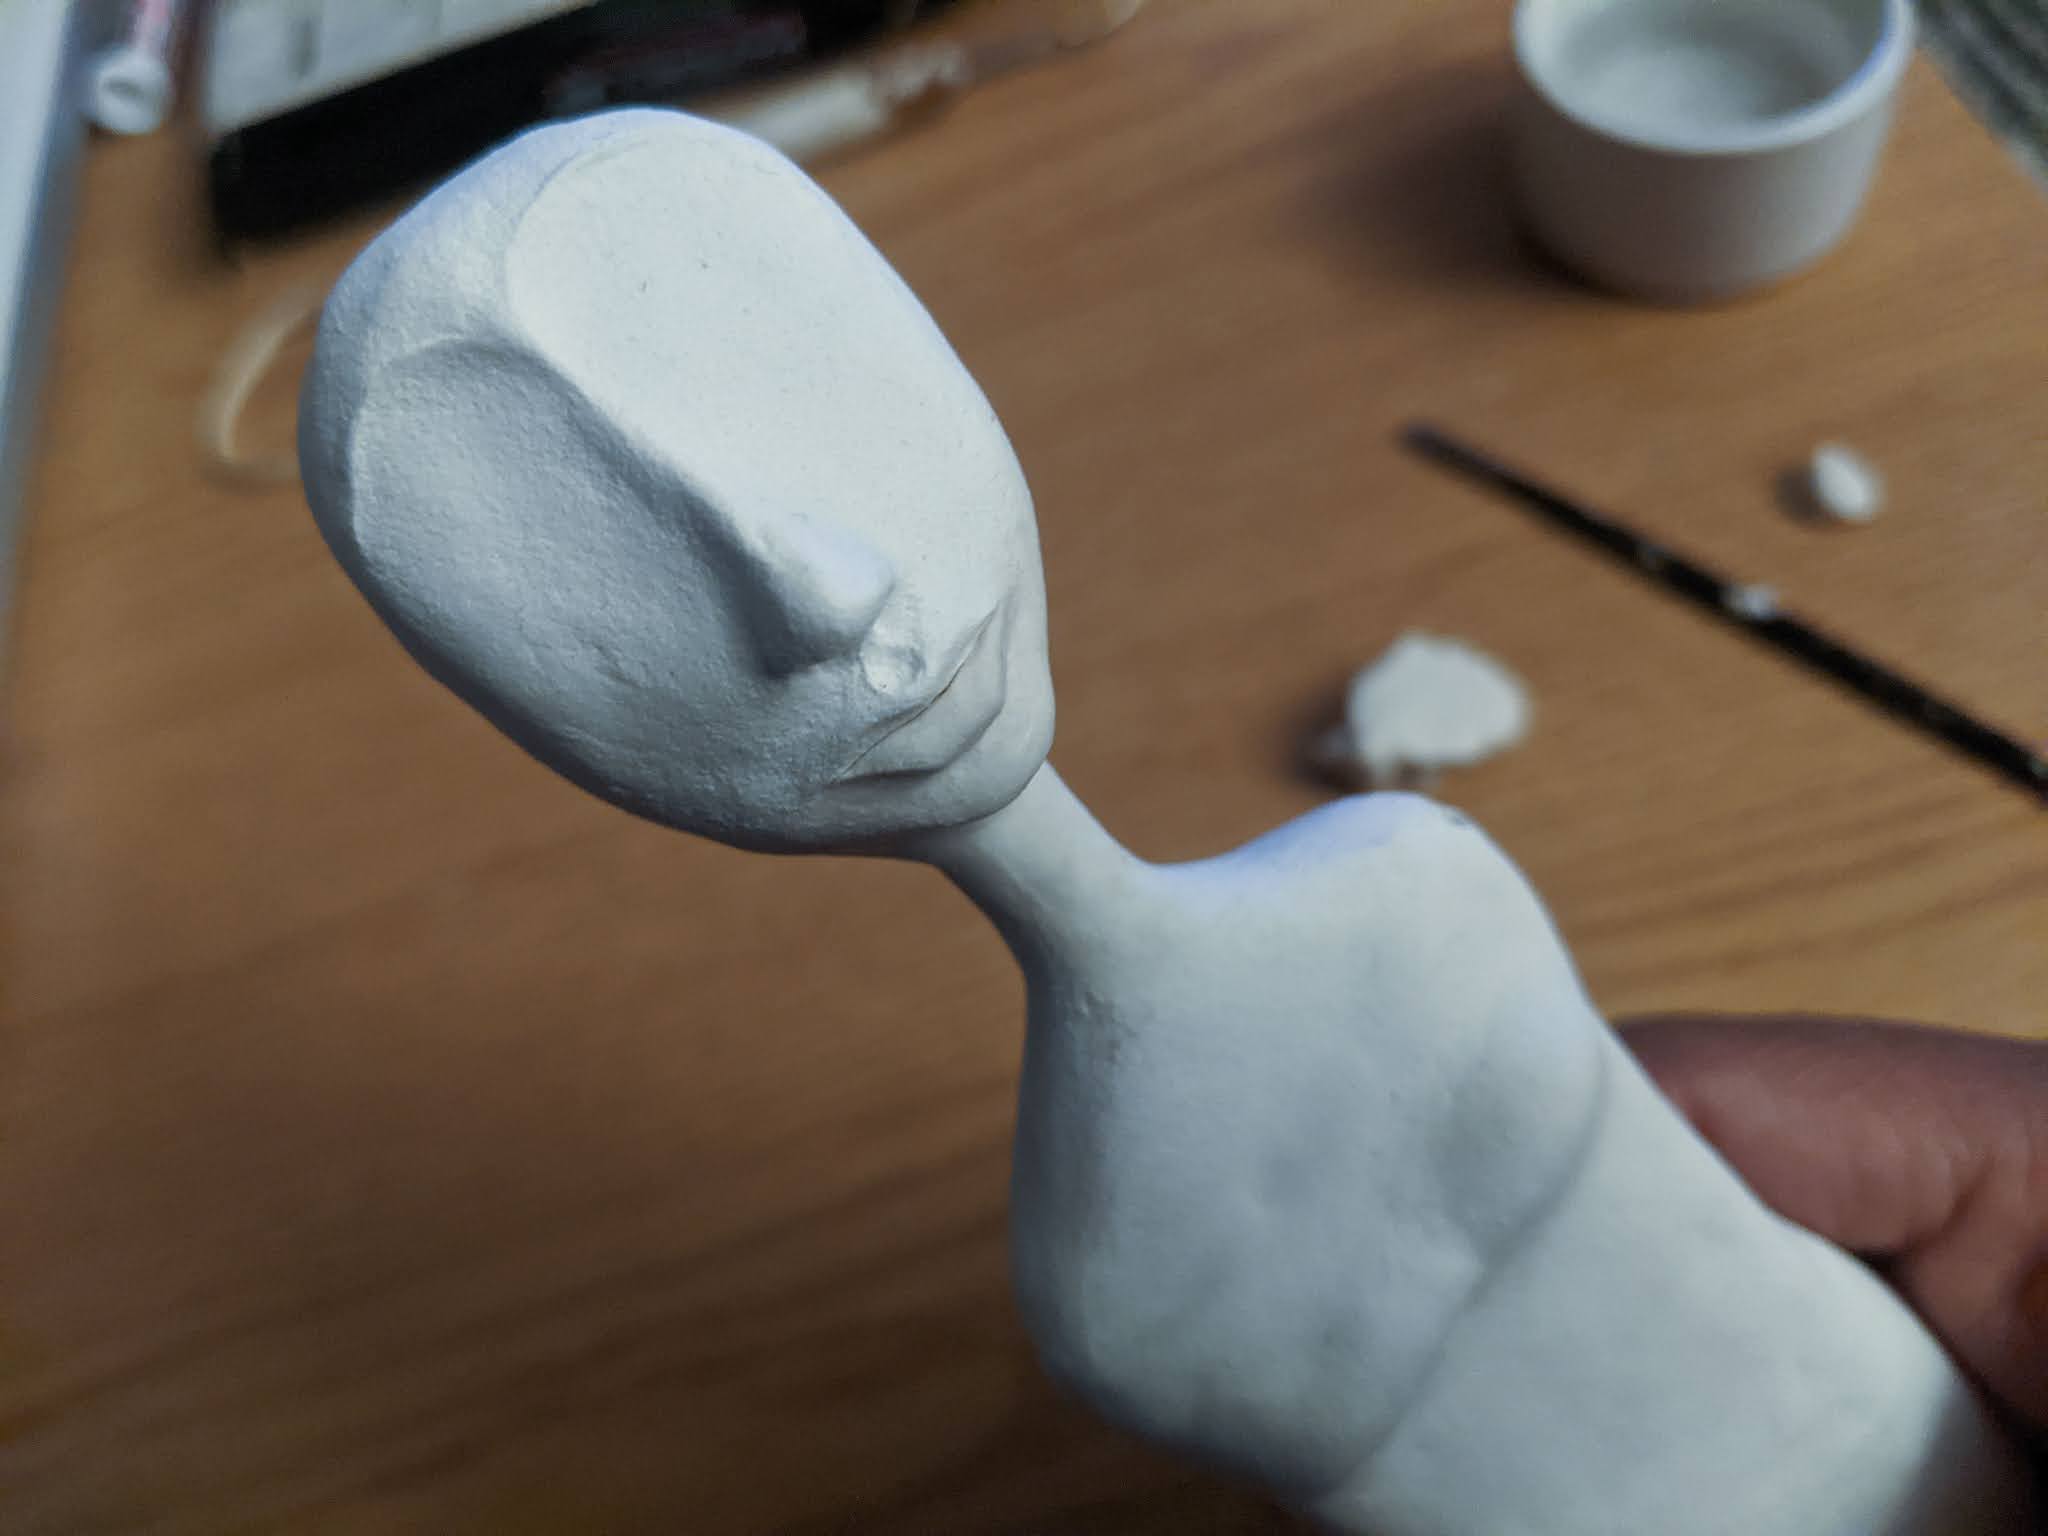
Start working on the features of the face. I usually start working on the top
lip, let it begin to dry a bit and the begin working on the lower lip.

I decided to sculpt the eyes closed. Make sure to try to keep
a sense of symmetry with the placing of the eyes.

Scraping off the bottom of the lid to keep it to the same size as the
other one. Set the piece aside to dry again.


Use sandpaper to smooth down your piece. if you wish, this would be
the best time to paint your piece and seal it with varnish. I choose to leave it.


You should start out with at least 3 feet of wire, the longer the better.
You can always cut off the wire that you don't need at the end.
Take your wire and make a tight fold at the end so that
there aren't any sharp parts sticking out.


Start coiling up the wire in circles like a spring. Start with larger circles at
the bottom and get gradually smaller as you work your way up. You may
need pliers to help you along the way, smooth out bends and try to
shape the wire in a smooth circular pattern.


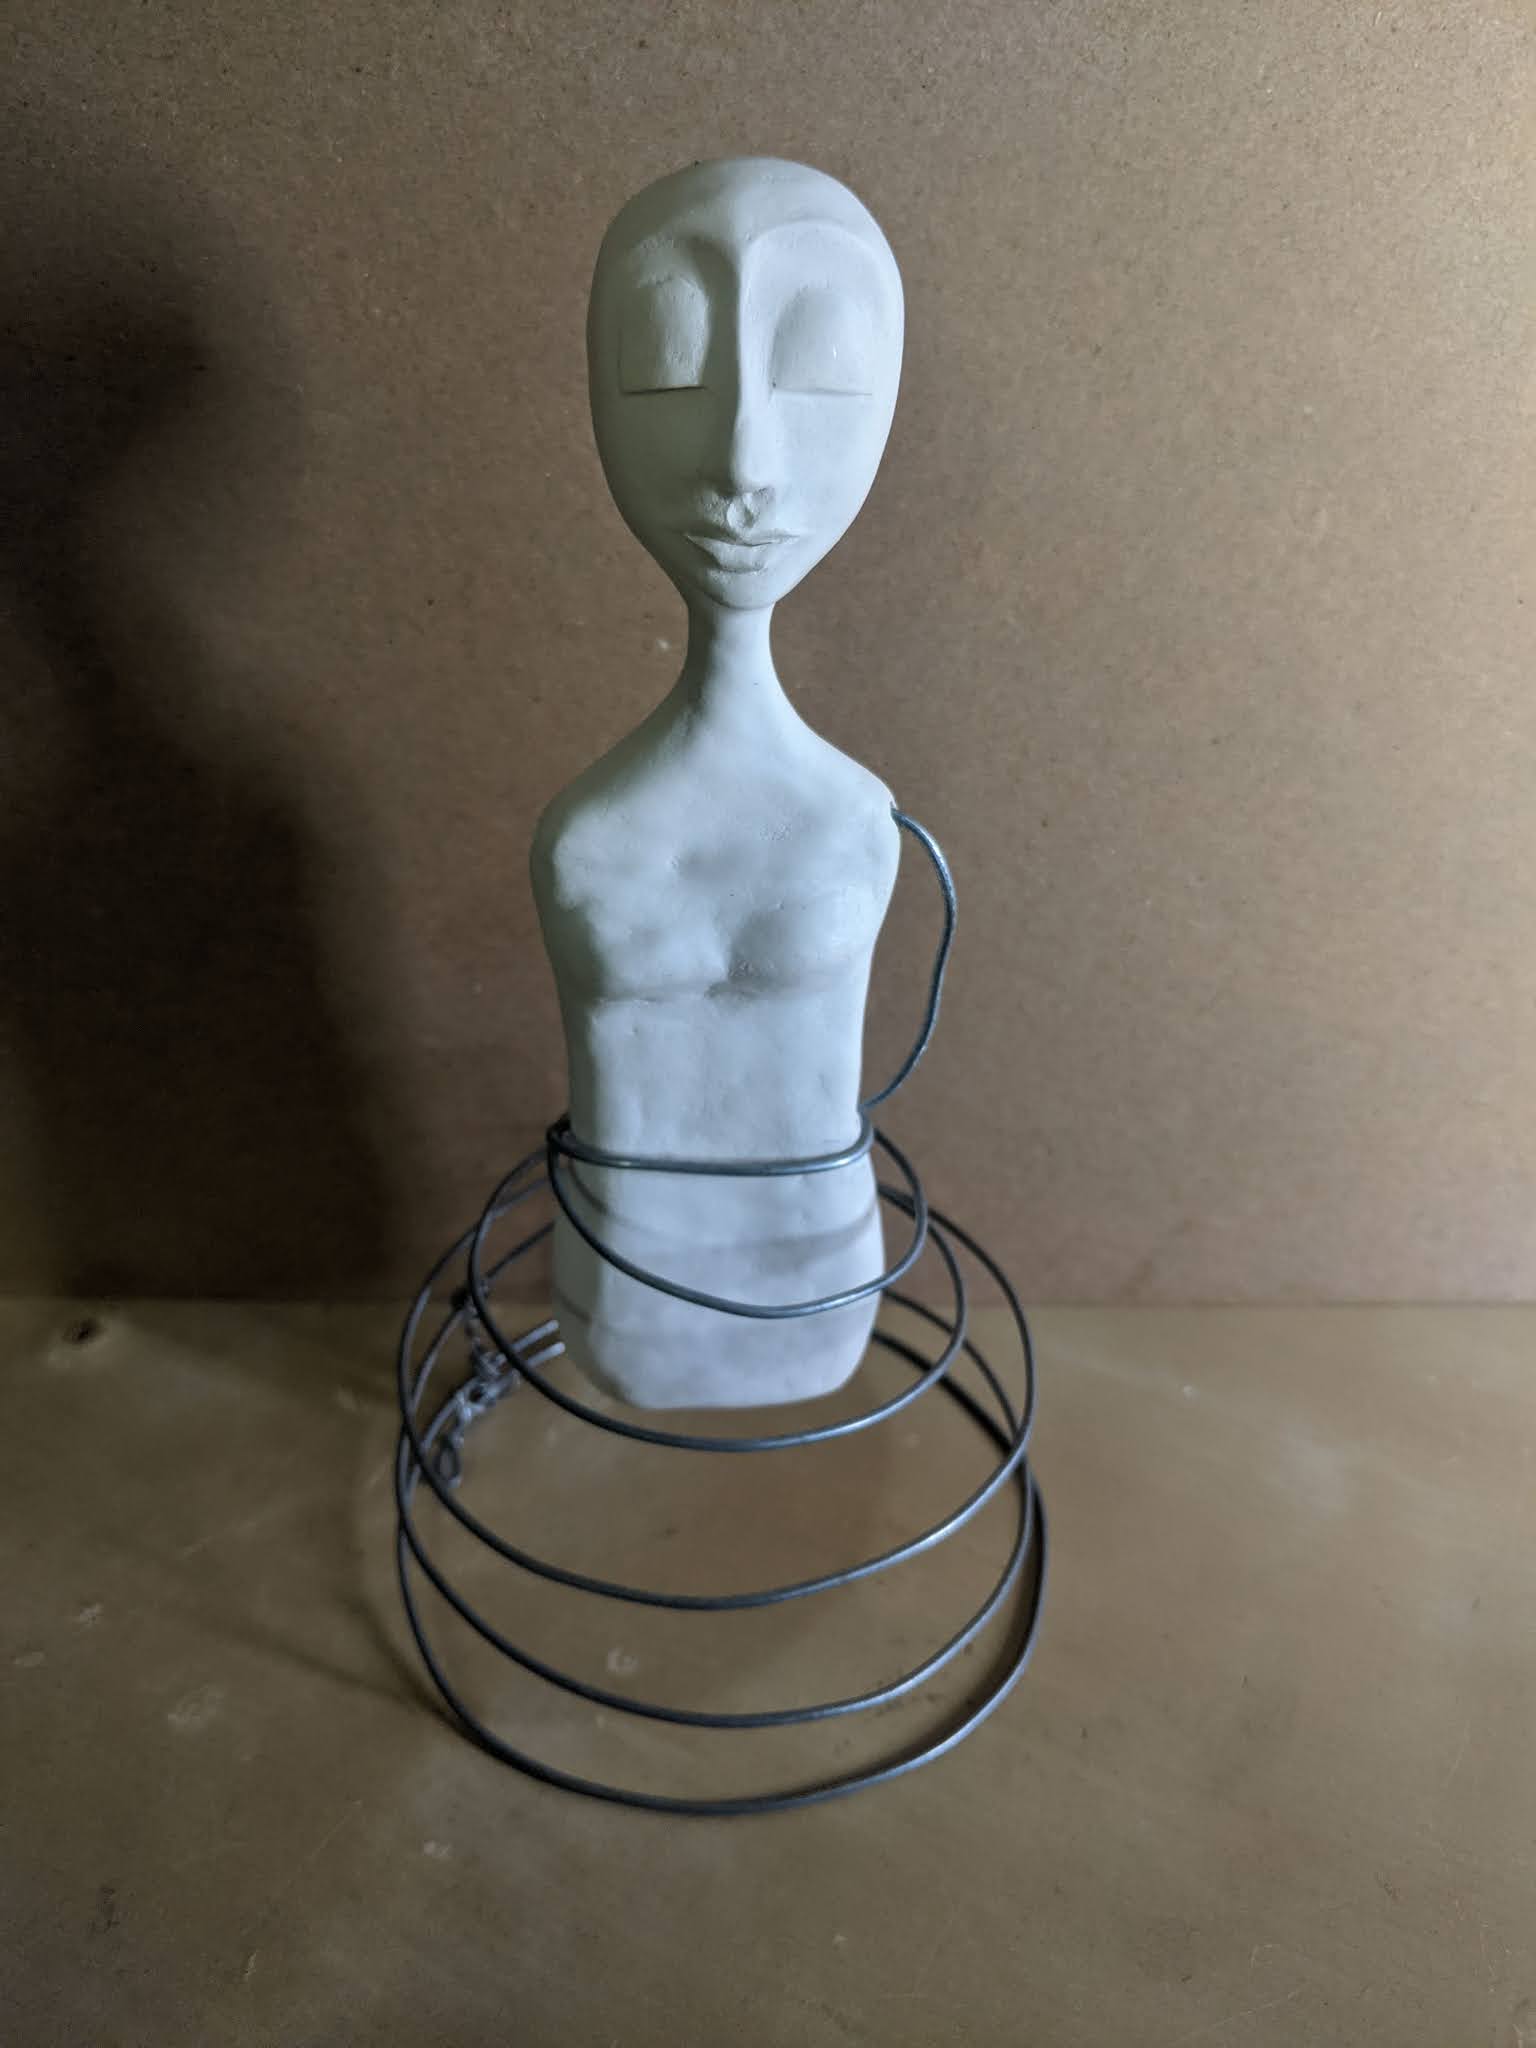
When you feel that your spring is at a good height, begin to run the top
part of the wire through the tunnels that you made on the torso and the
shoulders of the doll in the beginning of the tutorial. Run the wire from
the middle and make a loop up to the top as shown above.
This is the hard part, getting your piece to be in balance. You will need to
keep adjusting the coil of your spring to get the piece to sit right in the
center of it. This part took me about an hour to get right, keep working
on it until you get to a place that you are happy.
This piece should be balanced in weight on the front and the back
to make this work. If you are adding hair, keep it to a minimal so
that the majority of the weight isn't in the back of the piece!

I added a little bit of reinforcement to the bottom of the piece with a
thin piece of wire. Forcing the coil to keep it's shape and height at the
bottom adds a ton of stability, this will help if you are having an issue
getting the piece to stand up straight on it's own.

Here is the finished piece!
Thank you all once again for stopping by, and I hope that you enjoyed
today's tutorial! You can find Creative Paperclay® at the following
See more of my work at Melandolly.com, catch updates on

No comments:
Post a Comment