In the example above, some bands of a burnt umber wash have been painted over clay that was dried then sanded to various levels of surface finish. I used the sandpaper in one direction only to create the grooves of various sizes - this is how the growth lines (and rings) are created on horns. It is also a good technique for adding texture to leaves, flowers, etc.
For bone finishes, what you choose will depend on whether or not you want the bones to look worn, what age and level of decay you want them to appear as, and what area of bone you are creating. I may have said this a few (hundred) times before, but I'd like to say again that Creative Paperclay® modeling material is great for making bones, horns and teeth of all shapes and sizes! Often, you don't need to do anything to the clay at all after sculpting it, other than give it a wash of acrylic or watercolor paint to bring out the sculpting details.

In these photos of a miniature dragon skull, you can see the different finishes between bone, horns, and teeth. The horns have lines made from the sandpaper, and have also been rubbed with paper to make them slightly shiny. The teeth have been polished.
To polish the clay, use fine grit sandpaper, then a piece of torn paper bag to buff the surface, and finally a piece of newsprint or packing paper. Paint a wash over the clay, then polish again after the wash is completely dry- repeat as necessary until you have the desired effect.
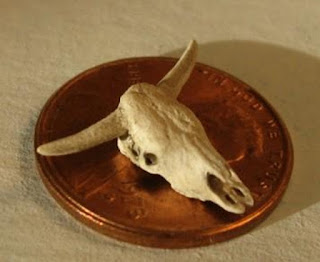
For the miniature cattle skulls, you can see that the lines along the horns follow the shape, and the teeth are polished. The skull bones were lightly sanded with 320 grit sandpaper stuck on a shaped toothpick. I think the dirty greenish yellow cow teeth took three or four washes of various tints, polished in between.
 |
| This little (less than 5.5" tall) skeleton was shaped with files and lightly sanded |

and this one is a life-size pose-able hand - the clay was only lightly sanded to shape it, and it was painted with a light coat of gesso, then washes were added. This is a good technique to use if the piece is going to be used in an area that is not well lit, as it will make the "white" of the bones stand out a bit. This was one of my Halloween projects for the Design Team last year. If you want full directions, including a pattern, click here (The project is easier than it looks!)
Thanks for joining me here again! As always, play, experiment, and have fun!


3 comments:
Did you create these items using the project?
Did you create these items using the project?
Yes, Kwantwell, I did - all of those items are made with Creative Paperclay
Post a Comment