 You can read part one here and you can find part two here.
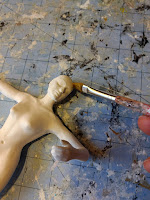
By the time I reached this point in the sculpture, I had changed the figure's arm and leg positions several times.
If your clay is not completely dry when you decide to change a pose, you can just bend the clay to the new position and smooth out the surface cracks.
If your piece has fully dried, which mine had, then you have to break it at the joint, re-position the arm or leg and then use fresh clay to cement it back together.
It sounds worse than it is and only takes a couple of minutes.
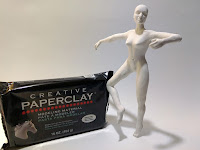
My original idea was for a figure climbing a hill, but as it progressed, I pictured a dancer on the edge of a knife.
 Once you decide on your final pose (and, of course, you can always change it again) you can add the final details to the face, hair, hands, feet, muscles, shoulder blades, etc.
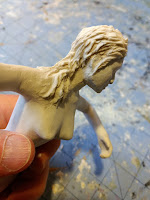
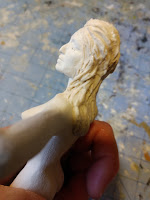
 I thought it would be fun to show how I like to work on hair.
With every detail I follow the same procedure, which is to add a small bit of clay, carve in the detail, look at it closely from every angle and make adjustments.
Often, the part I'm working on looks perfect from one angle and completely screwy from another angle.
If I can work on it, by making adjustments, so that it looks good from most angles, then I'm satisfied.
To get fresh clay to stick to dry clay, brush on a little water.
For adding hair, I take a bit of clay and squish it to about the thickness I would imagine my figure's hair would be. Add a bit of water to the figure's head and press on the clay.
For shaping, I mainly use silicone-tipped shapers (these are usually called color shapers). These tools work beautifully for carving fine details in paper clay. The silicone tip doesn't stick much to the clay.
I usually have a clump of fresh paper clay on my work table. If I'm working on fine details and the clay sticks to the silicone tip, I just dip it in water and wipe off the excess clay onto the clump of fresh clay.
When carving fresh clay, if it is too firm, add a little more water. I just brush some across it with a watercolor brush.
The consistency of the clay I want to use for details is soft enough to carve with a slight resistance against the tool I'm using.
Once I am happy with that part of the hair, I add a new piece of clay and continue working around the figure's head, adding small bits of clay and shaping them. I don't know a lot about hair styles, so I just go with what I feel like doing.
If you add too much water, the clay will become too soft so that every touch of your tool results in digging into the clay too deeply and blowing out the details. I guess this could be used for a special effect.
If there is one thing that I have had to develop as a sculptor, it is to have more patience. Building up small details over several days and making adjustments is not something that sounds appealing to me, however, I have found that I really enjoy the process and it has helped me find patience in other situations.
After taking pictures of this figure, I am not completely satisfied with her hair and I'm thinking of making it longer and more flowing. Using paper clay makes it very easy to add more hair later to the existing sculpture.
For me, the final bit of a figure is to create an environment that adds interest or reflects an idea about the figure. For this piece, I created a knife from a cardboard cutout that I covered with a smooth layer of paper clay and painted. I like the contrast between the knife (which looks dangerous to me) and the lyrical dancer.
You can visit me on Facebook.


No comments:
Post a Comment