You can read part 1 here.
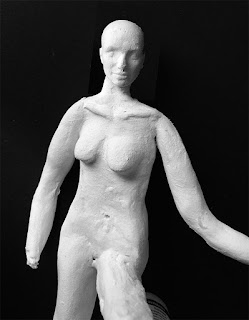
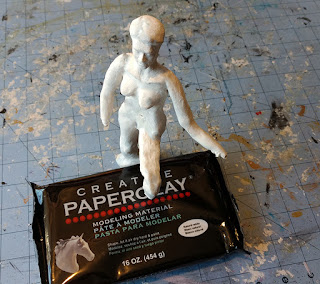
The first part was making the armature and preparing it for sculpting. In this step, we want to start adding detail, showing musculature, bone structure, etc.
Once the first layer of clay is dry, we can start adding a second layer of clay. I know that adding thin layers takes a lot of time, because you have to wait for each layer to dry.
 If you are impatient, like me, you can invest in a basic food dehydrator, which will dry your pieces in minutes instead of hours. A cheaper alternative is to use a fan, but it does not work as fast.
This is the time to consult anatomical reference material. Try to find photos from different angles to get a clear picture of the details you want to add to your figure. Any internet search along these lines will yield more images than you could possibly want.
If you want free e-books of art reference materials, you can find a bunch here.

It is easy at this point to get caught up in trying to show every muscle and bone, but if you look in the mirror, you will see that many of them don't show (unless you are a weightlifter or something).
Also, feel free to show humans with all of their imperfections. The ancient Greeks liked to show perfect human bodies, but most of us didn't turn out like that. It's good to show figures that are overweight, aged, damaged or even part mythical beast.
While the glue and first layer of clay added strength to the paper craft armature, I find that is is still a bit wimpy for piling on lots of clay for the second layer. Often, what I do is work on the second layer of the back, let it dry at least partially, then work on the second layer of the front. In this way, the added weight of the wet clay doesn't deform the armature.
 Adding the second layer of clay will not only give strength to your figure, but should reveal to you what direction you want to take. Often, artists like to sketch how they want their finished piece to look, but I like to wing it. It's more fun and often reveals new directions that I otherwise might not have considered.
You can make all the "mistakes" you want, but you can't ruin your finished piece, because you can always make changes. With that in mind, remember these basic concepts.
If you are working on part of a piece, and you get that part of it perfect, but another part looks weird, let it dry first. You can always go back and rework the weird part, but if you keep working on it to get the entire piece just right, you'll end up messing up the perfect part.
 With paper clay, it is much easier to add to a sculpture than it is to take away. A good approach is to build up the clay to the shape you want and let it dry. Then, go back to finalize the texture and finish. It is okay to repeat this process multiple times until you get your desired effect.
Work on several figures at a time. While one is drying, you can work on part of another.
In part 3, we will add a final layer of clay and put in details and also look more closely at sculpting hair.
Click here to go to part 3.
You can visit me on Facebook.


No comments:
Post a Comment