

Hello everyone! My name is Cinnamon Willis and today's tutorial is going to show you all how to create a standing statue on a base using Creative Paperclay®. In honor of Women’s history month, I am going to introduce you to another sculptor named Elizabeth Catlett. Most of Mrs. Catlett's works revolve around social justice and themes of feminism, and they were done in a modernist style. For this project, I wanted to demonstrate how to create a standing sculpture like her sculpture of Mahalia Jackson who was a gospel singer and a notable civil rights activist.
Supplies:
- Creative Paperclay®
- Thick wire 16 gauge
- Thin wire 22 gauge
- Drill with small drill bits
- Pliers
- Masking tape
- Sand paper
- Your choice of Acrylic paint
- Sealer, Varnish


For this piece, I started building the armature with two types of wire one being a thin 22 gauge and the other in 16 gauge. Shape the thicker wire with your hands and pliers to create the overall body form, be careful not to poke yourself. Take the loose thin wire and weave it around the thicker wire to secure it in place. With this piece I decided to make the piece with 3 supports since the third could be hidden under the dress. I worked on the top half and bottom half separately as shown above but you can do it in one piece if you wish.


When you decide on the right placement for the holes drill them into the base. When drilling, it is important to get the drill bit that would be just the right size for the wire that will be placed into it. I used a drill bit that was roughly the same width of the thicker wire that I plan to stick down into the hole so that it would be a snug fit. Once I placed the wire far enough into the base, I took the pliers and bent the wire sticking out from the very top in a angle to kind of lock the armature in place. This was done at the base of each wire. It worked in this case for me, but you may have to glue the wire down into the hole for it to stay, I would probably use epoxy for a good adherence.

Take your masking tape and wrap it around the armature completely. You could paint a layer of gesso on top of the tape so that the clay could adhere better to it or just stick the clay it on as I sometimes do. You may need to add a drop of water to the surface for the clay to grab hold to better.

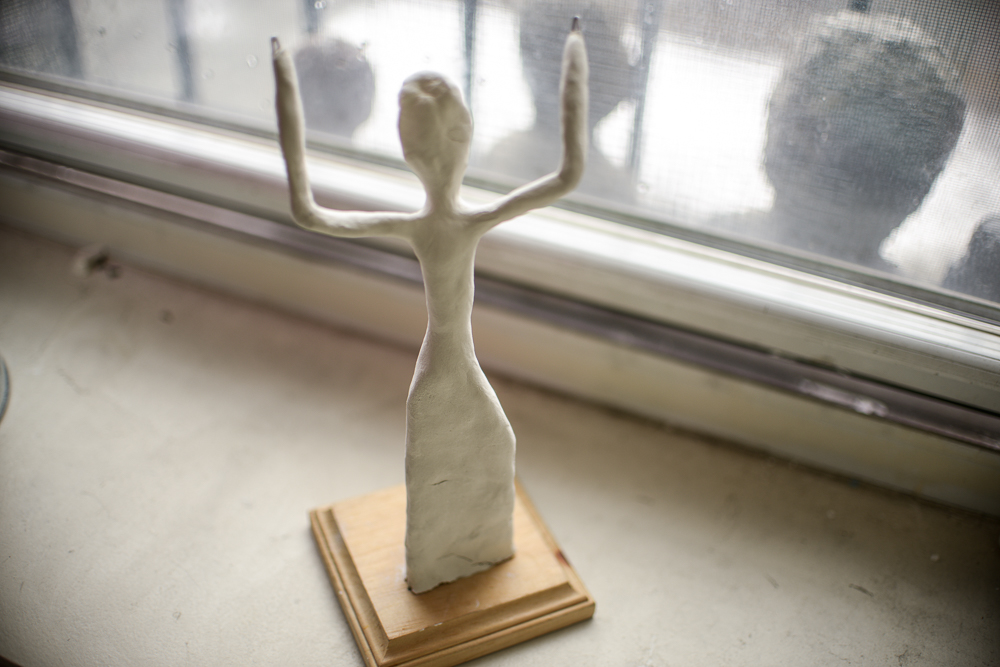
Start adding your first layer of clay to the base. Once the piece is dry, which roughly takes 24 hours depending on the thickness of the clay, you could begin adding more to bulk out the piece if you need to. Remember that if the clay dries and has a few cracks, you can add more clay into the area that cracked to fill it up. When that dries you can get started working on the details such as the face shape and features. This can be done by adding a drop of water onto the places that you would like to add clay to and blending the new clay into it. Don’t worry about getting things perfect when working with moist paper clay, most of the sculpting is done when it is dry.


When working on a piece like this, I find it easier to build up the face in different intervals and allow each stage to dry before I continue. This allows me to work without worrying about me ruining a part of the doll that isn't dry yet. After building up this piece quite a bit with the clay, I sanded down the parts that I wanted to be smooth.


Thank you all once again for stopping by, and I hope that you enjoyed today's tutorial! You can find Creative Paperclay® at the following retailers Creative Paperclay® Online Store, Michael's, Amazon, Joann's.


No comments:
Post a Comment