Showing posts with label #embossingfolder. Show all posts

Thursday, March 29, 2018

Patina Look Jewelry with Creative Paperclay®


Hello there! Jenn here sharing my jewelry project using Creative Paperclay®.
In a previous post I demonstrated how I created molded pieces using embossing folders and cookie cutters. That post can be found HERE.
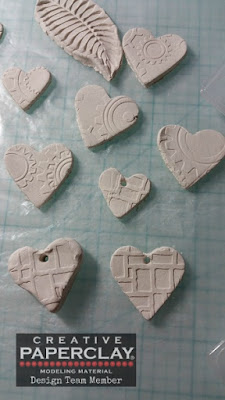
Patina and rust effects are a major trend right now so I decided to create some jewelry using the hearts and some other items.
The additional supplies I used are as follows:
2 clay molded beads
metal butterfly embellishment
Strong glue
Satin Cord
Copper jump rings
Medium sized rusty washer (this was previously treated with a sulfur to patina) from stash
Earring wires
Acrylic paints in patina/rust shades
Liquid ink in a dark blue shade (I used Art Anthology Minx ink in Stargazer)

Start with a base coat of an aqua colored acrylic paint on all of the hearts, butterfly, and beads.

Using a darker teal acrylic mixed with water apply lightly with a brush and wipe off all excess to re-expose the lighter color in all areas except crevices. This will give more dimension. Alternate between golds, blues, and a bit of the liquid darker blue until you reach the desired patina look.


Make sure all pieces are completely dry. Tie a knot part way down the cord and slide one bead on. Tie a knot on the other side of the bead and make sure both knots are tight and secure.

Next, tie the washer onto the cord in the middle using a slipknot.
Make sure the knot is secure and tight and add a dab of strong clear glue to the back of it.
Place a large jump ring onto the main heart and then onto the washer. Add earring wires to the two smaller hearts and there you have it! Such fun!


I hope that you enjoyed my tutorial today! Thanks for visiting!
For all of your Creative Paperclay® needs visit our online store HERE.
You can also find Creative Paperclay® at the following retailers

Thanks again! Happy Creating!!


Sunday, February 4, 2018

Renewing a Plain wooden frame

Hello there! Jenn here today to show you how easy it is to renew a plain wooden frame using Delight® from Creative Paperclay®!

Supplies
Delight® air dry modeling compound
Plain wooden frame 5x7
liquid adhesive (brushable)
Embossing folders (folders used here are all Tim Holtz)
Semi-sharp edged clay spatula
Deco Art Metallic Lustre wax based paints ( used here: Fab Fuschia, Black Shimmer and Brilliant Turquoise)

Start by rolling out Delight® as shown below.
Using a semi sharp edged spatula, cut into smaller strips as shown below.
Grab some embossing folders. Using light pressure push the Delight® compound into the pattern and then remove. Do this for all of your pieces. For less sticking, add some cornstarch dust sparingly to the embossing folder before pressing.
Grab the wooden frame and brush a light amount of liquid glue to the area before wrapping the embossed Delight® piece. continue adding adhesive and embossed pieces until frame is covered as shown below. Use a rounded handle of a paintbrush or other tool to press the pieces together to appear molded.


Trim off excess compound from back and let dry overnight.


Apply black gesso to entire frame both inside and out. Allow it to completely dry.

Now for the magic!!
Using your finger gently rub on alternating colors of DecoArt Metallic Lustre.


COntinue applying until you are satisfied with the results. The picture below shows the magical metallic look that is achieved.
Because Delight® retains so much detail from the embossing, the Metallic Lustre highlights it perfectly.

Thanks so much for viewing my post today! I hope it inspires you to get creative!

Delight® Air Dry Modeling Compound can be purchased in the online store here.
Creative Paperclay® products are also conveniently available at

Have a happy creative day!!
x Jenn