Showing posts with label Plaid Acrylic Paints. Show all posts

Monday, April 5, 2021

A Creative Paperclay® Easter Bunny

 Hello, Happy Easter and welcome to another tutorial! Today I have an Easter Bunny to share with you.

Isn't he cute?


The supplies I used are:

  • Creative Paperclay®
  • Foil
  • Masking tape
  • Diluted white glue
  • 220 grit sandpaper
  • gesso
  • Folk Art Vintage White and Seashell Pink
  • Apple Barrel Pewter Grey
  • Plaid Antiquing Medium: Apple Butter Brown
  • Black Paint
  • White Paint
  • Pearlescent chalking set (used for cheeks and eye shadow)
  • Spray Varnish
  • Royal Coat Dimensional Magic by Plaid Crafts
  • Brown Paper Strip 1" x 1' 6" ( I used a paper bag)
  • 1/4"- dowel (12" long)
  • washi tape
  • craft wire
  • wire cutters, pliers
  • needle tool
  • paper towel
  • water


Follow the steps below:


Step 1: Form the bunny's head out of foil.


Step 2: Shape the ears.
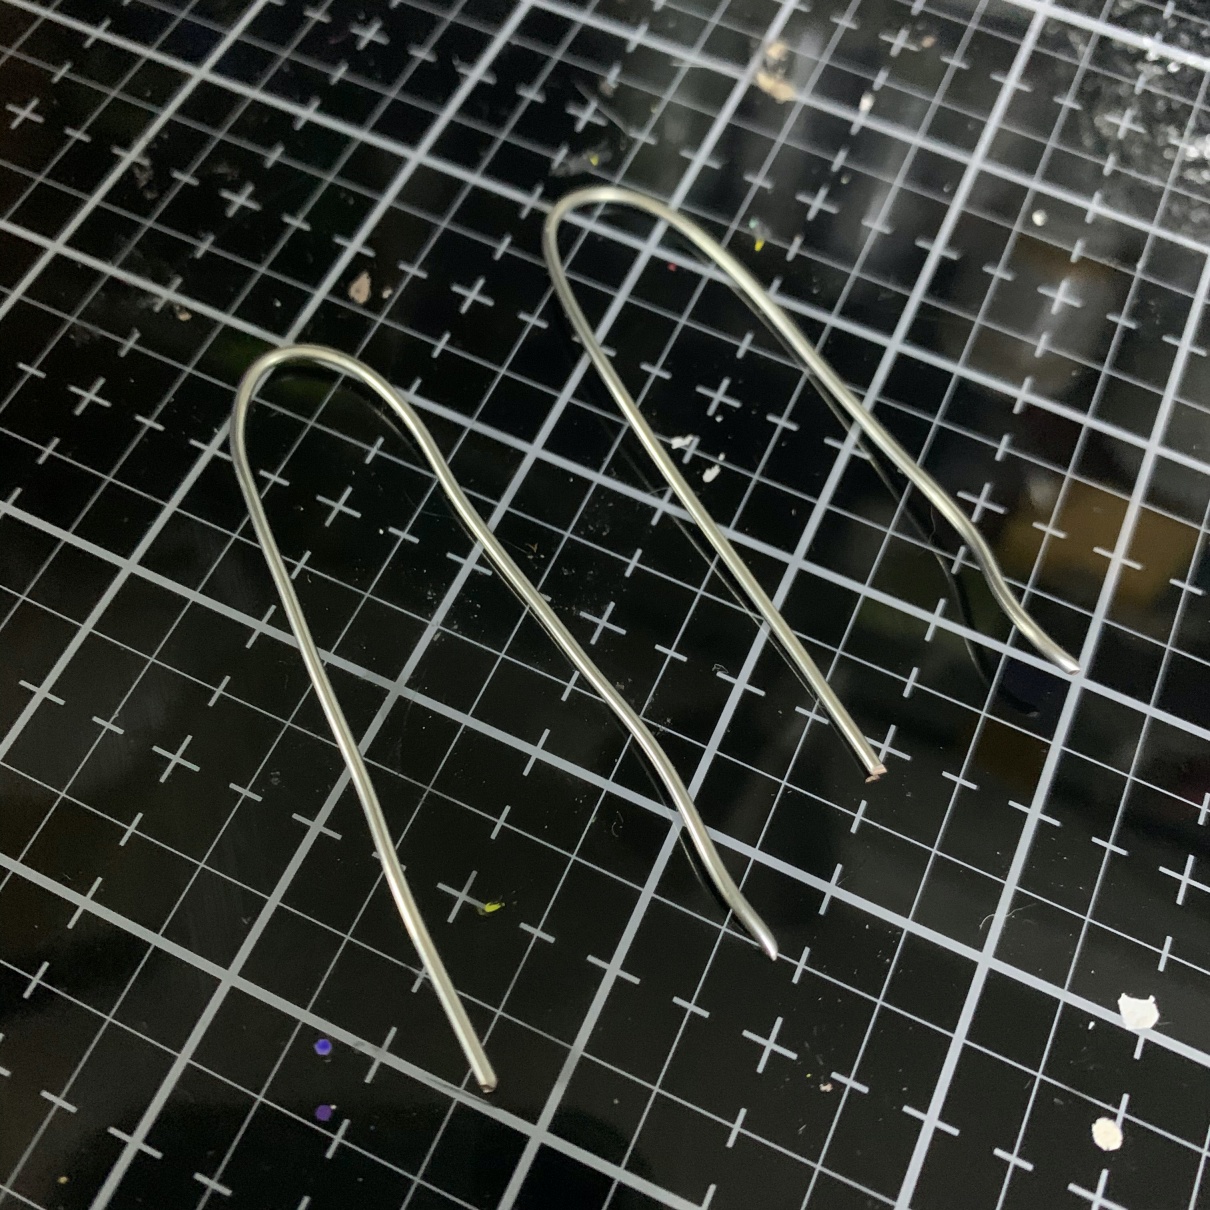


Step 3: Press them into the foil and secure with hot glue.


Step 4: Cover with masking tape.


Step 5: Coat with diluted white glue and cover with Creative Paperclay®.


Step 6: Add the nose, cheeks and eyebrows . Poke holes into the clay for the eyes. Set aside to dry.
When dry sand, fix any cracks and coat with gesso.
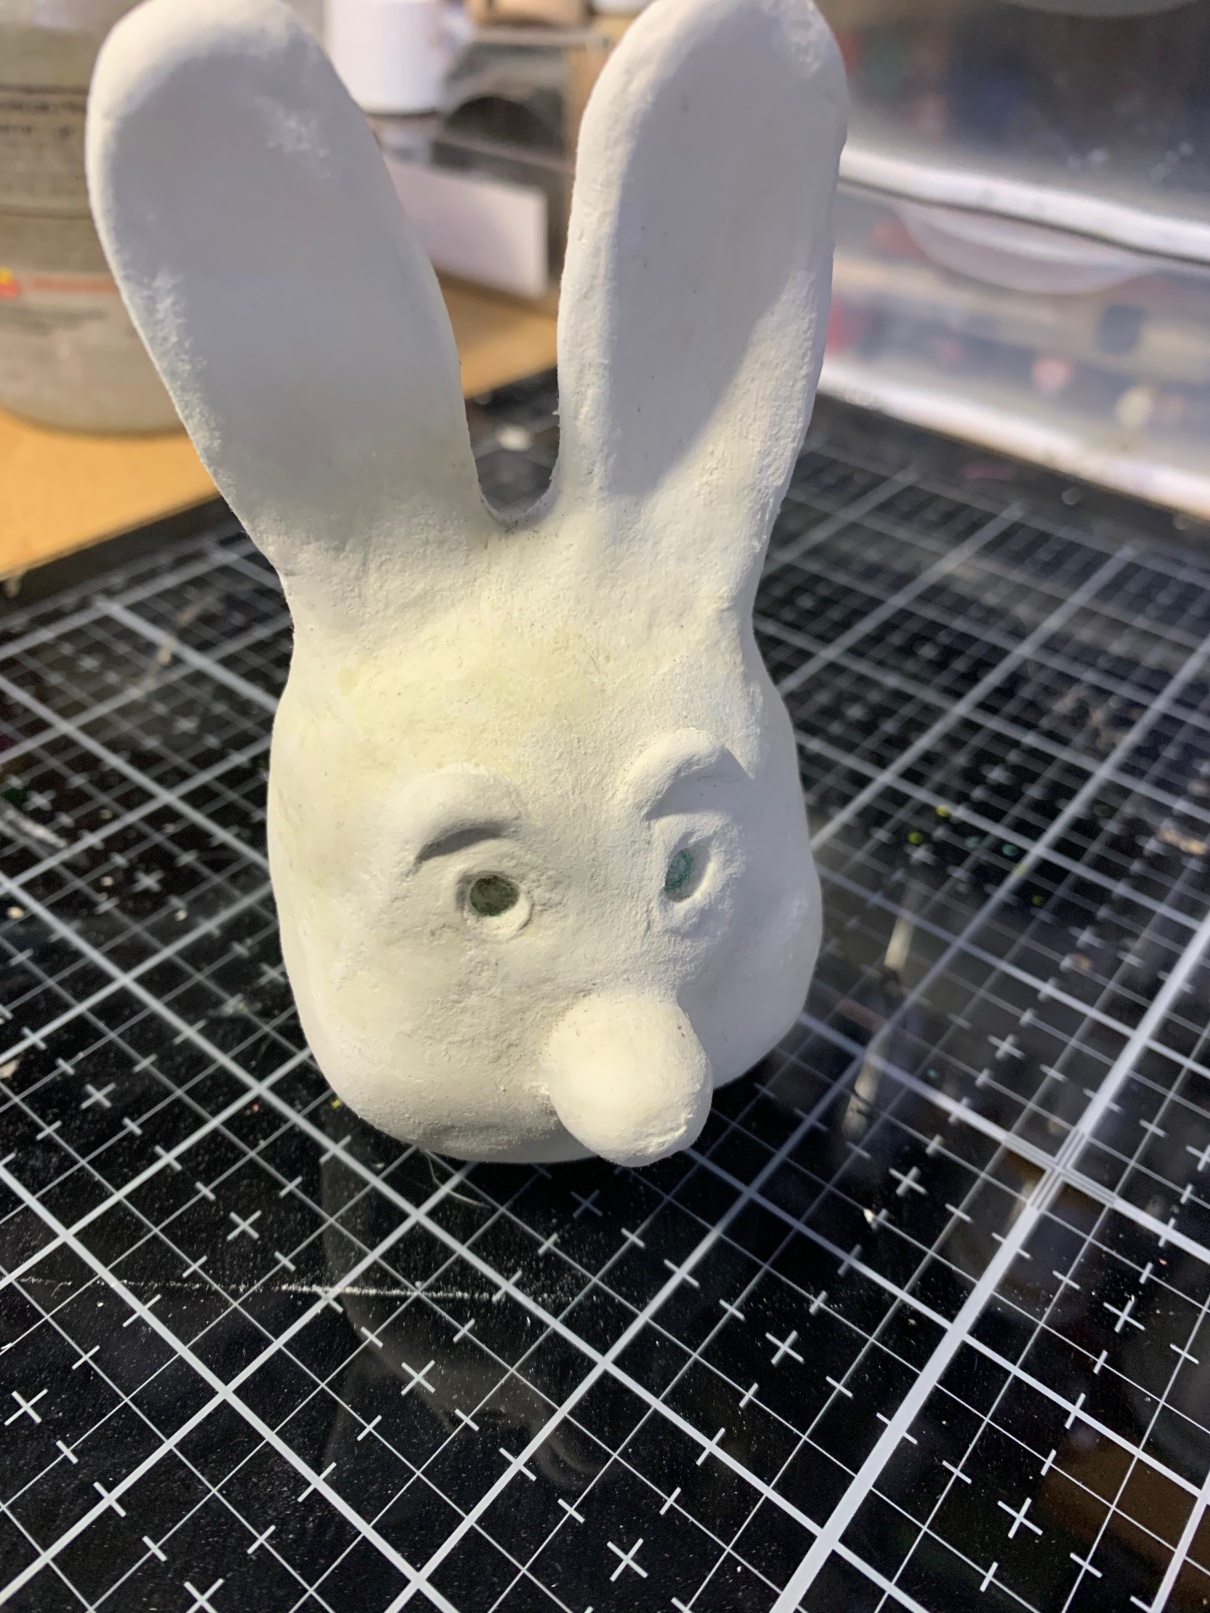


Step 7: Paint your Easter Bunny.


Step 8: When completely dry coat with stain.  Let it sit for 15 to 30 seconds and then wipe off with a paper-towel. If it is too dark, dampen the paper-towel.
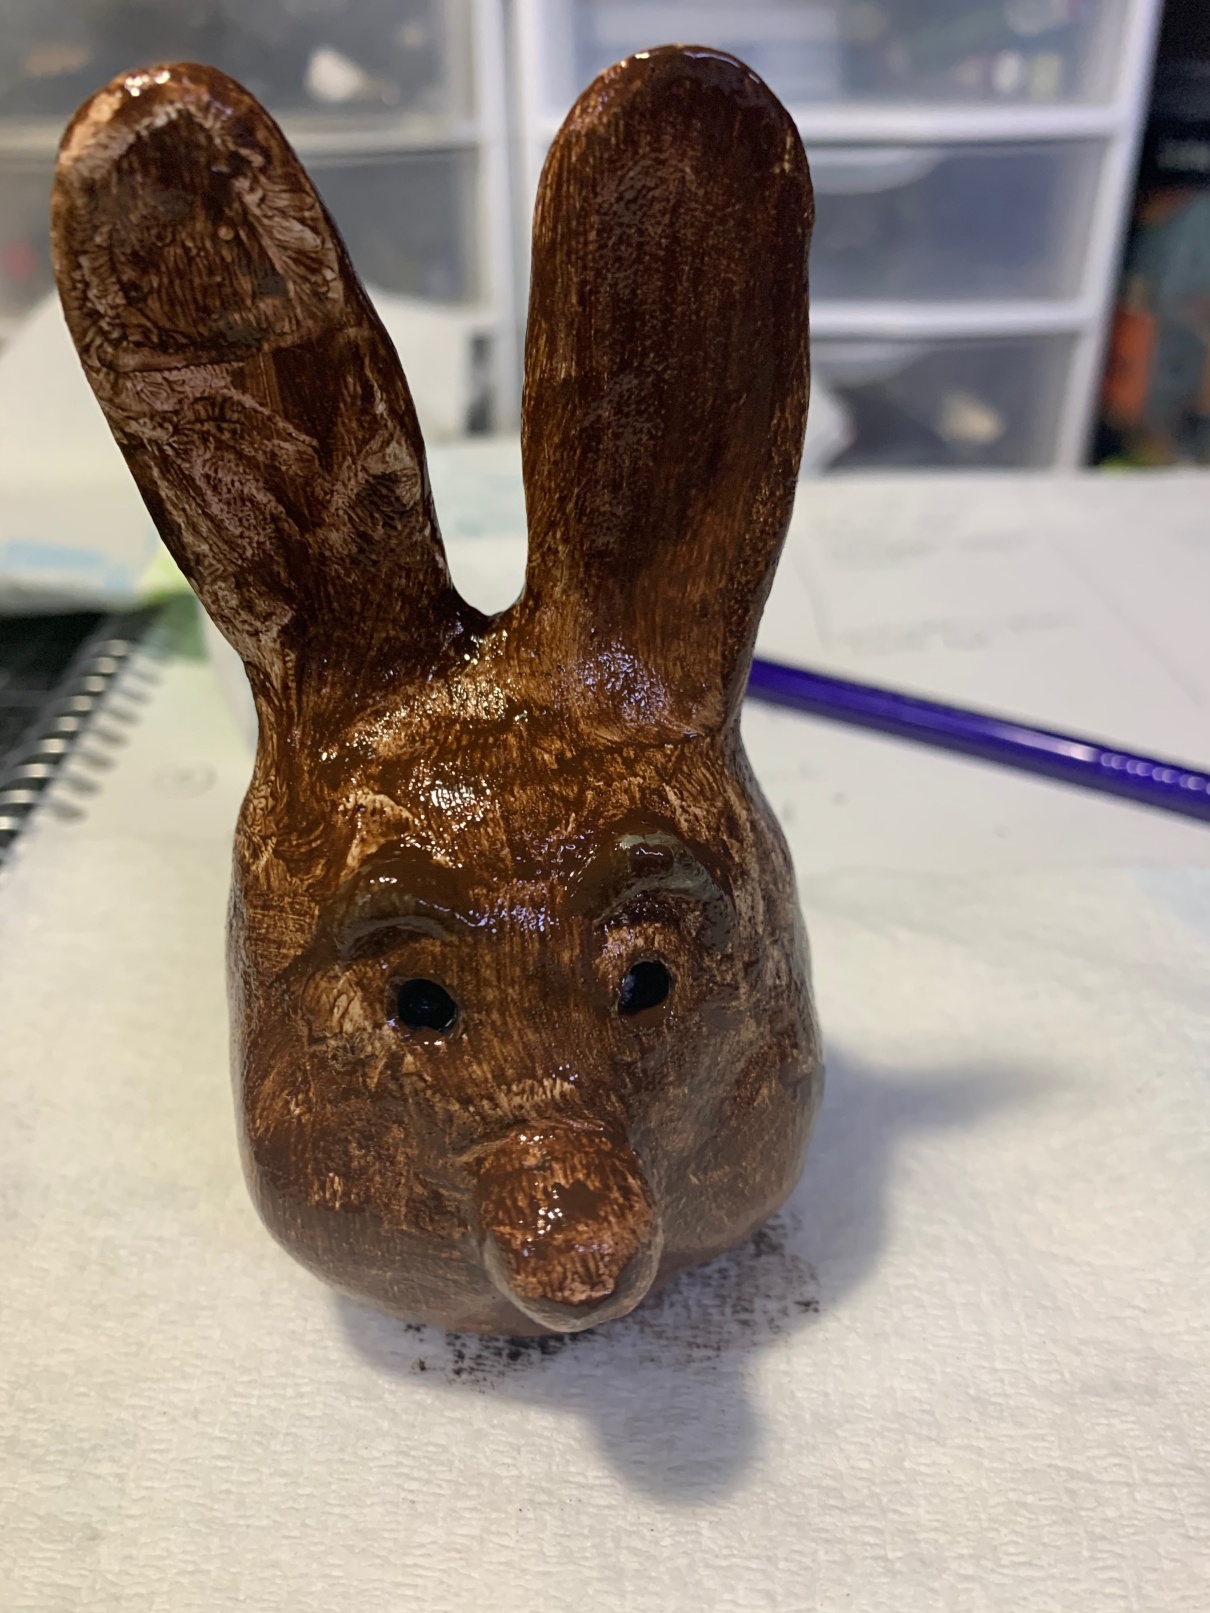

Step 9: Use chalk pastels to add eye shadow and blush. Spray with varnish to seal.


Step 10: Fold the strip of brown paper accordion style. Secure the ends and form into a collar shape.


Step 11: Fill the eyes with Plaid Dimensional Magic.


Step 12: Drill a hole big enough for the dowel under the bunny head. Glue the collar to the base of the head.


Step 13: Secure the dowel with glue and cover with washi tape. 


Step 14: Add ribbons and raffia.


Step 15: Add a white spec to each eye. 


The finished bunny.


You can share your creations with us on our Facebook page. We would love to see them! For more inspiration have a look around the blog. There are tutorials for many levels using Creative Paperclay®. You can also visit my blog/website  Paper Mache Patch.  

You can find Creative Paperclay® online at Creative Paperclay Co and also at Michaels, Hobby Lobby, Dickblick and Amazon. 


Thanks for stopping by!

Suzette


Monday, September 7, 2020

Halloween Candy Corn

 Hello, welcome to another blog post! I hope you are keeping safe! On Clay Talk this month, I decided to get started on my Halloween decorations.  I made this adorable Candy Corn.


I just love him! Don't you? Not to worry if you missed Clay Talk, the recording is below. 

Clay Talk - Making A Candy Corn Decoration

Join us as we sculpt a cute Halloween decoration and paint with paints from Plaid Crafts

Posted by Creative Paperclay modeling material on Thursday, September 3, 2020


Clay Talk is held once a month on the first Thursday. It takes place on Facebook Live on the Creative Paperclay Modeling Material page. The next episode will be on Thursday, October 1st at 8pm EST/ 5Pm PST. We will be making a jack o'lantern tea light holder (for battery operated tea light only). Be sure to join us!

Thanks for watching and be sure to look around the blog for more amazing tutorials using Creative Paperclay®. We have an amazing design team that create to keep you inspired.

You can share your creations with us on our Facebook page. We would love to see them! For more inspiration have a look around the blog. There are tutorials for many levels using Creative Paperclay®. You can also visit my blog suzettehussey.com

You can find Creative Paperclay® online at Creative Paperclay Co and also at MichaelsHobby LobbyDickblick and Amazon. 

Thanks for stopping by!

Suzette


Monday, July 1, 2019

Seaside Shells with Delight Clay™

Hello and welcome to another blog post. Today I am continuing with my seaside theme. We will be making some shells using Delight Clay™ and a mold. 


Supplies needed:

*If you don't have these use a pearl acrylic paint.

Follow the steps below:

Begin by adding a drop of off-white acrylic paint to the Delight Clay and blending. This will give a nice base color for the shells.


Now press the clay into the mold.


Gently remove and set aside to dry.

Trim the edges with scissors if necessary and sand away any uneven bits. I nail file is perfect for this.


Apply a coat of clear gesso and allow to dry.

To finish off, mix a bit of gold mica powder with an acrylic glazing medium and use to paint the shells.


Arent those beautiful! And they were so simple to make. Be sure to save these as we will be using them on a mixed media board soon. Next month I will be making corals, also with Delight Clay™ so be sure to subscribe so you don't miss out.


Thanks so much for stopping by. You can share your creations with us on our Facebook page. We would love to see them! For more inspiration have a look around the blog. There are tutorials for many levels using Delight Clay™ and Creative Paperclay®. You can also visit my blog www.papermachepatch.com.


You can find Delight Clay™ online at Creative Paperclay Co and also at Michaels, Hobby Lobby, Dickblick, and Amazon. 

Thanks for stopping by!

Suzette