Thursday, April 21, 2022

Bushel of Mushrooms

 Let's make some fun oversized mushrooms!


I've been drawing and sculpting mushrooms since elementary school in the good ole 70's, and since my mom never throws anything away, I can share my lil' shroomy with you today๐Ÿ„


 But let's get to the reason you came here.  I've created a little video that goes super-fast.  I am working on a better way to record on my app to be able to offer a better quality video.  


Supplies: Creative Paperclay® sturdy cardboard tube (mine is from a used roll of foil) paper bag or paper foil glue scrap fabric/lace heavy thread and needle basic clay working tools paint brushes acrylic paints Creative Paperclay® https://paperclay.com/ can also be found at Michael's and Joann Fabrics


I hope you enjoyed this tutorial.  If you have any questions you can leave a comment below, find me in Creative Paperclay® Q & A Facebook group as well as my email ArtbysusieK@gmail.com


๐—œ ๐—ถ๐—ป๐˜ƒ๐—ถ๐˜๐—ฒ ๐˜†๐—ผ๐˜‚ ๐˜๐—ผ ๐—บ๐˜† ๐—ผ๐˜๐—ต๐—ฒ๐—ฟ ๐—ฎ๐—ฟ๐˜ ๐˜€๐—ฝ๐—ฎ๐—ฐ๐—ฒ๐˜€ on Facebook and Instagram:

* @๐—ฎ๐—ฟ๐˜๐—ฏ๐˜†๐˜€๐˜‚๐˜€๐—ถ๐—ฒ๐—ธ ๐น๐‘œ๐“‡ ๐’ซ๐‘’๐’ธ๐“Š๐“๐’พ๐’ถ๐“‡ ๐’ถ๐“ƒ๐’น ๐ป๐’ถ๐“๐“๐‘œ๐“Œ๐‘’๐‘’๐“ƒ

* @๐—ช๐—ถ๐—น๐—น๐—ผ๐˜„๐—›๐—ผ๐—น๐—น๐—ผ๐˜„๐—ช๐—ผ๐—ผ๐—ฑ๐˜€   ๐’ป๐‘œ๐“‡ ๐ธ๐’ถ๐“‡๐“‰๐’ฝ๐“Ž ๐’ž๐’ฝ๐’ถ๐“‡๐’ถ๐’ธ๐“‰๐‘’๐“‡๐“ˆ ๐’ถ๐“ƒ๐’น ๐‘€๐’ถ๐‘”๐’พ๐’ธ๐“€


Friday, April 15, 2022

Make your own Gnome Tree House

๐Ÿ„ GNOME TREE HOUSE ๐Ÿ„


WHAT YOU WILL NEED

Cardboard Paper Towel Tube
Corrugated Cardboard
Toothpicks
Glue
Xacto knife
Thin Slices of Styrofoam
Block of Styrofoam for Base
Dowel or Straw for Chimney
Paint / Brush / Water


Always keep the area wet when you are adding Paperclay to dry Paperclay.

I sand off rough spots as I go. You can also sculpt with a wet paintbrush.


Cut cardboard tube about 5.5 inches tall. Flatten tube
and draw roofline, window and door. Cut out and make two
cardboard circles the diameter of inside of tube. My tube
is 1.5 inches. 


Glue cardboard circles inside tube for Tree House floors
and to add strength to the tube.


Cut styrofoam in strips as thin as you can get. Then glue
them vertically to tube. They can vary in width. Cut along 
roofline, window and door. This will create
the texture for tree bark.


Cover styrofoam with  Creative Paperclay to create bark.


Round off the top edge of 4 inch stryrofoam base.
Glue tree to 4 inch base. Create roots with styrofoam
and cover everything with Creative Paperclay 


Cut 2 pieces of cardboard 2.5 inches wide by
3 inches long. Add thin strip of cardboard to bottom
edge of roof. Glue pieces together. Fill in along 
corrugated cardboard edge with
Creative Paperclay. Cut door and shutters
to fit opening in tree.


Glue roof to tree. Add triangle of cardboard at the
front of roof peak. Add door and shutters. Add steps made with styrofoam
covered with Creative Paperclay and paint gray. Give everything 
a coat of brown paint, make base a bit lighter. Then
use dry brush technique to add color.


Sculpt Gnomes with Creative Paperclay. Paint
before attaching to tree house.


Create mushrooms. Make a half circle with Creative
Paperclay and push toothpick into bottom.


Paint mushrooms and chimney and glue. Add surface details you like.


GOOD LUCK with Your Project!
                      R. Michael Palan 


Monday, April 4, 2022

Happy Easter!

 Hello, 

Welcome to another blog post! As Easter is just around the corner, it is time to make those fabulous Easter Decorations. Here are some fabulous pieces I have made throughout the years on the Creative Paperclay® Design Team.


You can find this tutorial here.

Friday, March 25, 2022

Make a DIY Table Card Holder


Hello everyone, Cinnamon here and I am going to show you how I created this table card holder. This holder was inspired by the character from the Japanese brand Comme des Garรงons. I fell in love with it and I finally got my hands on a pair of sneakers by the brand. Keep reading to see how this was created!

(Comme des Garรงons character)

Supplies:

  • Creative Paperclay®
  • Pliers
  • Wire 
  • Small wooden disc
  • Tool or drill to  put a hole in the wood
  • Masking tape


Take your wire and begin to shape it to the length you would like your table card holder to be with your pliers. 


Create a loop at the top and go around two times. You want to make sure that a piece of paper will hold up and not fall through. Test your loop with paper as you go to make sure that it actually woks.


After you create your loops at the top, create a notch going across the middle so that you have a place to put your heart. This notch is what will keep your heart from sliding out of place on the pole later after it dries.


Cover your notch in the middle with masking tape so that you will have a foundation for your heart.


Cover the masking tape with a layer of clay. Begin creating the shape of the heart, it doesn't have to be perfect at this stage. When you are satisfied, put the piece aside to revist after it dries.


Now it is time to finesse the shape of the character. With the inner layer of the piece dry, you can now put another coat of clay on top of it for the final shaping of the piece. When you are satisfied with the shape, set the piece aside to dry.


After letting the piece dry, I am now getting ready to draw the eyes. I start by drawing a dot for the placement of the eyes from start to finish.  


Draw the eyes when the dots seem to line up at the starting point on the bottom and the end points on the top.


Start painting your piece when you are happy with the placement of the eyes.


I went over the eyes in red by mistake, I am correcting that in the second photo above with white paint.


Take your black paint and paint in the pupils. I dabbed the paint on in a playful way to match the look of the character. Set the piece aside to dry.


Take your wood and drill in the hole for the holder to go down into. I am using a clay tool but you can use what ever you have available to you.


I am cutting down my wire to the height that I would like my holder to stand. In the second photo I am putting the wire in place. You can use glue here to make sure that the wire stays in place with the wood


Here is the final piece in action with my sneakers that have the character in the background!

Thank you all once again for stopping by, and I hope that you enjoyed 
today's tutorial! You can find Creative Paperclay® at the following 

See more of my work at Melandolly.com, catch updates on 
my Instagram page and here is a link to my shop!


.  

Tuesday, March 15, 2022

How to create Easter Bunnies with Creative Paperclay

EASTER BUNNIES 


WHAT YOU WILL NEED 

Creative Paperclay® 

2 Styrofoam eggs

2 Styrofoam balls

Sandpaper

Paint Brush and water

Cardboard

Toothpicks

Glue

Paint

Gesso

Stain


Always keep the area wet when you are adding Paperclay to dry Paperclay.

I sand off rough spots as I go. You can also sculpt with a wet paintbrush.


Cut a 1" circle out of cardboard, glue a 6.5" x .5 strip of paper 

around circle. Let dry and the glue to 1.5" circle. 

Let dry and cover entire hat with Paperclay.


Cut 2" circle out of cardboard. Make a half circle out of Paperclay.

Let dry then cover entire hat with Paperclay.


Cut ears out of cardboard. Cover with Paperclay.
Cut feet out of cardboard.

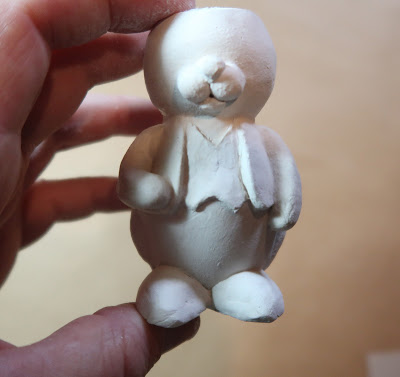
Cut top and bottom of styrofoam egg. Cover with
Paperclay. Cover styrofoam ball with Paperclay. Let dry.

Glue feet to bottom of egg. Push toothpick into top pf egg.
Glue styrofoam ball to top of egg. Let dry.


Cut top of styrofoam ball off. Add Paperclay to 
cardboard feet and sculpt legs on side of egg.
Let dry.


Add strip of Paperclay around rabbit and up front. Smooth
clay to create jacket for boy. Let dry.

Add strip of Paperclay around rabbit and smooth upward to
create skirt. Let dry.

You don't need to add a whole jacket or skirt. Creating
the edge will give the look of a complete piece of clothing.


Add vest edge and two balls for rabbits face.
Add apron edge.Let dry.

Glue ears on both hats. Let dry.
Patch the ears to the hats with Paperclay. Let dry.


Add arms, nose and chin on both figures. Finish top of vest on boy
and blouse collar on girl. Let dry.


Glue hats on. Add strip of clay for shirt cuffs. Sculpt clay
away from hands. It will give the illusion of a complete shirt sleeve.
Let dry.


 Sand any rough spots and cover with gesso.
Paint and add details. If you are mixing colors keep 
colors in a container for touch ups. I use stain to
make the color pop a bit.


GOOD LUCK WITH YOUR PROJECT
R Michael Palan


Sunday, March 13, 2022

Four Leaf Clover Tutorial


Thanks for stopping by for a fun and quick project, perfect for St Patrick's Day. I am Susie Krichbaum of Art by SusieK and I am a Creative Paperclay® Design Team member. The design team presents tutorials and tips throughout the month and post them at https://creativepaperclay.blogspot.com/ SKILL LEVEL: beginner
VIDEO BELOW: filmed in real time and time-laspe with my voice instructing. SUPPLIES: Small canvas or canvas hardboard ** I prefer hardboard to canvas because it provides a stronger surface. I purchased my hardboard at the Dollar Store, but you could also use a flat piece of wood which would look so nice. Creative Paperclay® Available at Michael's, Joanne Fabrics and Dick Blick Art Supplies (online or store) variety of clay tools water gesso (optional) can use white acrylic paint acrylic paints You can glitz it up with glitter or shimmer paints all you want. I even added a few drops of Diamond Glaze® on the clover for water droplets. This project took about 1.5 hours to sculpt and then another hour to paint. **tip when I let the clay dry over night I placed heavy cups along the edges of the hardboard to prevent warping. You will see this in the video. Add a little easel photo stand for a cute little accent piece.


I hope you enjoyed this tutorial.  If you have any questions you can leave a comment below, find me in Creative Paperclay®Q & A Facebook group as well as my email ArtbysusieK@gmail.com


๐—œ ๐—ถ๐—ป๐˜ƒ๐—ถ๐˜๐—ฒ ๐˜†๐—ผ๐˜‚ ๐˜๐—ผ ๐—บ๐˜† ๐—ผ๐˜๐—ต๐—ฒ๐—ฟ ๐—ฎ๐—ฟ๐˜ ๐˜€๐—ฝ๐—ฎ๐—ฐ๐—ฒ๐˜€ on Facebook and Instagram:

* @๐—ฎ๐—ฟ๐˜๐—ฏ๐˜†๐˜€๐˜‚๐˜€๐—ถ๐—ฒ๐—ธ ๐น๐‘œ๐“‡ ๐’ซ๐‘’๐’ธ๐“Š๐“๐’พ๐’ถ๐“‡ ๐’ถ๐“ƒ๐’น ๐ป๐’ถ๐“๐“๐‘œ๐“Œ๐‘’๐‘’๐“ƒ

* @๐—ช๐—ถ๐—น๐—น๐—ผ๐˜„๐—›๐—ผ๐—น๐—น๐—ผ๐˜„๐—ช๐—ผ๐—ผ๐—ฑ๐˜€   ๐’ป๐‘œ๐“‡ ๐ธ๐’ถ๐“‡๐“‰๐’ฝ๐“Ž ๐’ž๐’ฝ๐’ถ๐“‡๐’ถ๐’ธ๐“‰๐‘’๐“‡๐“ˆ ๐’ถ๐“ƒ๐’น ๐‘€๐’ถ๐‘”๐’พ๐’ธ๐“€

*

            ๐“’๐“ก๐“”๐“๐“ฃ๐“˜๐“ฅ๐“” ๐“Ÿ๐“๐“Ÿ๐“”๐“ก๐“’๐“›๐“๐“จ® ๐““๐“ฎ๐“ผ๐“ฒ๐“ฐ๐“ท ๐“ฃ๐“ฎ๐“ช๐“ถ ๐“œ๐“ฎ  @creativepaperclay


Susie Krichbaum of Art by Susie K
www.ArtbySusieK.com