Sunday, January 29, 2012

A Valentine Creative Paperclay® Delight Clay Project


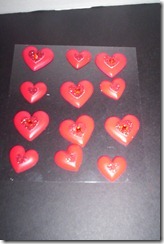
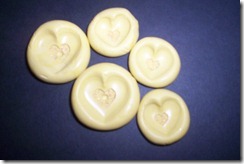
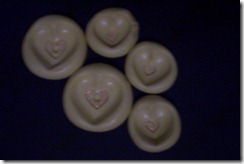
It’s hard to believe that Valentine’s Day is just right around the corner. This project turned out so cute I thought you might want to make something at least similar to it for someone special in your life. To start with I took some little hearts that I had and made a mold of them. I then filled them with Delight Clay, waited for them to start drying and then popped them out to finish drying. (They dry quicker when they’re out of the mold).

                   1-29-12 paperclay post 002               1-29-12 paperclay post 009      1-29-12 paperclay post 010

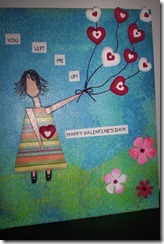
Once dry I painted them red and white. I took an 8X10 canvas board, spritzed it with some paint, used some Mod Podge and attached some green fiber, paper, string, words, flowers and my cute little hearts. Take a look at the final project and tell me what you think.

1-29-12 paperclay post 008

You can change the idea, use the Delight Clay in a different way etc. I’ve got to say this is one of the few times that I’ve used the Delight Clay but have to say it’s great for Mixed Media such as this or for scrapbooking or card making. It is so light weight, it takes detail amazingly and takes paint well.  This project would look very nice on a little stand which is what I plan to put it on.

Don’t forget to join us for the blog hop on Feb.1, “Love Cast in Clay”. We’re going to have some awesome prizes to give away!

Barbara

Friday, January 27, 2012

Golden Cameo


The design team from Creative Paperclay® Modeling Material, was lucky to get to choose a mold from Articus Studio Design to play with! They have so many cool molds, I had a hard time making up my mind, but finally decided on the Cameos Flexible Rubber Art Mold.

I used the Delight™ air dry modeling compound, and pushed it into the mold and let it dry before I removed it. I used the new Terri Sproul Mixers/Sakura Crystal Lacquer to color the cameo, with an elegant, Old World feel.


I can see so many possibilities for these molds - jewelry, home decor, any kind of paper craft....

I hope you will check them out and give them a try. You will love how they work with the Creative Paperclay!


Delight™ Air Dry Modeling Compound
Sakura Crystal Lacquer
Terri Sproul Mixers - Gold
Lifestyle Crafts die
Kanban Crafts Metallic Glaze Salerno - Beige CRD9754
Kanban Crafts Crystal Glittered Acetate

Wednesday, January 25, 2012

U Make Me Bloom


Have you ever had someone in your life that well....just makes it better?  I'm so lucky to say my sister Gini is one of those people in my life.  This layout is all about her. 


I adored using the mold to create these PaperClay faces.  Don't they just make the layout!!!


I was able to also create some smaller faces that I nestled down in the die cut flowers and leaves.  The faces were all colored with a mixture of watercolor pencils, distress inks, blender pens and a hair of smooch.  I love the way they came out and hope you do to.  The molds are so beautiful and have so much detail so the two paired together are perfect.  

Hugs,

Monday, January 23, 2012

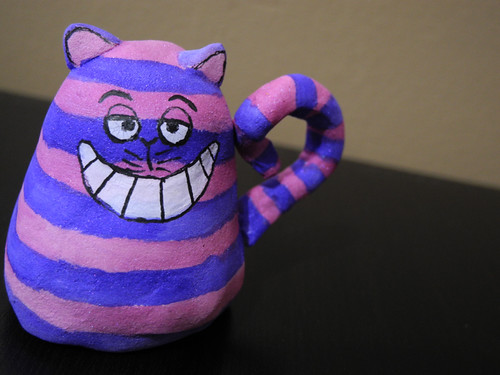
The Cheshire Cat

Hi, folks! Jingle here! Today I am SO excited to share a super fun project I created with Creative Paperclay® and some gorgeous Luminarte watercolor paints!

Meet...the Cheshire Cat!

Cheshire Cat


I created him by starting with a foam ball split in half for the base and then built up with foil from that to create the basic shape I was looking for.

Foil Armature for Cheshire Cat


From there, I covered the foil with Creative Paperclay® and formed the tail portion over a length of wire pushed into the base of the cat. I allowed this to dry for two days before proceeding.

Cheshire Cat Sculpt in progress


I sanded gently before painting. I first applied the stripes using Luminarte Twinkly H2O's. This gives the Cheshire Cat a wonderful shimmer!

Cheshire Cat Painted (no features yet)


The final step was to add the distinctive toothy grin and spirited eyes using white paint (Sharpie paint pen) and black marker.

DSCN5009


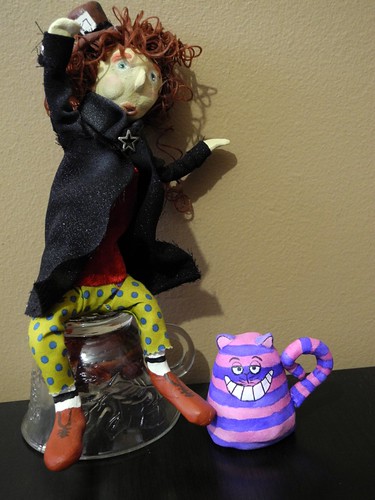
I just love the way he turned out! And he sits quite happily along side his friend, The Mad Hatter!

The Hatter and the Cat


Thanks for stopping by and please remember to leave your comments! We love your comments! You can see more of my work at Just Jingle, my blog! Thanks, and have a super happy day!

Saturday, January 21, 2012

Creative Paperclay® Time Flies!!!

What I love most about Creative Paperclay® is... if I cannot find an embellishment for a project be it a card, assemblage, wall art I can always make it from Creative Paperclay®!

First create molds using mold putty from found objects then cast the Creative Paperclay® and allow to dry.  For this project I made: pocket watch, column and a frozen Charlotte.

Supplies:
Creative Paperclay®: molded Frozen Charlotte, column,
pocket watch
Molding Compound
Book - tools to cut pages
Tissue
Stamps:
   Viva Las Vegastamps! Eiffel Tower
   Viva Las Vegastamps! Tree
   Viva Las Vegastamps! Flying Bird
   Cavalini - Paris, stamped in clay
   Stampin UP Print Pattern
Stewart Superior Memories Black Ink
Stewart Superior Memories Mist Silver
Stewart Superior Memories Mist Iridescent
Versafine Olympia Green Ink
Memento Rich Cocoa Ink
Gold Paint
Paper Ephemera
Tim Holtz Letters
Tim Holtz - spinner and bradStickles
Tacky Glue
Fixtive
Embellishments: 
Dice with alphabet 
Doily
Clock faces
Plastic Eyelashes for wings

Believe it or not... this book is a found item. The pages had already been cut out when I found it!  Lucky for me.  The cut pages were wired together, which made it easy to work with. I white washed the back inside cover with a light coating of gesso, then spritzed with Stewart Superior  Memories Mist: Silver and Iridescent. 
Stamped background images on tissue and adhered to the back of the book.  
Adhere the pages to the back cover of the book and painted a little gesso around the outside edges of the pages.
The Creative Paperclay™ column was aged with brown ink, then place  in the window box. Stamped the border of the window box with the print pattern and added a bit of paper ephemera.
The Creative Paperclay® pocket watch was painted gold and the the clock faces and spinner with brad were added.
Final touch to the pocket watch are the plastic eye lashes for wings, adhere to book.  Distress the alpha dice with Memories Black Ink and adhere!
Add the bird on tissue to the border, a little bit of cut doily and the word "flies" using Tim Holtz letter.  Add a dash of blitz with Stickles on the doily.
Touch up with gold paint around the pages, a bit of gold distressing on the frame, Paris clay piece and my  Creative Paperclay® frozen Charlotte. 


February 1st 
be sure to join our Blog Hop
Creative Paperclay® and Amazing Mold Putty 
are joining to create
an AWESOME blog hop 
LOVE CAST IN CLAY!

Thursday, January 19, 2012

Feet to Fin by Edie

I collect fairies and other lady figurines and I am really starting to appreciate art dolls of all kinds, but I am not usually drawn to mermaids. They are beautiful and I love the way they look but I don't normally collect them. However, I am currently working on two different art courses that both heavily feature mermaids, so needless to say, I have been on a mermaid kick.

I have been collecting mermaidesque tid bits to use in upcoming paintings and journal pages and I even collected seashells on the beach while I was on vacation in San Diego to use in a painting I am planning.

This recently awakened mermaid obsession even inspired my Creative Paperclay® design team project for the month. I decided to alter a basic Barbie doll and turn her into an OOAK mermaid art doll and I *LOVE* the way she turned out! I like it so much, I will even be displaying her in the curio with my other favorite lady figurines :D


Be sure to watch the full tutorial in the video below, but here are the basics...

Start with any Barbie of your choice. Mine happened to have blue hair and her 'bathing suit' was plastic and made her body.


Using Creative Paperclay® air dry modeling material completely encase her legs to form a mermaid tail.


Create her fin using wire and fabric and insert it into the end of her tail


Add hair extensions made from inexpensive hair weave


Paint and embellish however you like. Viola'!!!!

I used two different kinds of Paperclay on this project. Her tail is made from Creative Paperclay® air dry modeling material and her seashell embellishments are made from Delight® air dry modeling material.

The Delight® has a puffier texture than the Creative Paperclay® which was perfect for this project. I suggest you try both products for yourself because they do feel very different and can be used together to create unique contrast on your projects.

To see more of my work visit my blog

Check back here on February 1, 2012 to join our blog hop "Love Cast in Clay" featuring Creative Paperclay® AND Amazing Mold Putty!!!! I have seen a sneak peek at a few of the projects that will be shown and I am super excited!!!!

I hope you enjoyed this tutorial and I would love to see what you create!

Wednesday, January 18, 2012

Good Luck Charm

Good Morning
Today I am going to show you another project using Creative Paperclay® and a stamp.  A while back we were given an opportunity to order some stamps from VivaLasVegas Stamps and I went a bit overboard. I love stamps and of course using it with the clay opens another new world.


I rolled out my clay at about 1/4 inch thickness and stamped the dartboard image onto the clay using a black ink.
Then I trimmed the access around the image before
it dried.  I wanted just the image
After the clay piece was completely dried, I placed
it on a measuring cup inside another cup and poured
a mixture of the Amazing Clear Cast over the top
This will give it a shiny and sturdy coat so I can toss
this inside of my dartcase as a good luck charm.
See how shiny it got?  And now the resin cast
will also protect the clay piece.

I hope you can get a chance to get yourself some Creative Paperclay®.  There are so many things you can make with it and you can purchase it at Hobby Lobby, Michaels and online here.  I also hope you can go out and check out the Viva Las Vegas Stamp site and check out all the fabulous stamps that are available.

Sunday, January 15, 2012

Creative Paperclay® Heart pendant


With Valentines on its way my head is filled with hearts so this month I'm going to create an easy but very pretty Heart pendant using Creative Paperclay®.


Material list:
Creative Paperclay®
wire - for the bail
tool to stamp in your texture
acrylic paints

1. Make a paperclay ball, about the size of a walnut. Actually, the amount of clay you use really depends on the size you want your finished piece so play around. If you use too much simply make the ball smaller and reshate again.


2. Start shaping the clay into a heart. I first roll the ball in my hands to form a cone shape and then squish and moosh the clay into a heart shape. This is play time so have fun and don't worry if your heart isn't a perfectly shaped heart. I kinda like the wonky look, I think it gives the pendant more character.


3. Insert your wire bail into the top of your pendant. Since mine is a wonky heart I inserted the bail so the heart will hang at an angle.


4. Next we stamp in our texture. I used a leather stamping tool for my texture but you can use whatever you have handy. Stamp the texture deep enough to make it look like it's inside the heart, not on the surface of the heart.


5. Once you get the look you like let the pendant completely dry. What? We're done? Yep, how easy is this! :)

6. After it dries completely you can paint it . I started by painting the entire pendant black. I then dry-brushed metalic gold and red. That gives the pendant an aged look that I love. After the paint dried I sprayed a couple of layers of polyurathane on it to protect the paint. All that's left to do is sting it on a cord or ribbon and you have a beautiful heart to wear.