Friday, December 27, 2019

How to make a Fully Posable Art Doll


Hello Everyone, this is Cinnamon again. I hope that everyone had a nice and eventful holiday. Today I am going to show you how I create dolls with dangling limbs that are super posable. Dolls with limbs that move freely can be a dream to pose for photographs. 

Supplies
  • Skewers
  • Scissors
  • Creative Paperclay®
  • Newspaper
  • Masking tape
  • Sand paper
  • Wool
  • Acrylic paint
  • Sealer, Varnish


Start with a ball of paper & tape it onto a wooden skewer.


Wrap it with clay to form the head.


When the clay drys, glue the head to the skewer with Aleene's tacky glue.


Take wire and wrap it around the skewer, cut off excess skewer at the bottom if necessary.


Be sure to make loops at the shoulder and bottom of pelvis for attaching limbs.


With wire, form 8 ovals and keep open in the middle. Hook one oval into each loop on the armature and then interlock another oval into that one.


Once loops are in place, tape the center closed.


Bulk up armature & limbs with tape, paper, foil, etc., leave joints loose for movement in the piece.


Wrap armature and limbs with clay leaving the joints free to dangle as done in the previous step, this is crucial.


At this stage where the limbs and head has dried, I begin to work on the face. Work in layers as you would do with anything else, sculpting and allowing it to dry before sanding the piece down for smoothness.  When you are satisfied with the face, paint the piece wit acrylics and seal to prevent from chipping.


Here I just glued some lambswool onto the dolls head with the Aleene's tacky glue.


Above are just a few photos of my posable doll. I hope you all have fun making these as I did!


Thank you all once again for stopping by, and I hope that you enjoyed today's tutorial! You can find Creative Paperclay® at the following retailers Creative Paperclay® Online Store, Michael'sAmazon, Joann's.

See more of my work at Melandolly.com and be sure to catch updates on my Instagram page


Thursday, December 12, 2019

Paddy O'Malley the Christmas Mouse

It's Second Friday and time for another tutorial.  Sharing some tips and tricks.  

Paddy O'Malley the Christmas Mouse is ready to make an appearance this Christmas.  He loves to help out with the decorations.  


SUPPLY LIST:
Creative Paperclay®
Paper Mache' box or wood box for drum
Acrylics paints
assorted paint brushes
basic clay tools  
tinsel
small ornaments
18 gauge wire
tin foil
masking tape
glue
small wooden skewers 
small bowl of water
2" and 4" foam ball
fine grit sandpaper

Follow this link for a video of the sculpting process and well as the still pictures below with text.  


I started by painting the box to look like a drum and decided where I wanted the mouse to stand and poked a couple of holes in the top to secure the legs.  The larger ball is the body, with 2 wooded skewers as the legs.  

18 gauge wire passed through the body where you would imagine shoulders to be.  Another skewer placed where the neck would be and the smaller foam ball placed on top as the head.  Adjust to where you like it.  


I work on the body and head separately in the beginning.   Here I have covered the body in  Creative Paperclay® and while it drys I'm working on the eye sockets of the head.  just pressing a ball tool in the foam or use your thumbs.  

making small loops for ears and pressing them into the foam.  Kinda Mickey Mouse ears.   Cover with masking tape and then clay.  


I cover foam with masking tape because there is less cracking of the clay as it dries.  I find the foam absorbs the moisture quickly and causes the clay to have more cracks, thus more repair work to do.  

Start adding clay to the bottom of the skewer and add little fun toes.  


Roll out some clay and start to construct a santa like coat.  I made three separate pieces.  One across the back and one for the right and left side of the jacket front.  At the bottom I used a straight tool to add texture.  Making is look like fur lining.  


While the jacket dries I move on the the head.  This takes some time and everyone will have a different look.  Just have fun with it.  

Adding that tin foil to the arm wire.  This adds strength and gives the clay something to hang on to.  Pose the arms the way you like.  I knew I wanted him holding the garland, so I made sure I had the arms arranged in a way that it looked natural.  


Cover the arms with clay, add texture and seams.  


Finally he will need a nice fur collar.  So add a snake of clay to circle the neck area and add the texture.  

Add a hat if you want. I created a tin foil hat and covered int he same fashion as the jacket adding the fur around the base.  

And you're done!   Let him dry before sanding and painting.  Spruce up the drum by adding your design.  

I hope you enjoyed this tutorial.  You can see other things I create by visiting my various social media sites and my Etsy store and website.  If you have questions you can always shoot me an email.  


Contact: Susiewhc@gmail.com
Facebook and Instagram search @artbysusiek
https://artbysusiek.com Here you can sign up for my Creative Breakfast Club
www.artbysusiek.etsy.com
https://www.pinterest.com/susiewhc/


]


Wednesday, December 11, 2019

Holiday Fun with Delight Air Dry and Creative PaperClay

Anyone who follows my blog posts knows that I am an Art Teacher to ages PreK-8th grade.  the students LOVE when I pull out the clay for a project!  For today's blog post I will highlight some mixed media art projects that can be created with a variety of ages.  Of course, any of the projects could be amped up by older children and adults, but I don't think there is anything better than appreciating the talent of youngsters.

First up, Day of the Dead Shrines that I created with my 8th graders.  This project took 3-4 weeks (1hr class periods) to complete.
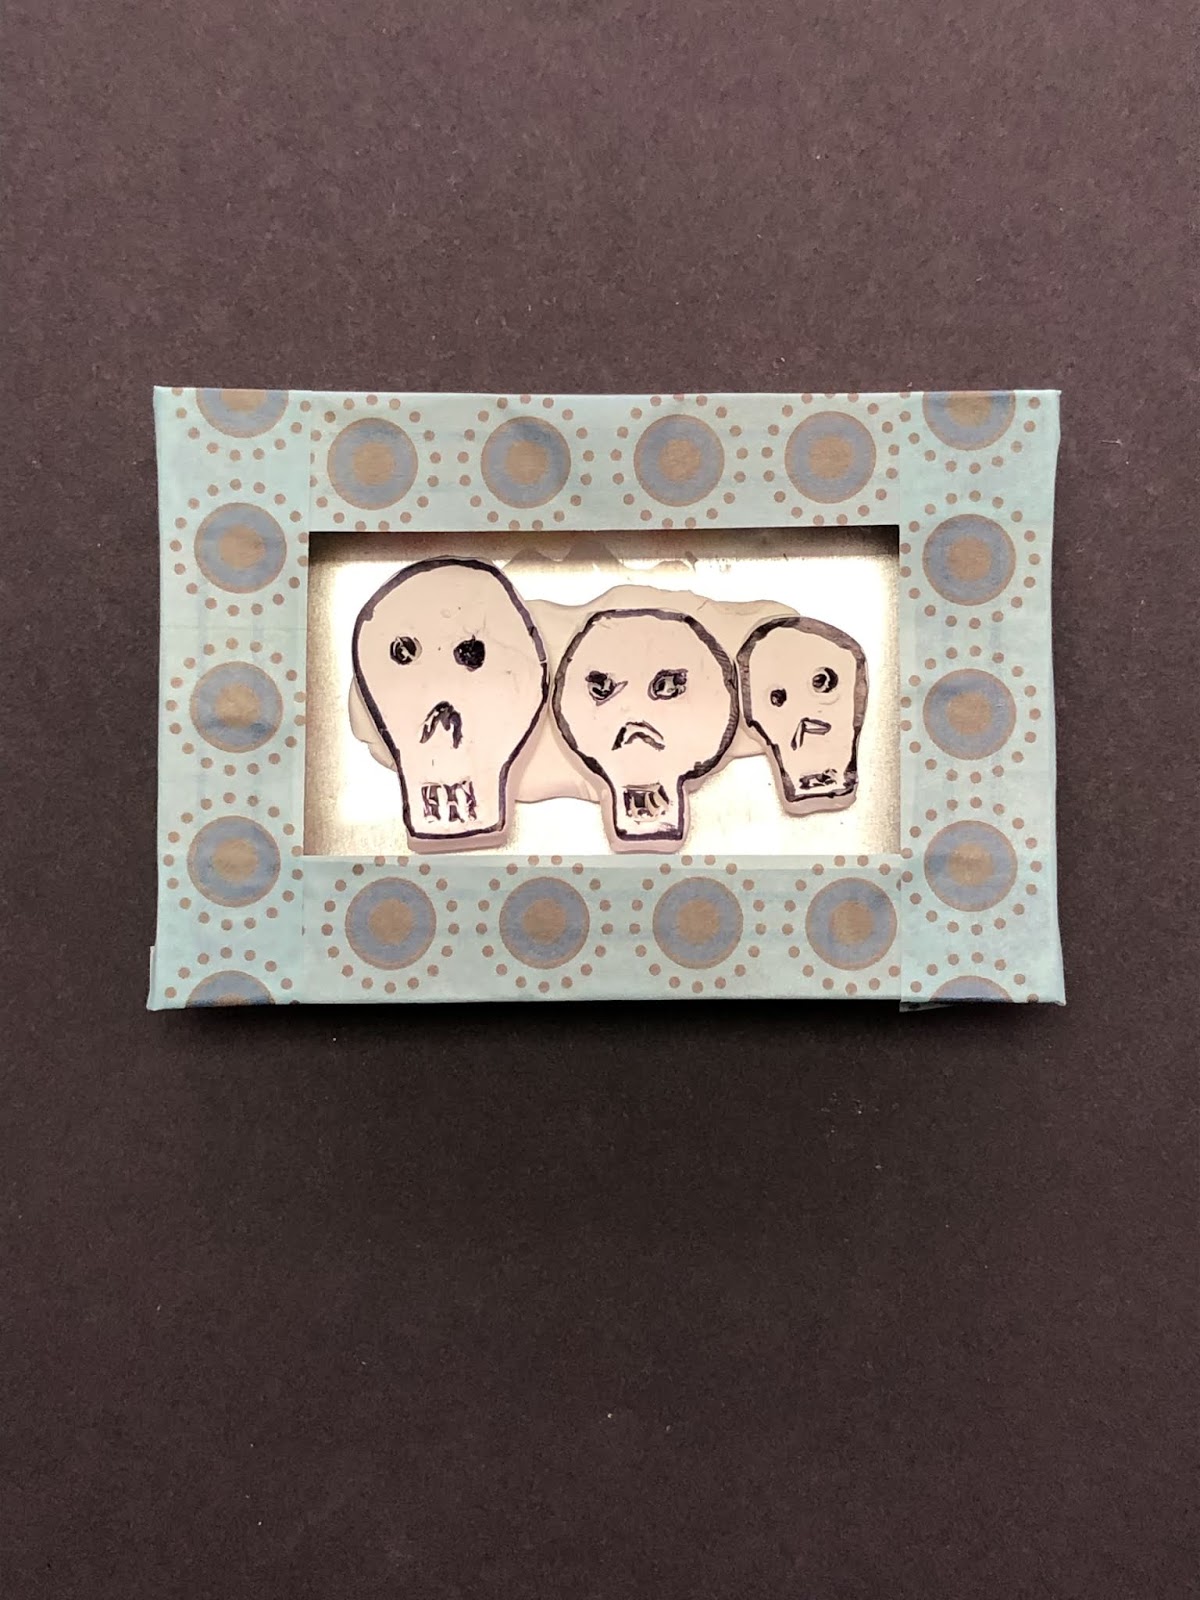
Class 1: Students began the project by creating a box bottom (with tabs) from thin cardboard (cereal box, breakfast bar box, etc.).  An Altoid tin was used for sizing.  Once the base was completed, decorating the inside of the shrine began.  Students used scrapbook paper, recycled book pages, washi tape, and other materials to decorate the inside and give the figure an interesting backdrop.
Class 2: Delight Air Dry day!  Students were given the same amount of Delight Air Dry Modeling Compound to create the figures for their shrines.  They were shown how to dab the surface with watercolor markers and mix the color into the clay to add color where desired.  Many of the students left the clay white since they were creating skeletons, but look closely at the projects and you will see color details (a rose, a hat, a bow, etc.).  I have only chosen a few examples to share.  Other details (eyes, facial details, mustaches) were added to the figures with ultrafine Sharpie after the pieces dried. 
The figures were set aside to dry until the next class period.  Then students continued work on bases and began creating the lid (or top) of the shrines with any remaining class time.
Class 3:  Students completed the shrines: Finetuning the details, gluing figures in place, gluing the lid onto the tabs, and adding glitter glue details (is there anything better than bling?!).  I was thrilled with the results and all of the students seemed pleased.  


I lied...had to share all of them 😉


Is there any wonder why I couldn't share just a few??  I love the humor that many students added to individual shrines (please notice that even Star wars made an appearance).

Next up, my 6th graders created Nativity scenes featuring the Holy Family.  These students completed the project in three 45 minute class periods.  They began by painting canvases using watercolors.  Once complete, we sprinkled salt onto the wet canvas and set them aside to dry until the next class.  Next class, they were given Delight Air Dry clay and directions for adding color (just like the 8th graders).  With that, they were off and running!
 

I forgot to mention that some of the students added "sand paint" to the bottom of the canvases.  What is sand paint?  Literally, sand mixed into the paint.  Students used a popsicle stick to spread it onto the bottom of their canvases to give added dimensional detail to the finished pieces.
The final touches came in the 3rd class as students completed the scenes, glued figures to the canvas, and added glitter glue star details (you knew the bling had to creep in somehow).


Final class to share: My Kindergarteners
For the Kindergarten project, we took four 35 minute class periods to complete!  In the first class, they created value paintings using white and one other color of their choosing.  We had blue, black, purple, and red skies!  Value painting started with the students painting a white moon somewhere towards the top of the canvas.  Then the brush was dipped into the darker paint and mixed into the white before painting around the moon.  The step was repeated until the whole canvas was completely painted.  As you can imagine, some got it while others just enjoyed the process of painting.
Class #2, the students were given popsicle sticks to color and glue in place to form a stable.  I love kindergarten technicolor stables!  Not a brown wood stable anywhere to be found.
Class #3, the kindergarteners were given Creative PaperClay.  I chose Creative PaperClay for them because I thought mixing colors into the delight would end up with "mud" rather than individual colors.  It also allowed focus on fine-motor skills of rolling, shaping, and squashing.  Pieces were left in place on the canvases to dry.
Class #4, the dried figures were taken off the canvases to paint and then glued back in place.  Of course, glitter glue stars were added.


I hope you have enjoyed seeing my talented students at work and learning that these amazing products (Delight Air Dry Modeling Compound and Creative PaperClay) are perfect for use in the classroom setting.