Friday, June 28, 2019

How to Create a Hanging Set of Earrings


Hello everyone! My name is Cinnamon Willis and I am going to walk you through the steps on how I created this set of earrings.

Supplies:
Creative Paperclay®
Parchment paper
Earring fish hooks
Sand paper
Acrylic paint
Sealer, Varnish

I had these lovely round earrings and after loosing one, I have found it hard to find a similar replacement. I decided to use this one as a guide to help me get the right shape for the earrings that I planned on making. 


I start out by rolling out the parchment paper and flattening out the clay over it.  You can use a rolling pin here to flatten out the clay but I used a metal scraper since I had one lying around.


When the clay was flat enough, I pressed the earring into it and traced the shape with the end of the scrapper. 


After getting the shape right for the earrings, I poked a hole where I want the hook to go before the clay dried.


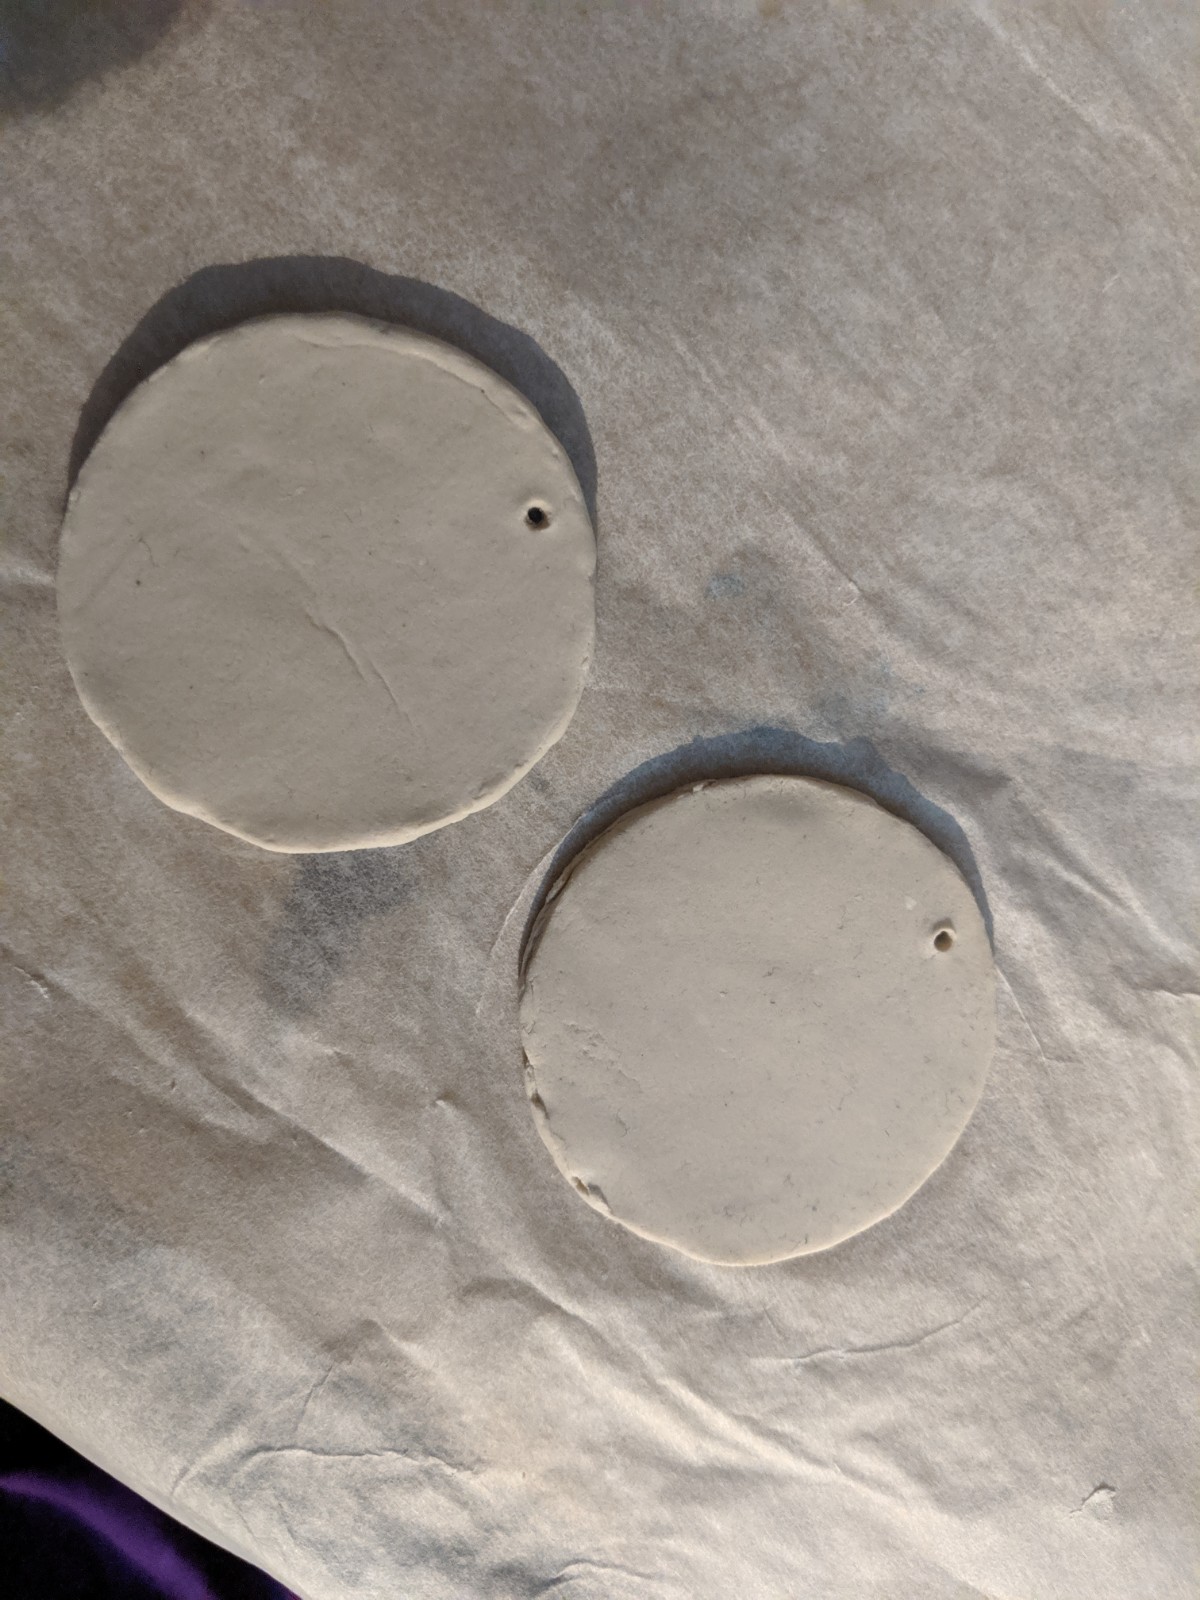
Set the earrings aside to dry but put a book or something with a little bit of weight on top to prevent them from warping during the drying process.


When the earrings dry,  sand them down to the smoothness that you would like them to be.


Use acrylic paint to color the earrings to whatever color you would like. Spray them with a varnish to prevent paint from chipping.


Take the fish hooks and attach them to the holes that was previously made in the earring.


Now these lovely earrings are ready to wear!


Thank you all once again for stopping by, and I hope that you enjoyed today's tutorial! You can find Creative Paperclay® at the following retailers Creative Paperclay® Online Store, Michael'sAmazon, Joann's.


See more of my work at Melandolly.com and be sure to catch updates on my Instagram page!


Monday, June 24, 2019

Making cute things with molds and Creative Paperclay


Every once in awhile you just need an article on products that work well with each other and that can be used in different ways. 

Supplies Needed for this Project:

Molds
Powder or cornstarch/makeup brush
Water and mild dish soap
clay tools
glue


I have a great many molds, including some that I've made myself which are not pictured. I have many more molds than those shown here. These are all silicone molds but I use plastic molds also. A great place to find molds for different holidays is at your local Dollar Store. They usually have Seasonal or Holiday silcone ice cube trays that are awesome to use with Creative Paperclay or Delight Clay, just don't fill them to the top. 

I used Delight Clay for these molds but in the future I will probably stick to the Creative Paperclay as opposed to the Delight Clay.


When using molds with my Creative Paperclay I dust the molds with baby powder but you can also use cornstarch. You can use many molds for making embellishments for mixed media pieces and even ones that are very thin for cards (or just don't fill your mold up completely). The leaves in the following picture are about an eighth of an inch thick.


Put Creative Paperclay into several molds at first and let them start drying around the edges before popping them out of the molds. I've found this works better than trying to pop them out all at once. Do the same with the Delight Clay that you use.

I recently saw life-sized busts of the Rock Star Group "Kiss" on the web that were made using Delight Clay that looked amazing and so life like!


This picture is of the Creative Paperclay & Delight Clay while it is still wet. The difference is noticeable.

This picture is of the Creative Paperclay & Delight Clay after it has dried. The difference between wet and dry can definitely be told on the Creative Paperclay but not at all on the Delight Clay .

Once your clay is dry you can paint it with acrylics or inks. I would use the same medium for both the clay and the item I'm putting it on. By popping your clay out of the mold while it's just dry around the edges, you can bend it to fit whatever you are placing it on. One thing I have found with gourds is that it will adhere nicely on it's own but I still don't trust it and use some glue also.

Clean up of the molds is very easy. Let them set in some water with mild dish soap for just a few minutes and just rub any leftover clay off the mold! You might want to use a fingernail brush to clean out any little, hard to get to spots.

I hope this article helps you to feel undaunted while using molds to create many embellishments. Some molds can be used for ornament making too.

So go on over to the Creative Paperclay website and pick you up some Creative Paperclay and Delight Clay or buy it from different retailers in your area.

Barbara

Wednesday, June 12, 2019

End of the School Year...A look back at the many ways Creative PaperClay can be used in the classroom

In my role as an Art Teacher (K-8th grade) I introduce my students to a variety of materials during the school year.  Nothing gets more excitement than when I pull out clay!  I am blessed to have a kiln in my classroom, but to be perfectly honest I prefer Air Dry clays and polymer clays for the ease of use.  My go-to airdry mediums are (of course) Creative PaperClay and Delight Air Dry ❤

Here are the many ways I have used Creative PaperClay and Delight Air Dry in my classroom this year:

4th grade used magazines to create recycled woven baskets.  Once complete we needed to create something to go into the baskets...eggs were the perfect choice!  Out came the Delight Air Dry clay.  The students loved that color can easily be mixed into the clay rather than colored on top...just dap the washable marker onto the clay and then mix in!  Easy peasy.  You can see from the photos no 2 eggs turned out exactly the same.


Next up: Jim Dine hearts
I created these with my 3rd graders.  We looked at many Jim Dine art pieces and talked about the colors, shapes, and designs.  They each created a background with tongue depressors focusing on color and pattern.  Next class we pulled out the clay.  I shared my example (bottom) and demoed how to mix color into the Delight Air Dry clay.  I encouraged them to make a variety of colors....a couple of students only processed "multiple colors" and added all the colors to the entire ball of clay.  Thankfully even "mud" can be gorgeous in the hands of a child (see far left photo).
NOTE:  This was a parent favorite ❤


Next up:  Easter Crosses
I teach art in a Catholic school so I am able to create religious pieces with students throughout the year.  For Easter, my 2nd graders used Creative PaperClay to create a cross or crucifix.  We talked about the thickness and how to best attach components to each other (a dab of water rubbed onto one piece and then the other attached was the favorite method).  I had a variety of texture sheets and texture tools for them to use.  ALL loved how easily the clay accepts texture.
For the background students could choose a wooden picture frame or a canvas.  Both were painted for the "perfect" backdrop.  For the frames, students chose a piece of wallpaper to cover the cardboard center.  Crosses were then glued into place.


Time for a Christmas project with my 1st graders.  We used Delight Air Dry for this project.  Again I demoed how to mix color into the clay rather than color on top.  I was WOWWED by what they accomplished!  Pieces dried in place, then were glued down with Elmer's school glue.  Heirloom project sure to be showcased year after year ❤


The final project of the year for my 6th graders featured Pop Art.  What better way to get POP than with clay??  The students used foam core, paint, and cardstock for bases.  Some created Benday dots using bubble wrap to print. The final step was to create lettering.  Some used cutters, but most free-formed letters to create a motion word.  Words dried in place and then were glued down (again with Elmer's school glue).  I think everyone can agree they all did an amazing job! 


I hope you have enjoyed this little walk through my year.  I look forward to introducing my students to more projects in the coming year using these fabulous products!