Friday, November 27, 2015

Tip Time

Hello, it's Ann from The Design Team and from Annmakes with a quick tip.  Did you know that Creative Paperclay® is very much like paper when it cures!  Well, if you make it thin it can be cut with scissors.


 I love doing this when working on a project, and then finishing off the piece to make it look like hard clay or marble, even metal.  You can use this Creative Paperclay® to achieve so many faux finishes.


So, back to the paper quality.  Not only can you cut Creative Paperclay® with scissors, or a craft knife, but you can also punch holes right through it with a regular hand held paper hole punch!  How neat is that?  Imagine all the possibilities.


In a previous post I talked about how you can color on Creative Paperclay® just like you can on paper. I have used many different mediums to color my projects from: colouring pencils,


crayons, pastels, paints, inks etc.


The properties of this awesome product are, well, awesome!  Once Creative Paperclay® dries it is so light weight and easy to alter into just about anything your heart desires.  Go on give it a try.
To see more of my other projects visit my blog at:  http://annmakes.blogspot.com.

Thanks for stopping by.

Thursday, November 26, 2015

Fun with Texture and Delight


I like being prepared and one way I do it is to create 4" x 4" masonite boards with different textures. I do these when I have a break in time and I am not working on a specific project. These are texture ideas for future pieces of art.

SUPPLIES
masonite boards
Delight (or Paperclay)
found objects
texture rollers


I used a textured roller to achieve this alligator skin look. When the Delight was hardened, I applied a metallic bronze paint to the surface. When that had dried, I rubbed a green metallic rub. I felt in love with this sample.


When through my kitchen drawers and found this silicone hot pad that I thought would make a great texture.
I started by stamping the Delight with a stain of light brown then did a wash of silver when the brown had dried.


A scrap of lace also made a great texture on the Delight. This had a wash of red oxide paint on it.


I used a volcanic rock from my yard to get this real natural moonscape type texture on the Delight. When it hardened I painted it grey then did a wash of bronze. I dripped alcohol on it while it was wet.


Years ago I picked up some laser cut plexiglas that I use with spray paint and decided to try it with the Delight. I applied red oxide paint then did a blue metallic rub when it had dried.


Reticulated metal also makes a great for Delight or Paperclay. Multiple washes were applied.

So get out your textures and have fun.

Dream in Color and have fun!

Darlene Olivia McElroy


Saturday, November 21, 2015

The Dangling Snowman


The Dangling Snowman
Tutorial
By
ImagiMeri's Creations


Hello there, this is Meri of ImagiMeri's Creations with another fun tutorial for you.  I wanted to do a video, but I've been sick with bronchitis and sinusitis and have lost my voice.  Please pardon my crude images, too.  Anyhoo, I hope you enjoy this tutorial and I look forward to comments and questions.

The Dangling Snowman
Here's your list of supplies;
1. Creative PaperClay
2. 18"X 2.5" piece of fabric for scarf
3. 2" styrofoam ball
4. 2.5" styrofoam ball
5. 3" styrofoam ball
6. 16" piece of wire, either 20 or 22 gauge
7. 4"piece of wire, either 20 or 22 gauge
8. 5"piece of wire, either 20 or 22 gauge
9. 6"piece of wire, either 20 or 22 gauge
10. Wire cutters
11. Round nose wire pliers for creating loops in wire
12. Clay roller
13. Oven set to 230 degrees Fahrenheit
OPTIONAL:
Rubber stamps for creating texture
Bamboo skewer
Acrylic paints
Gilding paste
Glitter
Sandpaper
Shaping tool or knife


Fig 1. some of the supplies, Fig 2. starting with the smallest
piece of wire (4") create a loop on one end.
Fig 3. insert 4" wire through the smallest styrofoam ball
(2").  Fig 4. leave space between loops and styrofoam ball
for 1/8" thickness of clay, and create second loop on
opposite end.
Fig 5. Proceed  with steps 3-4 for remaining styrofoam balls.
Fig 6. You can now roll out your clay to the 1/8" thickness
for covering the styrofoam balls.
Fig 7. Apply a uniform layer of 1/8" clay over each
styrofoam ball.  Fig 8. here all the balls are covered.
Fig 9. Insert a bamboo skewer or other tool for the hole,
which will house the "arm" wire (16"), through the middle
size clay covered ball (2.5")
Fig 10. continue pushing skewer all the way through.
Fig 11. This step is totally optional.  I used rubber stamps
to create texture on the surface of each clay covered ball.
Fig 12. Closeup of texture.
You can now place your clay covered balls in the
230 F oven for about one hour.  Remove from oven and move
on to step 13.
Fig 13 & 14. Take fabric, with right sides together, and
sew a 1/4" seam down the length, leaving ends open.
Turn fabric inside out and iron flat.  Take a sharp knife
blade and "scratch" at the ends to fray them.You may also
just cut a piece of felt into a length for a scarf.
Fig 15. Using small balls of clay, create carrot nose and
eyes, and mouth.  Attached balls together to create the
dangling snowman. Fig 16. Insert (16") wire through the
hole you created for arms.  Bend ends of wire into branch
shapes or hands (use your imagination).  Re-cook
your snowman for about one half hour to set the nose
and face features.
When done cooking you can then move onto painting
and decorating your snowman.  I first covered him
in a layer of gesso, then painted him white.  I painted
the facial features and then I applied silver gilders
paste all over for a highlight.  I wrapped his scarf
around his neck a few times and tacked it in place
with a needle and thread and a jingle bell.  I also
added glitter highlights all over.  With the bottom
wire loop you can either add something to dangle
or bend over the loop so it doesn't show.  I then
created a wire hook to hang him from.
The snowman is now complete and can be hung
on a tree or elsewhere in your house for a primitive
look for your Holiday decor.

If you have questions, please contact me at 
meriw@cox.net.  You may also leave a comment
question and I'll answer as soon as possible.
I hope you enjoyed this little tutorial
and may you all have a lovely Thanksgiving!

Hugs,
Meri

Friday, November 20, 2015

Altered Altoid Tin with Creative Paperclay® Figures

I'm having great fun altering tins—sardine cans, Altoid tins, etc. Creative Paperclay® is perfect for making the figurines that I include in them.

To begin I used pliers to gently open the hinges so I could remove the lid. Next, I spray painted the outsides of both the lid and bottom of the tin.

While the paint was drying, I created the snowman and tree using Creative Paperclay. The snowman is two small balls of clay with a wire support holding the head and body together.
Beginnings of a snowman
Wire support between head and body
To make the snowman's smile I cut away part of a soda straw, leaving just the right sized curve to press into the damp clay to leave the impression of a smile.

His hat was made in two pieces—a small flat circle and an egg-shaped pieces that I scored for the crease in the top of the hat. Looks a bit like a coffee bean, doesn't it? I attached the hat after is was dry and painted.
.

The tree was made by forming a cone of clay. Then, starting at the top of the cone and working round and round, use the tips of a pair of small, sharp scissors to make a series of snips. Gently lift these "branches" to form the tree.

Cone for tree
Newly formed tree
While the clay pieces were drying, I coated the inside of the lid and bottom of  the tin with Duo Adhesive and mica flakes. On the inside of the lid and outside cover of the tin, I added Christmas prints using double-sided adhesive along with embellishments. I cut the lamppost that is behind the snowman on my Zing electronic cutter.

Cover of the altered tin
Lamppost
Here's a close up of the snowman and tree—already for a Christmas display.


Carole

Thursday, November 19, 2015

It's Beginning To Look A Lot Like Christmas...Crafting!

I awoke this morning with a start!  I am an Art teacher 3 days a week and it suddenly hit me that I have only 3 weeks MAX to start to finish Christmas projects with each of my classes (K-8th grade).  I know how much the kids like working of any sort, so I pulled out my Creative PaperClay to experiment.  The project is super easy and the results eye catching.  Let's get started.

Materials:
1 package Creative PaperClay
rolling pin or acrylic roller (or pasta machine set to thickest setting)
mesh baggie
bamboo skewer
star cutter set (shown: Ateco)
wooden spool beads (Indus Trading Co.)
small clay pot
Optional:  paint, glitter, glue

Procedure:
1) Remove clay from package.  Flatten with chosen tool (rolling pin, acrylic roller, or pasta machine).  Place flattened clay on work surface.
2)  Use cutters to cut 2 of each size except for the smallest...cut only 1 of that size.  Use a finger to smooth the edges of each star.
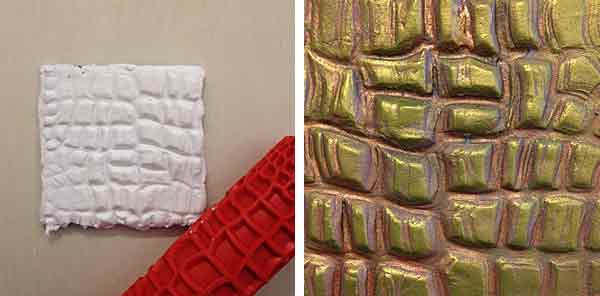
3)  Lay mesh baggie over each star and press.
Mesh will leave behind an interesting texture.
4)  Lightly stack the stars beginning with the largest and finishing with the next to smallest.
Press the end of bamboo skewer into the center to create a hole in each layer.  Remove skewer and unstack stars to dry.  Place smallest star on the pointed end of the skewer to dry.
NOTE:  Stars can dry overnight or (for those of you who know me well) placed into a 275 degree oven for about 30 minutes.
5)  Once dry (or cooled), glue the small star to pointed end of bamboo skewer.  Then add stars 2 at a time, sliding a wooden spool in between sizes.  Continue until all of the stars have been placed on skewer.  Add one last wooden spool.
6)  Press any remaining clay from the package into the clay pot.
Turn clay pot upsidedown.  Press skewer with tree through hole in top.

OPTIONAL TOUCH #1:  Paint tree and spools as desired.  Pot can be decorated with paint, permenant marker, or ribbon trim.

OPTIONAL TOUCH #2:  Drill small holes at the tips of each star and hang small ornaments (must be lightweight).  Display your tree on top of a mirror in the center of a table...GOR-GE-OUS!

For my students I think that I will adapt the tutorial to use smaller staggered stars and string on pipe cleaners instead of the bamboo skewer.  It will help the clay to go a bit farther in my classroom (up to 36 students per class) and leave me counter space for other projects :-)


Tuesday, November 17, 2015

Joining Clay Pieces - Tori's Tip for November

This month I'm going to share a tip with you for making the perfect invisible seam when you need to join two pieces of clay together.  This comes in handy when you are covering an object (as I'll be doing for next month's project ;) ) or trying to make a smooth finish with rolled out clay.


Here are the two pieces of clay to be joined - overlap them where you want the seam

Cut at an angle through both pieces of clay

Remove the extra pieces of clay from each side
dip finger or brush in water and dampen the edges to be joined

Gently press the two sides back together and smooth the seam
by rubbing back and forth with a damp finger.


Thanks for joining me here again, and I'll see you next month!


I'd love for you to join me for more projects & art adventures on my personal blog
Find me on Facebook, or peruse & ponder pics with me on Pinterest