Friday, May 27, 2022

How to Create a Ring Holder


Hello everyone! My name is Cinnamon Willis and I am going to show you how I created this ring holder!


Supplies:

Creative Paperclay®
Plier
Wire
Masking Tape
Sanding paper
Protective varnish or clear coat covering


First start off with shaping your wire with the pliers to get your armature started. I worked with a wire that was about 24 inches long so that I could twist and shape my armature without having to add more wire. I shaped the head and the arm first and then worked my way down to the base. Make sure that your rings/earrings will be able to fit over the head and arm


I took the remaining wire and shaped it into a circle at the bottom of the figure that I created. Once I was happy with the shapes, I covered them with masking tape


Once you have completely covered the armature with masking tape, begin adding clay on top of the tape. When you have a good amount of clay on the figure, set the piece aside so that it could dry before adding another layer of clay.


This is the first layer of clay that has dried, it is ready for another layer to further define the shape of the piece.
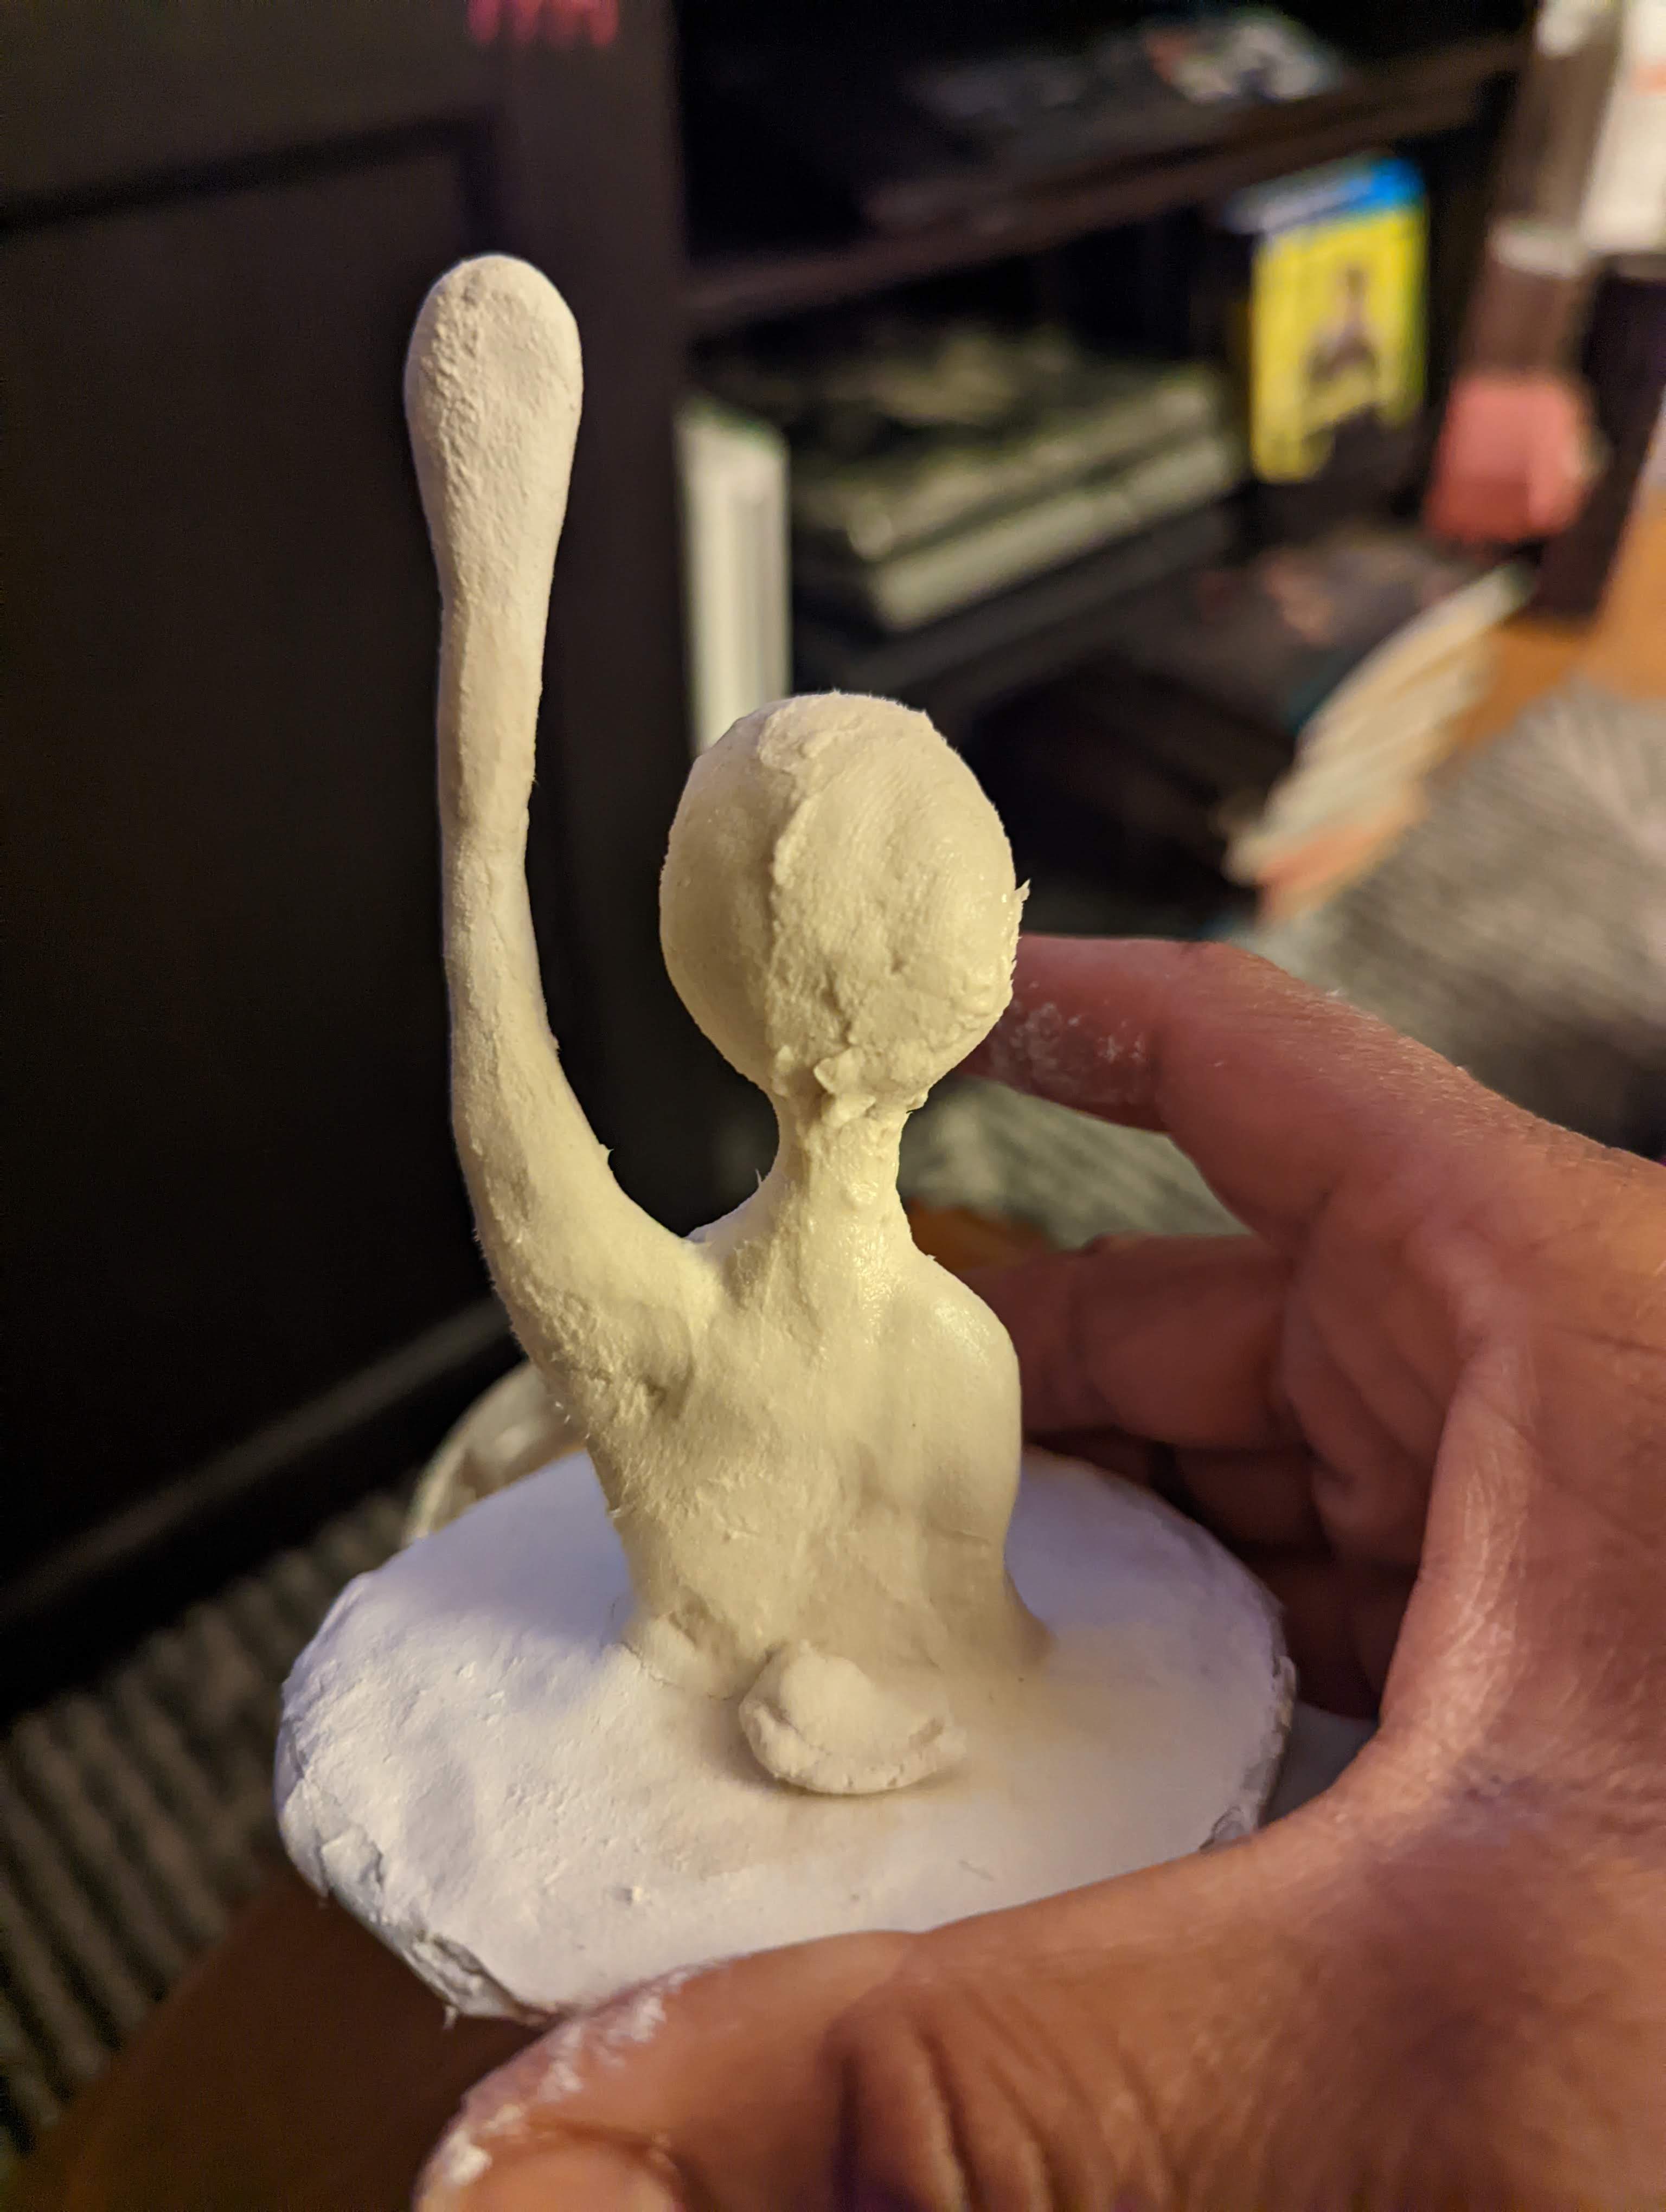


I am working up the shape with another layer of clay. This is the stage that you want to try to narrow down the shape of your piece. 


I am happy with how he is turning out. I used crystal clear to give it a layer of protection.


I was able to put my rings and hoop earrings over the head!.

Thank you all once again for stopping by, and I hope that you enjoyed today's tutorial! You can find Creative Paperclay® at the following retailers Creative Paperclay® Online Store, Michael's, Amazon, Joann's.

See more of my work at Melandolly.com, catch updates on 

my Instagram page and here is a link to my shop!


Friday, May 13, 2022

Make a Little Sunshine by R Michael Palan


Make a Little Sunshine

WHAT YOU WILL NEED
Pencil
Marker
Compass
Paper
Paint
Cardboard
Glue
Gesso
Ruler
Xacto knife
2.5" Styrofoam ball 


Use compass and pencil to draw a 2.5" circle. Then 
draw a 5" circle out side the smaller circle.
You will use this paper to create a stencil
to cut out sun rays on your cardboard.


Cut circle out of paper and fold in half four times.
This will divide the circle to help you create
your sun rays. 


Open folded circle. Use folds as guide and draw rays 
using a pencil and ruler. Cut paper rays and
use as stencil to draw rays on cardboard.


Cut rays out of two pieces of cardboard. Glue together.
Cover back rays with Creative Paperclay.
Glue styrofoam ball on top of cardboard rays.
Add center marks with marker and position eyes.
Push thumbs into styrofoam ball for eyes.
Cover everything with Creative Paperclay.
I let everything dry between each step.
It makes working a lot easier.


Lay a strip of Creative Paperclay on front rays.
Use thumb and index finger to create pointed edge.


Symmetry is important when making a face.
This face is far from perfect. 
The eye is a ball of Paperclay blended into
the space I pressed into the styrofoam. I pushed
a pencil into it to create the iris. Add a 
strip of Paperclay below and above for eyelids.
Nose is a strip that extends away
from the face with a round ball of clay on either side.
Add cheeks, lips, chin and eyebrow.
I let everything dry between steps.


Finish face and coat with gesso.


I gave this two coats of terre cotta paint.


I lightened the terre cotta paint with yellow and tan
to add some highlights. I then glued the sun to a
stick on put it in a house plant. You can add a
hook to the back and hang it on the wall also.


Have Fun with Your Project
🌻R Michel Palan


Monday, May 2, 2022

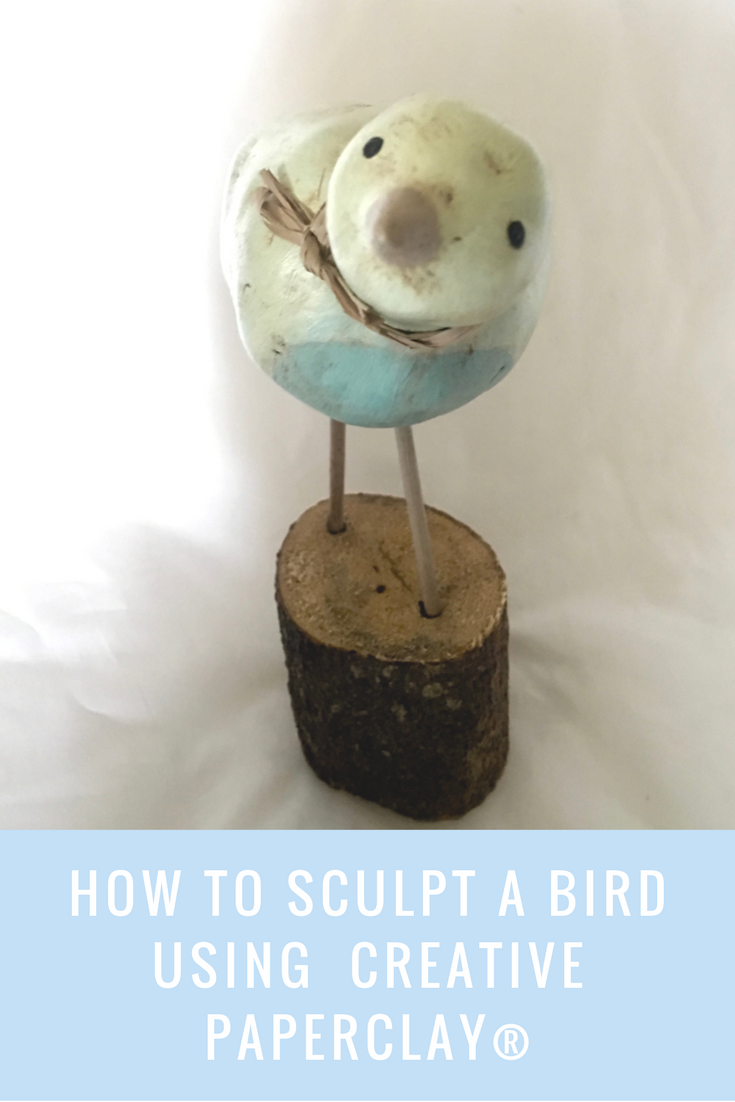
A Beautiful Bird for Spring

 Hello fellow artist! Today I am sharing a tutorial I did years ago; the most popular video on my YouTube channel. 😀


Isn't it just adorable? It is a simple project that just looks amazing!

The supplies used in this project are:

White Glue
Toothpick
Acrylic paints
A base of bird to be attached to. I used a piece of a branch.
2  1/4” dowels or chopsticks
Varnish
Raffia (optional)
Sculpting tools
Water
Paintbrushes


Follow along in the video below:


You can share your creations with us on our Facebook page. We would love to see them! For more inspiration have a look around the blog. There are tutorials for many levels using Creative Paperclay®. You can also visit my blog Paper Mache Patch.


You can find Creative Paperclay® online at Creative Paperclay Co and also at Michaels, Hobby Lobby, Dickblick and Amazon. 


Thanks for stopping by!


Suzette


Blog/website: https://www.papermachepatch.com

Instagram: https://www.instagram.com/papermachepatch/

Pinterest: https://www.pinterest.com/suzettehussey/

YouTube: https://www.youtube.com/c/PaperMachePatch

Skillshare: https://skl.sh/2QyIn93


Friday, April 22, 2022

How to create a Cute Original Character out of Paperclay


Hello everyone! My name is Cinnamon Willis and I am going to show you how I created this character!


Supplies:

Creative Paperclay®
Skewer
Pencil
Plastic knife or flat clay tool
Acrylic paint
Sanding paper
Protective varnish or clear coat covering


Start by shaping your clay into rectangular shapes. Use a plastic knife if you need to get clean flat edges.


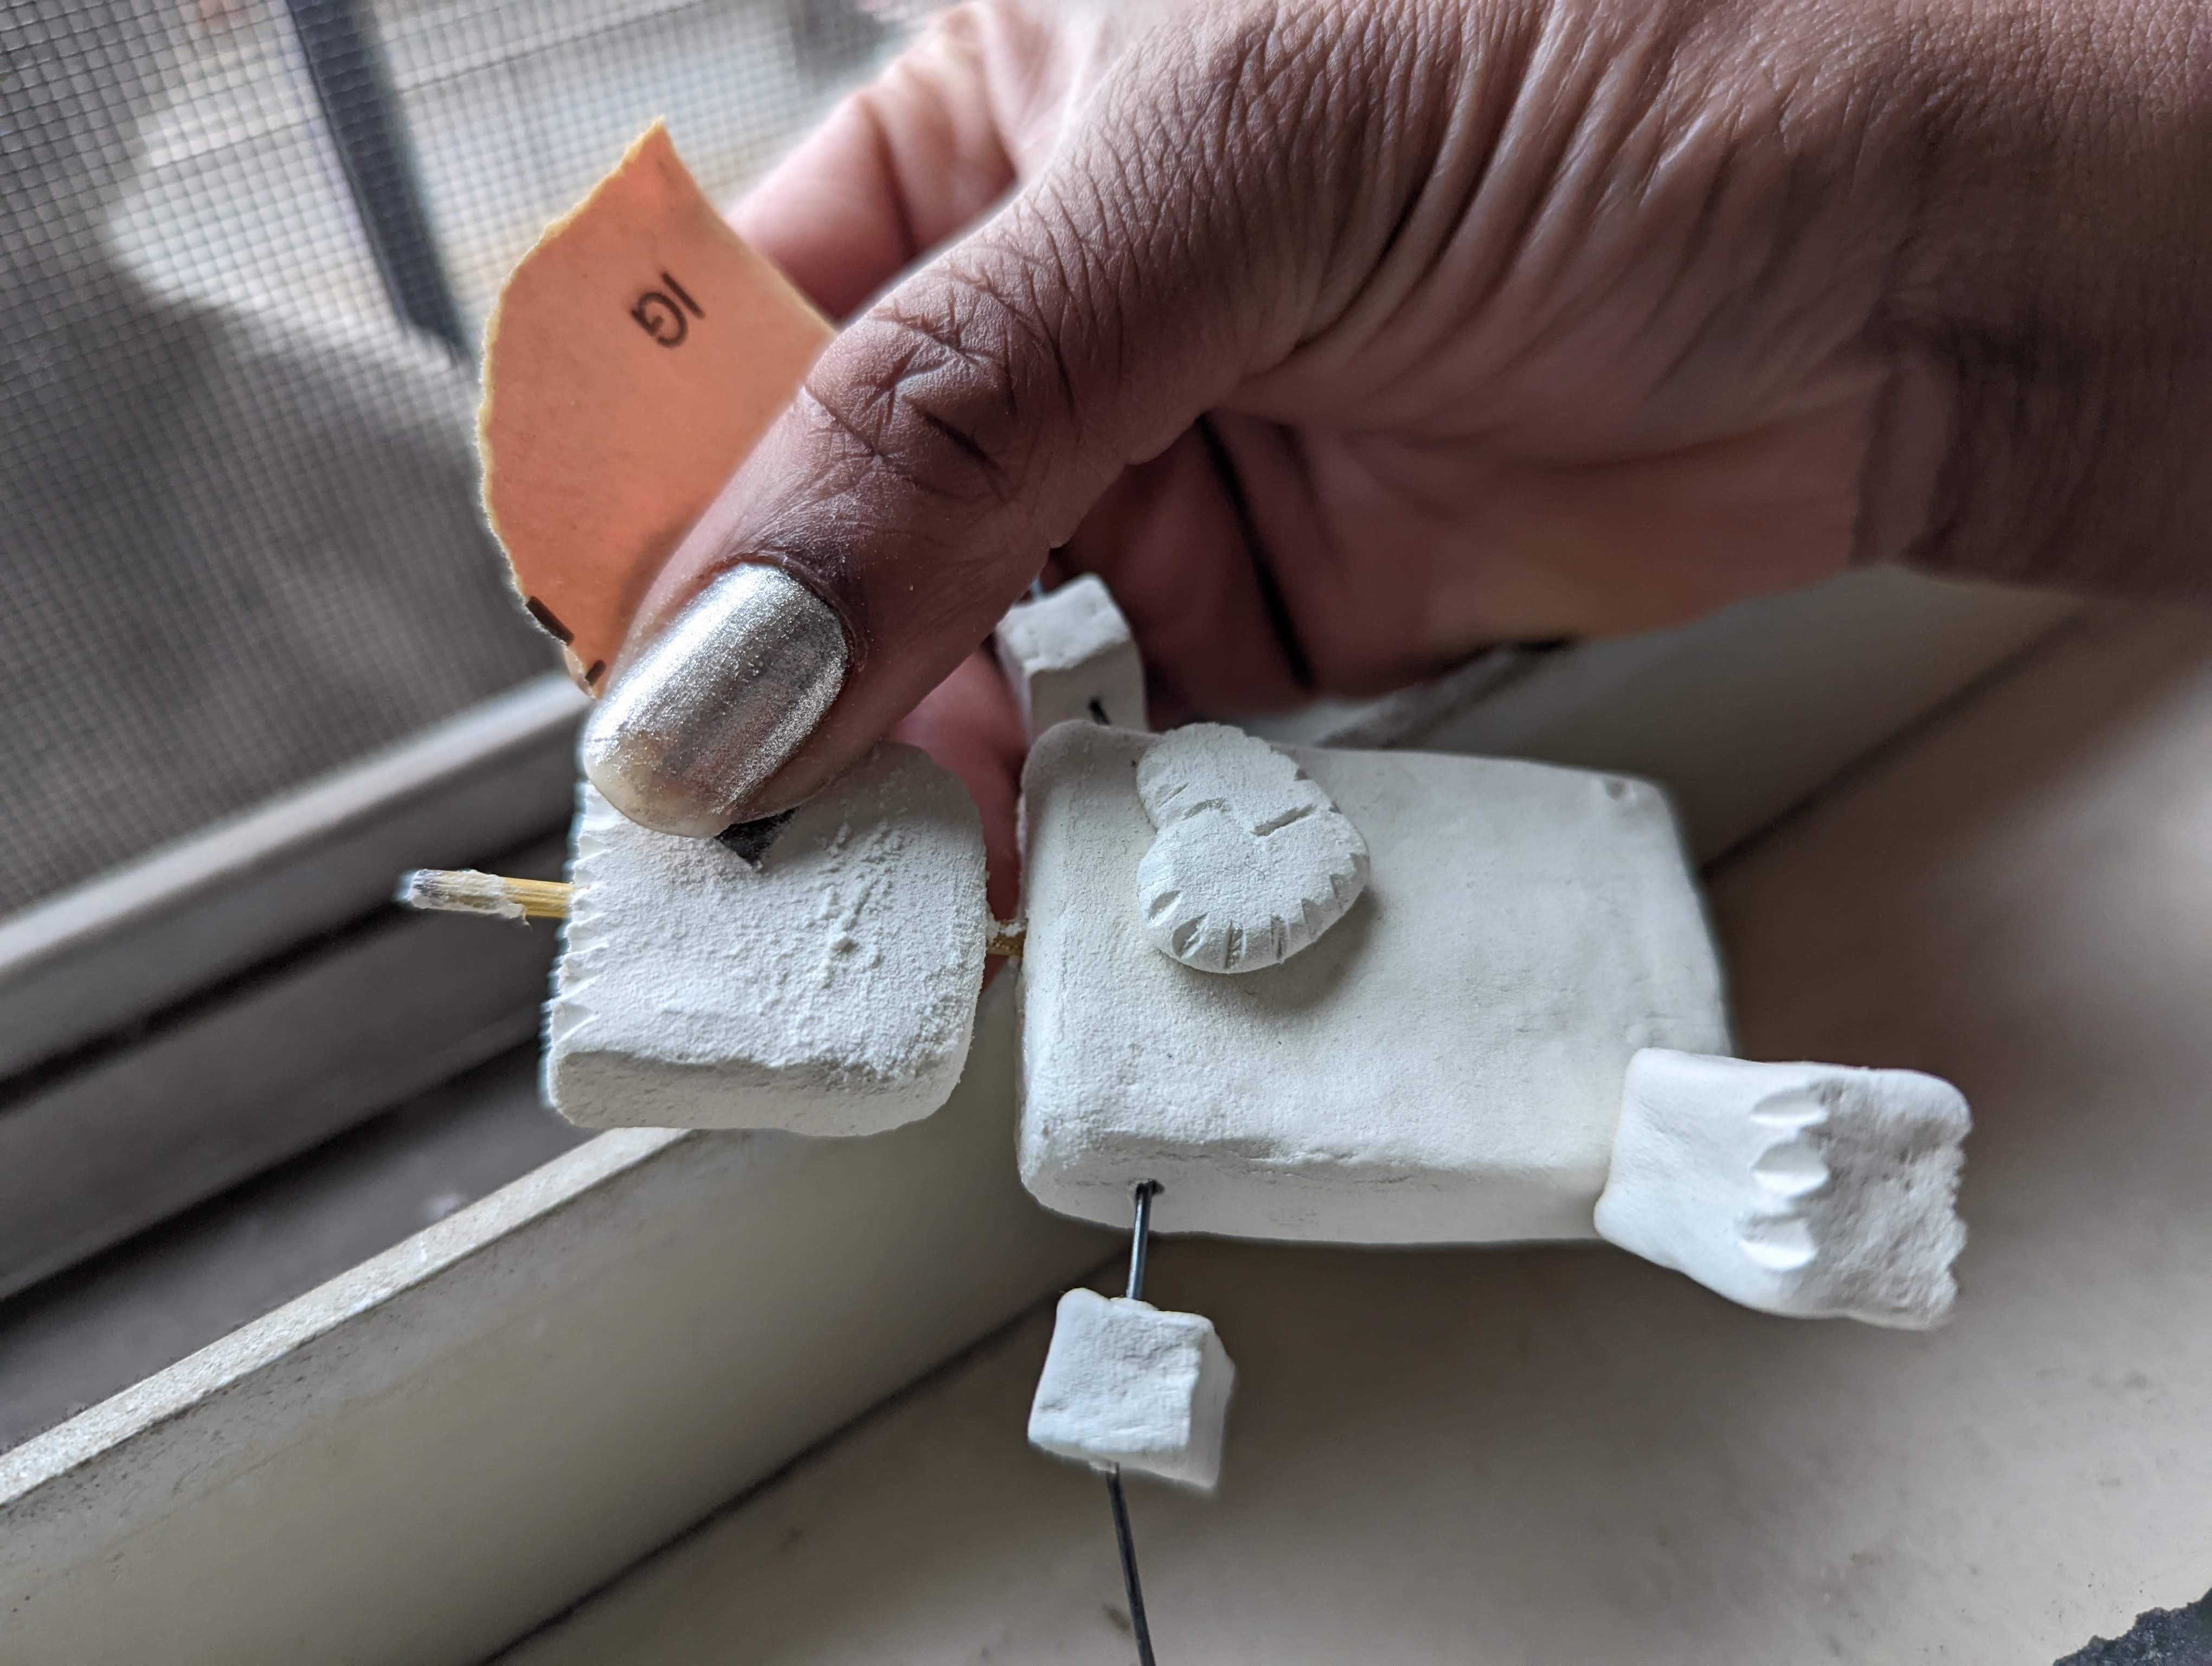
When you are happy with the shapes that you created for the head and torso take a skewer and push it through the center of the two as in the first photo. 


Take your skewer and run it through the parts where you plan to connect your limbs. When you are happy with where the limbs will connect, take your piece and set it aside to dry.


I am creating a heart to attach to the character. Take some water and dab it on to the torso to help attach the new piece to it.


After setting the piece to dry, I am cutting into the pieces of the character that I want to carve out. I want him to almost look like a paper lunch bag came to life.


Take your sandpaper and smooth out the pieces that you would like to have smooth. If you have a piece of the skewer sticking out from the top, you can cut it with a pair of pliers.


I decided to use buttons for eyes. I put thread in the middle so that they look like they belong on the clothes


I am painting some of my pieces with acrylic paint. Be sure to use your sealant.


I am using some probond advance glue to glue the eyes on. I also use it to glue the wire for the joints in place.


And here he is all done! Don't forget to seal your work with protective varnish! 


Thank you all once again for stopping by, and I hope that you enjoyed today's tutorial! You can find Creative Paperclay® at the following retailers Creative Paperclay® Online Store, Michael's, Amazon, Joann's.


See more of my work at Melandolly.com, catch updates on 

my Instagram page and here is a link to my shop!


Thursday, April 21, 2022

Bushel of Mushrooms

 Let's make some fun oversized mushrooms!


I've been drawing and sculpting mushrooms since elementary school in the good ole 70's, and since my mom never throws anything away, I can share my lil' shroomy with you today🍄


 But let's get to the reason you came here.  I've created a little video that goes super-fast.  I am working on a better way to record on my app to be able to offer a better quality video.  


Supplies: Creative Paperclay® sturdy cardboard tube (mine is from a used roll of foil) paper bag or paper foil glue scrap fabric/lace heavy thread and needle basic clay working tools paint brushes acrylic paints Creative Paperclay® https://paperclay.com/ can also be found at Michael's and Joann Fabrics


I hope you enjoyed this tutorial.  If you have any questions you can leave a comment below, find me in Creative Paperclay® Q & A Facebook group as well as my email ArtbysusieK@gmail.com


𝗜 𝗶𝗻𝘃𝗶𝘁𝗲 𝘆𝗼𝘂 𝘁𝗼 𝗺𝘆 𝗼𝘁𝗵𝗲𝗿 𝗮𝗿𝘁 𝘀𝗽𝗮𝗰𝗲𝘀 on Facebook and Instagram:

* @𝗮𝗿𝘁𝗯𝘆𝘀𝘂𝘀𝗶𝗲𝗸 𝐹𝑜𝓇 𝒫𝑒𝒸𝓊𝓁𝒾𝒶𝓇 𝒶𝓃𝒹 𝐻𝒶𝓁𝓁𝑜𝓌𝑒𝑒𝓃

* @𝗪𝗶𝗹𝗹𝗼𝘄𝗛𝗼𝗹𝗹𝗼𝘄𝗪𝗼𝗼𝗱𝘀   𝒻𝑜𝓇 𝐸𝒶𝓇𝓉𝒽𝓎 𝒞𝒽𝒶𝓇𝒶𝒸𝓉𝑒𝓇𝓈 𝒶𝓃𝒹 𝑀𝒶𝑔𝒾𝒸𝓀


Friday, April 15, 2022

Make your own Gnome Tree House

🍄 GNOME TREE HOUSE 🍄


WHAT YOU WILL NEED

Cardboard Paper Towel Tube
Corrugated Cardboard
Toothpicks
Glue
Xacto knife
Thin Slices of Styrofoam
Block of Styrofoam for Base
Dowel or Straw for Chimney
Paint / Brush / Water


Always keep the area wet when you are adding Paperclay to dry Paperclay.

I sand off rough spots as I go. You can also sculpt with a wet paintbrush.


Cut cardboard tube about 5.5 inches tall. Flatten tube
and draw roofline, window and door. Cut out and make two
cardboard circles the diameter of inside of tube. My tube
is 1.5 inches. 


Glue cardboard circles inside tube for Tree House floors
and to add strength to the tube.


Cut styrofoam in strips as thin as you can get. Then glue
them vertically to tube. They can vary in width. Cut along 
roofline, window and door. This will create
the texture for tree bark.


Cover styrofoam with  Creative Paperclay to create bark.


Round off the top edge of 4 inch stryrofoam base.
Glue tree to 4 inch base. Create roots with styrofoam
and cover everything with Creative Paperclay 


Cut 2 pieces of cardboard 2.5 inches wide by
3 inches long. Add thin strip of cardboard to bottom
edge of roof. Glue pieces together. Fill in along 
corrugated cardboard edge with
Creative Paperclay. Cut door and shutters
to fit opening in tree.


Glue roof to tree. Add triangle of cardboard at the
front of roof peak. Add door and shutters. Add steps made with styrofoam
covered with Creative Paperclay and paint gray. Give everything 
a coat of brown paint, make base a bit lighter. Then
use dry brush technique to add color.


Sculpt Gnomes with Creative Paperclay. Paint
before attaching to tree house.


Create mushrooms. Make a half circle with Creative
Paperclay and push toothpick into bottom.


Paint mushrooms and chimney and glue. Add surface details you like.


GOOD LUCK with Your Project!
                      R. Michael Palan