Showing posts with label necklace. Show all posts

Friday, January 22, 2021

How to Make a Heart Pendant for a String Necklace Using a Paint Blocking Technique


Hello and happy Friday everyone, Cinnamon here and I am going to show you how I created this pendant using a paint blocking technique with artist tape. I chose the Pan African Flag design to celebrate Black History Month, but you could apply this technique to any design that you would like.

Supplies:
Creative Paperclay®
artist tape or masking tape
Sand paper
Skewer
Leather string for a necklace
Thin 22 gauge wire
Acrylic paint
Sealer, Varnish


Start with the amount of clay that you would like to use for your piece. Since this piece is small, I didn't use any type of filler to cut down on the amount of clay that I would use as I normally would. Create the shape of your choice and smooth it out as much as you possibly can, I chose a heart.


Make the hole for your string with your skewer before the piece dries. Make as many adjustments to the hole as you need. Set the piece aside to dry for at least 24 hours or until it feels dry to the touch.


When the piece is dry, this would be the perfect time to sand it. I am happy with the imperfections of this heart so I chose to leave it as is.


I painted this first with a layer of black paint. I chose black for the underpainting so that it could show a bit through the top layer for a rustic worn look. Set the piece aside to allow coat of paint to dry.


After the coat of paint is dry to the touch, use artist tape to block out any part of the heart that you don't want to paint on by accident. I like to use artist tape because it is designed to not damage paper if you remove it from artwork. You could sub it out for masking tape as well but just make sure to be extra careful when you are removing it. I blocked out the middle of the piece with the artist tape so that I could get perfectly straight lines on the top and bottom.


I painted the top and bottom with a dry brush technique so that the black layer underneath could show through.


When the paint dries pull the artist tape up to see if any of the paint layers needs to be touched up again. If you are happy with the finish, spray your piece with protective coating and set it aside to dry.


I had a wide flat leather string, so I was not able to tie a knot in it as I could if it was a thinner piece. I had to improvise by wrapping a piece of wire around the base to pull the strings in the front and back together and also separate them in the front as shown in the second photo so that the pendant would lay flat.


This is what it looked like after I was done. Tie the loose string in the back to the length that you would like the pendant to hang.


This dress form is 1/4 scale, so the pendant looks way bigger then it actually is.


Thank you all once again for stopping by, and I hope that you enjoyed 
today's tutorial! You can find Creative Paperclay® at the following 

See more of my work at Melandolly.com, catch updates on 
my Instagram page and here is a link to my shop!


Friday, July 15, 2016

Goddess Diary Necklace

Last month I showed you how to make goddess dolls using Creative Paperclay®. In this post I'll show you how I used one of my goddess dolls to make this goddess diary necklace.

Remember—I already had the goddess, so I'll walk you through making the diary. To make the diary cover, roll out a slab of Creative Paperclay® about 1/16" thick. I work on a teflon mat to make handling the clay a bit easier.

Next, measure strips of clay, and cut them with a craft knife. Remember to move the clay off the teflon mat before cutting or you'll have teflon strips. My clay strips are 1 3/8" wide.

Then, measure and the strips into 1 3/8" squares. Of course, you can make yours whatever size you desire.
Measuring the strips
Blank Covers
Now, let the cover blanks thoroughly dry. To keep them as flat as possible you can dry them on a screen and turn them frequently, or press them under a heavy book. Drying them under a weight takes a much longer drying time.

When the covers are dry, it's time to paint them. I started by sealing them with an acrylic medium. When that was dry, I dropped on small amounts of mica powders using the tips of tweezers, and recoated with the acrylic medium. Take care not to overwork the mica/medium.

Last step in my cover design was to stamp a rubber stamp image using Staz-On ink. 

I cut 1 1/4" pages for the diary. The number of your pages will be governed by the size of your jump rings. I stacked the pages with a cover on each side, and used a Crop-a-dile to pierce the holes for the jump rings. I also pierced a hole in the center bottom of the back cover to attach the goddess.

I added a jewelry bail to the back of the goddess with E-6000.
I used jump rings to attach the goddess to the back cover of the diary. Last step was adding the necklace chain.

Wear your goddess diary necklace in good health.

Carole

Friday, August 21, 2015

Games of Thrones Mini Dragon Egg Necklace

Here you go, Game of Thrones fans—wearable art that Khaleesi would be proud to model!!

I started with a small ball of Creative Paperclay®, and formed it into an egg shape.

Next, I rolled out a small piece of clay until it was very thin—between 1/32" and 1/16" of an inch thick. (Oops!! There was leftover glitter from my last project on my work mat. See it in the clay? It really doesn't matter for this project, because the final product gets glazed.)

I used a slurpie straw as a cookie cutter to cut out the scales. These straws are about twice the size of a normal soda straw. A regular straw will work, there will just be more scales needed to cover the surface of the egg.

I began layering the scales starting at the bottom of the egg. 

I continued layering the scales, one row after another, until I reached the top of the egg. I used the smaller, regular soda straw for the last row of scales. Last step before drying is to add a screw eye to the top of the egg.

After the eggs were dry, I painted them with acrylic paints in dragon egg colors—cream, green, and black red. When the paint was dry, I brushed on a small amount of gold mica powder from Terri Sproul's  Mixers Jewel Effects Color Set Mixer to add the highlights. 

Here's the finished necklace.

Carole

Friday, September 26, 2014

Kids' Project: Leaves of Clay Necklace

This project can easily be scaled in complexity depending on the age and attention span of the child you're working with. I'm working with a four (soon to be five) year old, so I'll share with you how we made this necklace.

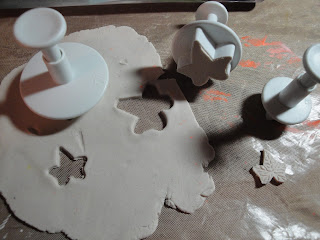
We started with a ball of Creative Paperclay® about the size of a golf ball. Chloe rolled the ball flat to a thickness of about 1/8". We used these veined rose leaf embossing cutters.


I held the cutter in place while Chloe pressed it into the clay, cutting the shape and embossing the surface in one step. We made many leaves, so we could select the best ones for our finished project. These are a few of the leaves before drying and sanding.

You can pierce holes in the leaves for jump rings while the clay is still wet, or you can wait until they are dry and drill a small hole with a fine bit and Dremel.

After the leaves were dry, I sanded the edges and the reverse side. I found that an emery board worked great for sanding the jagged leaf edges.

Next, was painting the leaves. We used mica powders mixed with Gloss PPA. Mixing the colors was a combined effort, but Chloe did most of the painting. Then, another round of drying before one last finishing coat of Gloss PPA. Here's what our leaves looked like after the paint was dry.


Chloe had fun going through my stash to select beads to add to the final project. I did all the jewelry work, with Chloe handing me beads and jump rings. Here's our finished necklace—just in time for the crisp autumn weather.

Don't forget our Halloween Link Up Party!!


Carole

Chloe

Table Cell Table Cell

Thursday, November 15, 2012

Jess B's Fall Jewlery

Hello Everyone
My name is Jess B. and excited to be a part of the new design team here at
 Creative Paperclay®
I can only say is this stuff is amazing!
Easy to work with and light as a feather.
Decided to make some fall jewelry
Although all autumn colors are
rich in reds, browns, and golds
I had to add my little twist of colors to the mix.

FALL JEWELRY


 This embossing press rocks
I  had extra Creative Paperclay® in my hands
so I just filled the rest for a future project

 I love that mine are not always smooth and clear details
but you can see the splits and missed filled parts - gives it character
 Although I did not take pictures
of all the painting that went into this project
 I encourage you to use any all paints and mixers your heart desires
Loving Terri Sproul's Mixers


INGREDIENTS
Lisa Pavelka Embossing Cutters - Ivy Leaf
Jaquard Lumiere Acrylic Paints - burnt orange, metallic rust, citrine
Chain - Joann's or Michael's

Thanks for stopping by
see you in a couples of weeks
enjoy your holiday

Give Thanks Everyday!

Jess B.