A little bit of information before starting on this post...... The beginning pictures of my project all got lost. :-( I was in a real tizzy after finding out that the card in the camera that I was using was not working. I thought maybe that the pictures were still on the camera and not on the card since I had reviewed them on the camera, anyway when I got ready to take more pictures, the first ones on there weren't there. Uh Oh! I had already gone beyond those pictures and wasn't able to start over with that project. Hmmm what to do? Well start over I suppose! I used a smaller box (jewelry) this time.Here's a list of the items that I used on the project:
Creative Paperclay Paint (acrylic)
A candy box or jewelry box Stamps
Brushes Molds
Embellishments Glue
Here's the start of the project:
Creative Paperclay Paint (acrylic)
A candy box or jewelry box Stamps
Brushes Molds
Embellishments Glue
Here's the start of the project:
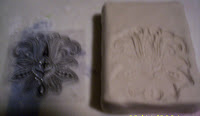
After I rolled out some paperclay, ( I use a fondant roller ) I attached it to the box lid. I used glue between the clay and box as I didn't want the box to get to wet and disintegrate. lol I pressed the stamp into the clay to make an impression and thought it turned out quite nicely:
After I stamped into the creative paperclay I used a copper metallic paint and got it into all the creases and crevices. I then used champagne metallic paint to go over the rest of the clay and sponged a couple of colors into the the clay lightly. Once the paints were dry I glued embellishments onto the clay, making my box just adorable I think. What about you?
 I gave you two different pictures to look at 'cause I couldn't get the lighting just right. The little round thing by the key is a button. Now this lid goes on a small jewelry box, but I think it would also be great as a little memory box also.
Since I did get started on the candy box to be used as a memory box, I felt that I should finish that box also. I used stamps on the big box also and used a lacy looking stamp in one corner of the top of the box and also on the sides. I used different metallic paints on this box also but I also used glitter, and a few different embellishments such as buttons, a head which was created from paperclay and a mold, butterflies cut out of paper, a tiny key and ruffles around the whole thing. See....

What do you think of the hummingbird that I stamped into the lid of the bigger box? I had a lot of fun making these Creative Paperclay memory boxes and I think I will put things in them as kind of a time capsule of my life. Working with Creative Paperclay is a great time and you can purchase it at Michaels or Hobby Lobby or from guess where else? Yep, Creative Paperclay!!
Barbara


2 comments:
Great box - I love it!
Very pretty. You could even do one in a boy's theme.
Post a Comment