Friday, January 29, 2016

Creative Paperclay Easter Bunny Egg

Spring is just around the corner so let's hop on in early with our decorations by making these cute Easter Bunny eggs! I show you how easy it is in my newest video.


Supply List:
Creative Paperclay
Mache or Styrofoam egg
Various sculpting tools
Water


Thursday, January 28, 2016

Little Monsters on a Sick Day

Under the weather on a cold winter night but still had the need to create. So I started with aluminum foil over my fingers. I applied Creative Paperclay® to the foil and shaped it. I pulled them off my fingers to let them dry overnight. The next day, I re-wet areas in order to add details.

SUPPLIES
Aluminum foil
Creative Paperclay®


I think I will just keep making these until I feel better then have a monster painting party with my friends.

Dream in Color!

Darlene Olivia McElroy

Tuesday, January 19, 2016

Safety in the Studio - Tori's Tip for January


This month I'd like to offer you some tips for studio safety and comfort -
  • When sanding, sawing or cutting clay, always wear a dust mask and safety goggles!
  • "Tender Tape" or finger tape is a great aid in protecting your fingers and providing additional gripping power for holding tools.....but, it will only protect you from minor scrapes and abrasions, not cuts, so be sure to always cut away from yourself when using craft knives or scalpels.
  • Reduce fatigue by taking frequent work breaks for both your body and your eyes.  For your body, do some mild stretches or get up and go for a short walk around the house.  For your eyes, rest them by looking at something more than 20 feet away for 20 seconds (eye care professionals recommend the "20/20 rule" for computer work and close-up work, and that you take these short vision breaks every 20 minutes)
  • My neurologist advised me years ago that leaning my forearms on the work table can cause permanent nerve damage!  My husband came up with a great solution - if you are a "leaner" put a piece of pipe insulation along the edge of your work table, it comes in various sizes and can be easily taken off and put back on when you need to clean the table.
Hoping all of you are having a safe and happy New Year!


I'd love for you to join me for more projects & art adventures on my personal blog
Find me on Facebook, or peruse & ponder pics with me on Pinterest

Sunday, January 17, 2016

Lynda's Creative Paperclay Keychain

I really like easy projects - things that just do not take a long time to finish up!  Yet, on the other hand, I also love to create more "in depth" projects too!!!  Today's project - well, doesn't require a ton of supplies - so lets get started!  

My daughters "word" is believe...  She is an amazing person, who has been through more than her fair share in life...  She has taught me more about life than I have taught her...  I am so thankful she is MY daughter - and that we have become as close as we are right now!  I love making little things for her - such as today's project!  I also decided it is MUCH easier to show you a video, than to explain the directions as to how to make something!!!  

Supply list:  
Creative Paperclay product
Saying stamp of your choice
Paint colors of your choice
Silent Setter (or something to create a hole
Ribbon
Rings

Directions:


Lynda Jeffs
Creative Paperclay Design Team

Friday, January 15, 2016

Creative Paperclay® Valentine Rose


This is a kid-friendly project, so that means adults will have success with it, too!! These paperclay roses would make a perfect Valentine gift. And, they are the easiest every to make. Let's get started.

First, roll out a ball of paperclay about 1/8" thick. Use a circle cookie or canape cutter, and cut out 12 petals. Our circles are 3/4" in diameter. Larger circles will make larger roses, and tiny circles would be perfect for miniatures.

Next, lay the circles in a line. Overlap each petal, covering a quarter to a third of the previous petal. Start at the end where you placed your first petal, and roll the line of petals.
Line of 12 petals
Close up of beginning of the roll
Next, pinch the edges of the petals to flatten them. At the same time, gently turn the edges downward, giving a more life-like appearance to your rose. (To make a bud use three to five petals, and omit this petal-shaping step.)

For our rose Chloe and I used a coffee stir for a stem. We just inserted it in the underside base of the rose. 

For the leaves, we rolled out a ball of clay about 1/8" thick, and used Lisa Pavelka's veined rose leaf embossing cutters

To give dimension to the leaves we draped them over a Slurpy straw to dry.

When the rose and leaves were dry, we painted them with acrylic paints, and glued a leaf to the under side of the rose. Here's a close up of our finished rose—ready to surprise a special Valentine.


Carole

Chloe

Table Cell Table Cel

Thursday, January 14, 2016

Delight(ful) Stamps

I woke up in the middle of the night with the thought of making stamps with Delight. No doubt not a new idea but that possibility had never dawned on me. So I got out of bed, went to the studio and started making them. One of the things I learned was that if you want straight edges, it is better to cut it before the Delight sets up. Tip is to coat them with matte medium so they don't stain and allows you to wash them off without reconstituting them. And, no, they won't last forever but in a pinch it is a great fun!

SUPPLIES
Delight
Scissors (optional)
Anything that can give you a texture.

I started with a regular rubber stamp. You get a reverse or negative image of the stamp. On all of these, I rolled the Delight flat with a rolling pin before stamping into it.


I have large sheets of rubber stamps without the wood backing. This one has grunge edges because I wanted to see how that would look. Plus I prefer more grunge than perfection.


Next, I brought out the Indonesian wood block. This one has a real graphic pattern to it.


Next, the stencils came out for a creative play day.


Dream in Color,
Darlene Olivia McElroy


Tuesday, January 5, 2016

How To Keep Your Mind Inspired?


My name is Gloriann Irizarry and I wanted to welcome you back to the Creative Paperclay Blog.
Creative Paperclay material has created a fantastic 2016designer team to help you inspire, create and share ideas. Stay tune and subscribed to learn from the many tips and tricks soon to be shared here.
 
Today I wanted to start with a great way tip to the one question I guess asked a lot.

How do you keep inspired to create? 

Sound simple but sometimes the inspiration seems to take a vacation. Now in order for you not to feel in a inspirational hole I got a few tips to help you get and keep those creative gears moving.


Glori's Monthly Tip
 

Tip #1


Keep an art journal and a pencil always handy. I always have one handy at the night stand or a small one in your purse with you. Feel free to keep has many has you want.  You really don't know when those creative ideas are going to pop in your head and even thou your not ready to complete the idea writing it down or sketching it will really save you the trouble to later on trying to remember what was that amazing idea you came up while your were at the doctors office or while waiting in line for lunch. Use it don't be afraid of taking your journal and write things downs.

This brings me to Tip #2

Don't be afraid to write details information about the idea down. Yes I had people said but I don't keep a journal because I do not know how to draw. Well to tell you the truth I know people that create amazing works of art and others that can barely doddle and still sculpt amazing. The journal is just a guide you kept so every time your out and enjoying the nature or viewing things that spark the imagination you can write them down and then continue with the normal daily routine and then when your ready to create to sculpt the instructions or template will be already there for you to follow. You can write them, doddle them or sketch them down what ever you do it will come very helpful for you. Then once your ready to work things will be a lot easier when your ready to start the project or craft you want.
 

Tip #3 

 
Organize your project idea material list. If your journal don't have what you want and feel like creating something totally new start by laying some items down in front of you. Choose some of you favorite fabric materials. The size of the armature you want your piece to be. Pick come of your favorite fabrics, wooden plaques, favorite Styrofoam shapes, aluminum foil and Creative Paperclay, Paverpol and lay it all down in front of you or in your working area sometimes looking at all these shapes, colors and forms could spark ideas or your next new project.
 

Some times having all these materials in front of your might help you come up with a totally new concept and create a new project that has no been added to your art/ideas journal.
Now don't be afraid to try or add other materials to your list or try to make it a challenge by adding a unique item like a soda bottle or a glass weird shape bottle


Example of a good how to keep inspire challenge would be
How could I include this unique shape Japanese soda bottle in my next project. Sometimes what the brains needs is a challenge to get those inventing gears moving.
Is all matter of patience and time both evenly distribute for you to come up with a great idea. Now do not try to force it if you don't end up right away with it is ok to walk away and rest. Do something else and come later to try to challenge your self again the beauty of the mind is that eventually that light bulb on top will light up.
 
Now I do hope this monthly tip help you to get inspire. The main trick is not to give up.
Have a great New year 2016 everyone and please stay tune for more tips and tutorials coming up.
 
Sincerely ,
 

Gloriann Irizarry

for Paverpol Designer 2016 Team


Faux Stone Plaque

Welcome, and Happy New Year!


This month I'll be showing you how to make a "stone" plaque for the garden, so even if it is snowy and cold outside, you can think about Spring planting and garden decor.

To make the plaque you'll need:

Creative Paperclay® modeling material
a work board or sturdy cutting board you can leave the clay on while it is drying
plastic scraper or credit card
small flat scraper or sculpting tool (one can be easily made from sharpening the end of a "popsicle" stick)
card stock or light cardboard
dimensional paint
gesso
acrylic paints in browns and greys
exterior varnish
a plastic straw
rolling pin
craft knife
tape
wire or twine for hanging your plaque
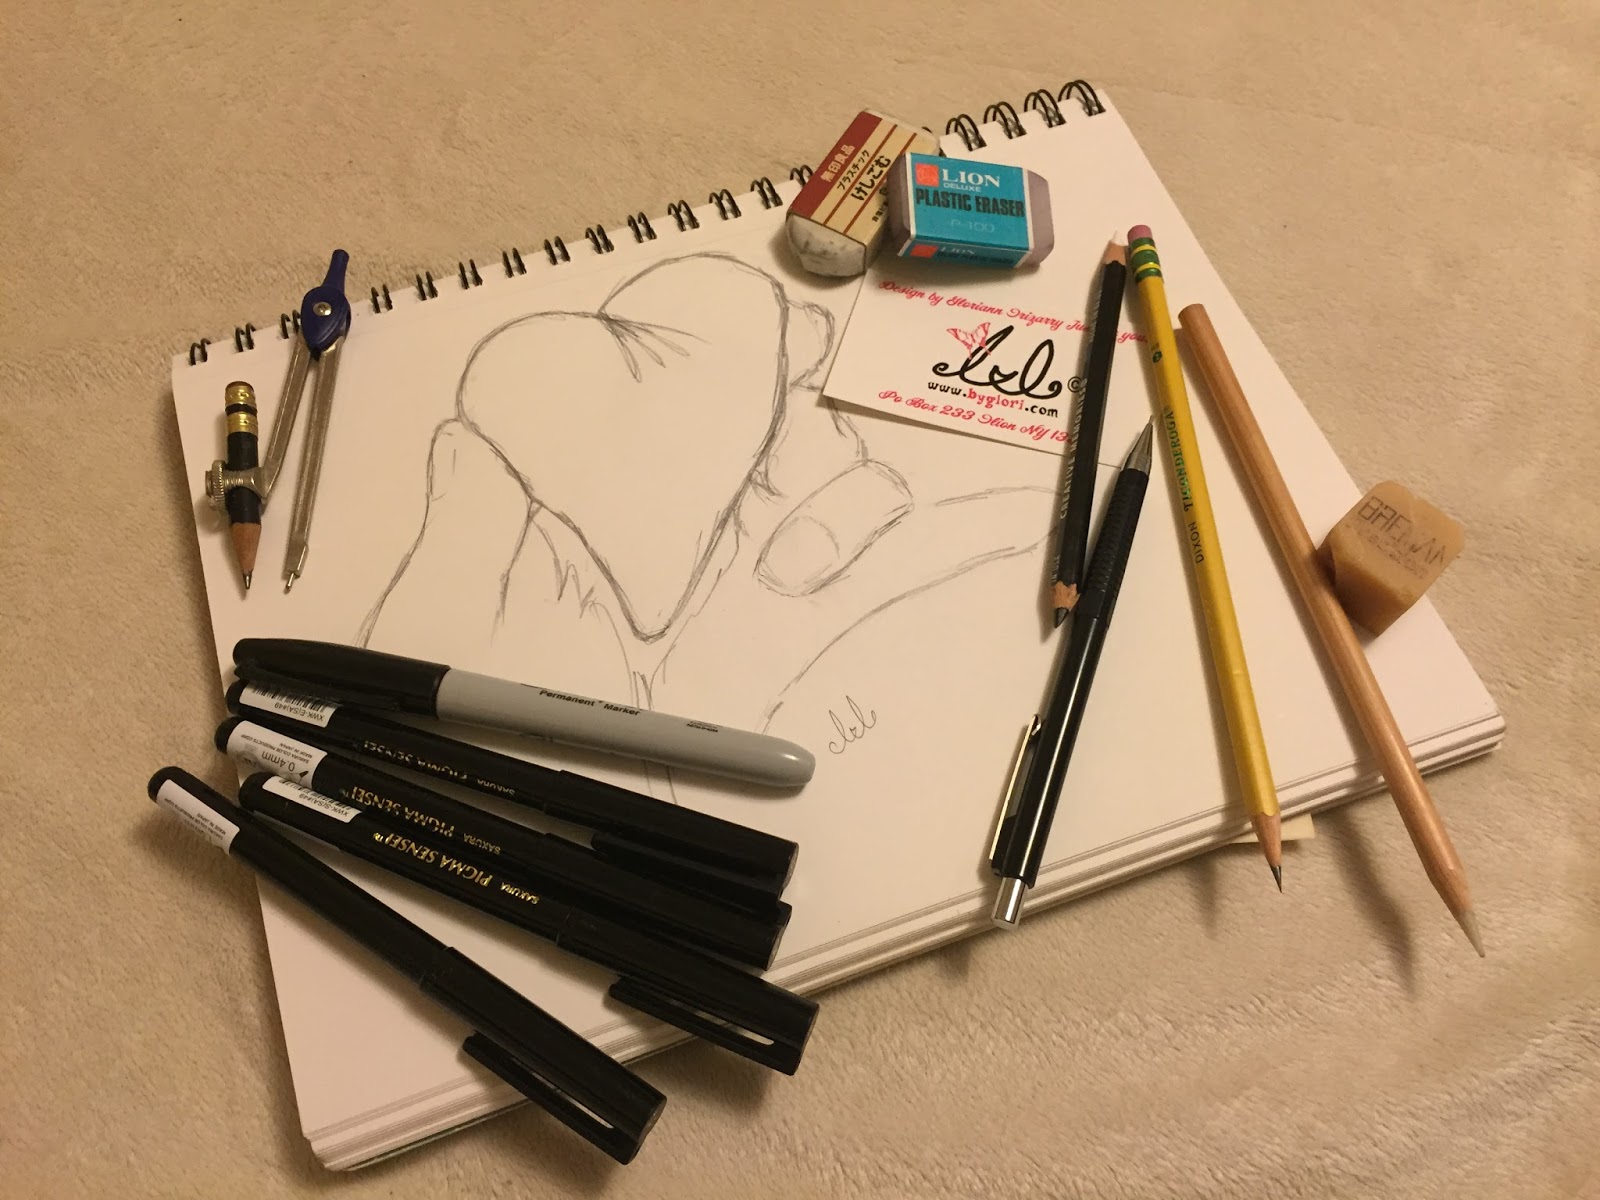
tracing paper, pencil
small paint roller
large bristle paint brush
pattern


Make your stamp first -

Trace the center design section of the pattern and transfer it in reverse onto cardboard.  Go over the lines with dimensional paint, then set aside to dry.  You may wish to go over some of the lettering, such as the word "SMILE" twice to give it added depth.


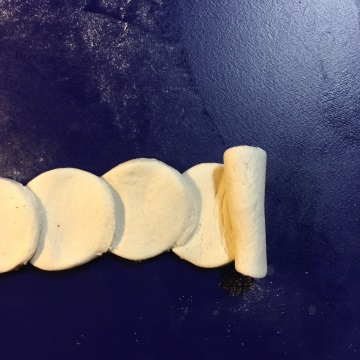
Roll clay out on your work board to a 3/16" thickness.  Trace pattern edges and holes onto tracing paper and transfer to clay.


Using your craft knife, cut into the clay slightly, then wet the center of the work piece and start scraping out and removing clay.  Continue scraping out the center section to a depth of about 1/8"


Use the edge of the small scraper to clean up the edges of the area you scraped out.


Add some tape to the back of your cardboard stamp and check the fit.  Trim the interior section of the clay as necessary until the stamp will fit inside, then carefully press the design into the clay.


Press the straw all the way through the clay to cut holes where indicated.

Now start the stone texture by gently rolling over the entire piece with the paint roller.  Be careful around the lettering and don't press too hard with the roller (start on the edge to see how much pressure you need just to make very slight indentations all over the piece).

Use the paintbrush to texture along the inside edge, and press the bristles in randomly along the edges of the piece to create more texture.  If desired, use the craft knife to add some cracks in the stone and some more dimension.

Allow the clay to dry on the board.  It may take several days to dry - be sure not to remove it until it is completely dry or the piece might warp.


When the piece has dried, remove it from the board and coat all surfaces with gesso.  Allow the gesso to dry, then begin painting with a wash of warm brown acrylic paints.


When the brown wash has dried, paint the piece with a wash of darker brown and grey.  Allow the dark color to flow into all the lettering.  Let dry.  Continue alternating washes until you are satisfied with the piece.  Remember that it will appear much lighter when it is out in the sun!


When the paint is dry, coat the piece with exterior varnish.  Add some "rusty" (mine is painted with burnt umber, black, and burnt sienna for rust) wire or twine and find a sunny spot to hang up your work!

Thanks for joining me here again!


I'd love for you to join me for more projects & art adventures on my personal blog
Find me on Facebook, or peruse & ponder pics with me on Pinterest

Sunday, January 3, 2016

Lynda's Tips for January

I have been more of a beginner, working with Creative Paperclay - more scared of what I can do with it than anything!  My husband on the other hand, a natural from the time he picked it up and started to play with it!  Watching him create the things he did for our Halloween scene, has helped me look at my next few projects a bit differently!  It is that in which I have learned I wanted to share with you today!  
  • If you are going to do a larger project, make sure to spend the time in sketching out the project and what you want it to look like!  
  • Do NOT bite off more than you can chew - start small and work your way up from there!   
  • When it comes to the ideas you want to create, make sure you get a list of what you need to make - and by when it needs to be done!  Have a sketch book to jot down ideas and sketch things out as the inspiration hits!  
I am working on some cost effective tips - and a video for my next project idea!  I have my calendar, some paper to sketch things out, and I am ready to plan the next few months of projects!  I can't wait to share with you what we end up creating!   
Lynda Jeffs
Memories in Tyme and
Creative Paperclay Design Team
 

Friday, January 1, 2016

January First Friday Fan Day


Need some inspiration for your next Creative Paperclay® project? Check out what folks are making with Creative Paperclay™.


Owl Wall Hanging
Sculpted Faces
Doll House Facade
How to Seal Air Dry Clay
Paper Clay Feathers
Paper Clay Leaves (tutorial)


Heart Ornaments (would be great for Valentine's Day, too)
Miniature Cream Puffs

HELP US FIND YOU!!
  1. Use the hashtag #CreativePaperclay on all your social networks.
  2. When using Facebook, be sure the your posts and images using the #Creative Paperclay hashtag are set to public, otherwise we won't be able to find you.
  3. Share your projects on the Creative PaperClay® Facebook page.
I'm always trolling the web, looking for great Creative Paperclay® projects. If you find something, post it on our Facebook page.

GOT QUESTIONS???

Find the answers to your paperclay questions. See what other folks are creating. Stop by our Facebook group and say, "Hi!" Creative Paperclay Q&A
Carole