Thursday, March 29, 2018

Patina Look Jewelry with Creative Paperclay®


Hello there! Jenn here sharing my jewelry project using Creative Paperclay®.
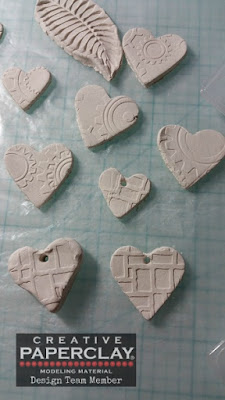
In a previous post I demonstrated how I created molded pieces using embossing folders and cookie cutters. That post can be found HERE.

Patina and rust effects are a major trend right now so I decided to create some jewelry using the hearts and some other items.
The additional supplies I used are as follows:
2 clay molded beads
metal butterfly embellishment
Strong glue
Satin Cord
Copper jump rings
Medium sized rusty washer (this was previously treated with a sulfur to patina) from stash
Earring wires
Acrylic paints in patina/rust shades
Liquid ink in a dark blue shade (I used Art Anthology Minx ink in Stargazer)

Start with a base coat of an aqua colored acrylic paint on all of the hearts, butterfly, and beads.

Using a darker teal acrylic mixed with water apply lightly with a brush and wipe off all excess to re-expose the lighter color in all areas except crevices. This will give more dimension. Alternate between golds, blues, and a bit of the liquid darker blue until you reach the desired patina look.


Make sure all pieces are completely dry. Tie a knot part way down the cord and slide one bead on. Tie a knot on the other side of the bead and make sure both knots are tight and secure.

Next, tie the washer onto the cord in the middle using a slipknot.
Make sure the knot is secure and tight and add a dab of strong clear glue to the back of it.
Place a large jump ring onto the main heart and then onto the washer. Add earring wires to the two smaller hearts and there you have it! Such fun!


I hope that you enjoyed my tutorial today! Thanks for visiting!
For all of your Creative Paperclay® needs visit our online store HERE.
You can also find Creative Paperclay® at the following retailers

Thanks again! Happy Creating!!


Tuesday, March 20, 2018

3D Canvas Art..... by Cindy Porter

Hi Creative Paperclay® fans, it's Cindy here,  this will be my final post as a design team member, I have loved my time on this fantastic team and will continue to create with Creative Paperclay® so keep your eyes out for some more great things happening with Creative Paperclay® in the future...

 Now onto my final project...

I created a 3D canvas.... I wanted to show how versatile Creative Paperclay® is by demoing yet another way to create with it...

keep reading to see how to finish off your own...

Supplies:
water
silicone and sculpting tools


Now onto a video demonstration .... enjoy


A couple more close ups  of the finished canvas...


So I'd just like to say thank you to Creative Paperclay® for having me on the team...  I have loved my time on the team...

Keep on creating with Creative Paperclay®
xC


Monday, March 19, 2018

Sanding Creative Paperclay®

Hello and welcome to another blog post. Today I want to share with you the tools I use to sand Creative Paperclay®. They range from traditional sandpaper to manicure and pedicure tools! I have put together a list below (with links) of tools I use for sanding Creative Paperclay®.


1) Traditional sandpapers.

Sandpapers with grit 100-180 are great for small imperfections in your sculptures. I would rub gently though as you do not want to do more bad than good!

For smooth surfaces a superfine grit sandpaper is the best choice. 180 to 320 grit sandpapers are perfect. Remember, the higher the number, the finer the grit. A variety pack is a good to have in your studio.

2) Drywall sanding sponge.

I use this for large rough areas that I did not smooth properly in my sculpting process. These are made for drywall and thus are not too harsh on the surface of your  sculpture. It can be purchased on Amazon or your local hardware store.

3) Sanding sticks and sponges.
These come in a range of sizes and grits. They are perfect for smoothing rounded corners and edges and getting into those hard to reach areas. I use Dura Sand Sanding Twigs and Loew Cornell Sanding Sticks.


4) Manicure and Pedicure tools.

Nail files are great for sanding Creative Paperclay®. A pedicure foot file can be used too but I would only use the smoother side.

Watch this short video below as I go through the various sanding tools.


You can find Creative Paperclay® online at Creative Paperclay Co and also at Michaels, Hobby Lobby, Dickblick and Amazon. 

Thanks for stopping by!

Suzette

Tuesday, March 6, 2018

How to make a Fairy House Part 2 using Creative Paperclay®...with Cindy Porter

Hi Creative Paperclay® fans, it's Cindy here,  I'm back to share the completion of my Creative Paperclay®, Fairy House...


keep reading to see how to finish off your own...
Here is a link to the video of Part 1 if you missed it: https://youtu.be/9zppCWdEKr8

Supplies:

water
silicone and sculpting tools

Now onto a video demonstration .... enjoy


Hope you enjoyed this video...

till next time
Happy Creating

xC


Sunday, March 4, 2018

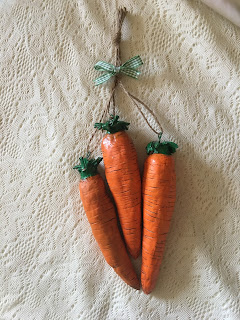
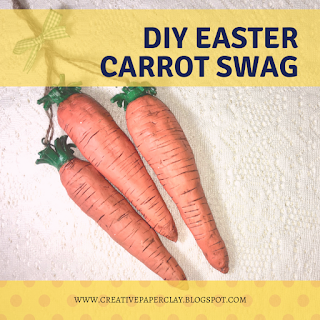
DIY Easter Decor: How to Make a Carrot Swag

Welcome to another post! As I continue with my DIY Easter decor, I will show you how to make an Easter Carrot Swag to hang up for the Easter Bunny!

Easter Carrot

Easter Carrot


This is an easy craft, great for beginners and children.


Supplies needed:

foil
2" piece of craft wire
glue
jute twine
ribbon/bow
glue gun and stick
sculpting tools
pliers/wire cutters
paintbrushes 
water
paper towel


Follow along in the video below!


You can share your creations with us on our Facebook page. We would love to see them! For more inspiration have a look around the blog. There are tutorials for many levels using Creative Paperclay®. You can also visit my blog www.papermachepatch.com.

Thanks for stopping by!

Suzette


You can find Creative Paperclay® online at Creative Paperclay Co and also at MichaelsHobby LobbyDickblick and Amazon. 

Friday, March 2, 2018

March 2018 First Friday Fan Day


Need some inspiration for your next Creative Paperclay® project? Check out what folks are making with Creative Paperclay™.


Easter Bunny and Chick
Using Pasta to Add Texture to Clay
Earbud Holder
Paperclay Bunny
Essential Oil Diffuser Necklace
Clay Easter Bunnies
Phases of the Moon Wall Hanging

Bear Charm
Mixed Media Canvas with Paperclay

HELP US FIND YOU!!
  1. Use the hashtag #CreativePaperclay on all your social networks.
  2. When using Facebook, be sure the your posts and images using the #Creative Paperclay hashtag are set to public, otherwise we won't be able to find you.
  3. Share your projects on the Creative PaperClay® Facebook page.
I'm always trolling the web, looking for great Creative Paperclay® projects. If you find something, post it on our Facebook page.

GOT QUESTIONS???

Find the answers to your paperclay questions. See what other folks are creating. Stop by our Facebook group and say, "Hi!" Creative Paperclay Q&A
Carole

Thursday, March 1, 2018

Mirror Transformation

Hello there! Jenn here sharing my mirror transformation using Creative Paperclay® today.

This clay is amazing to work with for so many projects!
One of my favorite things about it is how much detail you can get by pressing stamps into it. This is what I used to transform this boring wooden mirror.

First, gather supplies:
Plain Square mirror with a flat surface
Wax paper
Creative Paperclay® Modeling Material
Several rubber stamps
Rolling pin
Tool to cut excess clay (palette knife)
Ink Sprays
(to achieve this look: use hues of purple, teal, and a basic iridescent)
Black gesso
Strong Adhesive
Clear coat or transparent decoupage glue

Place wax paper on top of the mirror surface. Place a block of clay on and work with a rolling pin to flatten it evenly around the mirror. Trim off all excess clay from edges. Lift the clay with the wax paper and place on a flat surface on opposite side. Peel off wax paper.

Use rubber stamps to make impressions in the clay like a collage. Press and gently lift stamps when doing this. I like to use wooden rubber stamps so I can get a good hold on them. Place a small amount of strong adhesive on the frame and put the stamped clay back on it. Leave overnight to allow it to dry. If there are any cracks in the clay fill them in with wet clay and dry with heat tool. Sand all of the rough edges.

Apply a layer of black gesso and allow to dry.

Using spray inks, spray one color at a time and dry with heat tool. Continue doing this until the desired color is achieved.

Once dry, add a thin coat of transparent decoupage glue or other clear coat. This does a few things for the project. It enhances the colors, adds s nice sheen, and seals the paint.
Here are a couple of closer views of the detail achieved using stamping on Creative paperclay®.


Thanks so much for visiting!
Creative Paperclay® is available to purchase online and in the following stores.

Happy creating!!