

Hello everyone! My name is Cinnamon Willis and I am going to show you how I created this ornament! I was inspired by a logo of a clothing brand called Psycho Bunny and thought it would be cute to turn it into an ornament.
Supplies:- Creative Paperclay®
- Masking tape
- Filer such as paper, cardboard or foil
- Acrylic paint
- Sanding paper
- jewelry wire
- Pliers
- Thick wire for an armature


Begin by creating your shape for the skull with the wire.


Wrap your piece with masking tape. Use paper or what ever you would like to use as filler to bulk it out so that you use less clay.


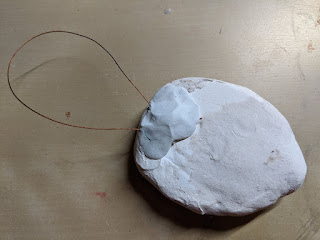
Start adding clay to your piece. This is where you would add the loop that we created on the back of the piece and position it as shown above before the clay dries. After you have the basic shape of the head and loop in position, set it aside to dry.
It is much harder to add the loop afterwards which is what I ended up doing after creating this bunny! You will need to drill a hole into it and fill it back up with clay and maybe even glue.


I am using a skull here for reference to get an idea of how the bones should kind of look around the eye sockets.


Start working out the details of how you would like your skull to look. Pay attention to the sockets, where the nose would be, the ears and also the teeth!

When you are satisfied with how your skull has shaped up, sand it down to smooth out the lumps and bumps. I use a sandpaper with a grit of 800 to get things super smooth and around 400 grit to take out the larger rough parts.


See more of my work at Melandolly.com, catch updates on
my Instagram page and here is a link to my shop!

No comments:
Post a Comment