SUPPLIES
Creative Paperclay®
Creative Paperclay®
Delight®
Acrylic paint
Chartpak colorless blender
Laser print
Scissors
Brayer
I started by laying Creative Paperclay® into my basic shape on a panel I had laying around the studio. I could have smoothed it out with a little water but I wanted it be remain clay-like. It was left to dry overnight.
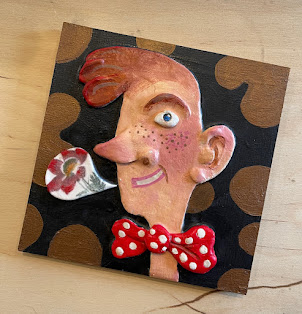
Here is the finished piece, Flowery Words. You never know what you will discover when you experiments with your art tools.I started by laying Creative Paperclay® into my basic shape on a panel I had laying around the studio. I could have smoothed it out with a little water but I wanted it be remain clay-like. It was left to dry overnight.
Wet clay was added to the dry clay shape to give dimension to my character and texture was added to the bow tie and eye. When this was dry, I applied gesso to my character. This sealed the clay and prepared it for painting.
I always sit with a piece before I decide if it is finished or not. After painting it with acrylics, I felt it needed more elements to tell the story of this crazy guy.
I brought out Delight® and rolled out a thin sheet. Next, came a laser print and a Chartpak colorless marker so that I could make an image transfer. The laser print was placed face down and the blender was applied to the back of the print several times. This was then cut into a shape and added to the painting. I have shown this to you previously but it is my latest favorite technique.Dream in Color!
DarleneOliviaMcElroy.com


No comments:
Post a Comment