Showing posts with label #ChristmasDecor. Show all posts

Monday, December 3, 2018

A Church for Your Christmas Village

Hello! Suzette here from The Creative Paperclay® Design Team. Don't you just love Christmas villages? I sure do and in the spirit of Christmas I decided to make a church.


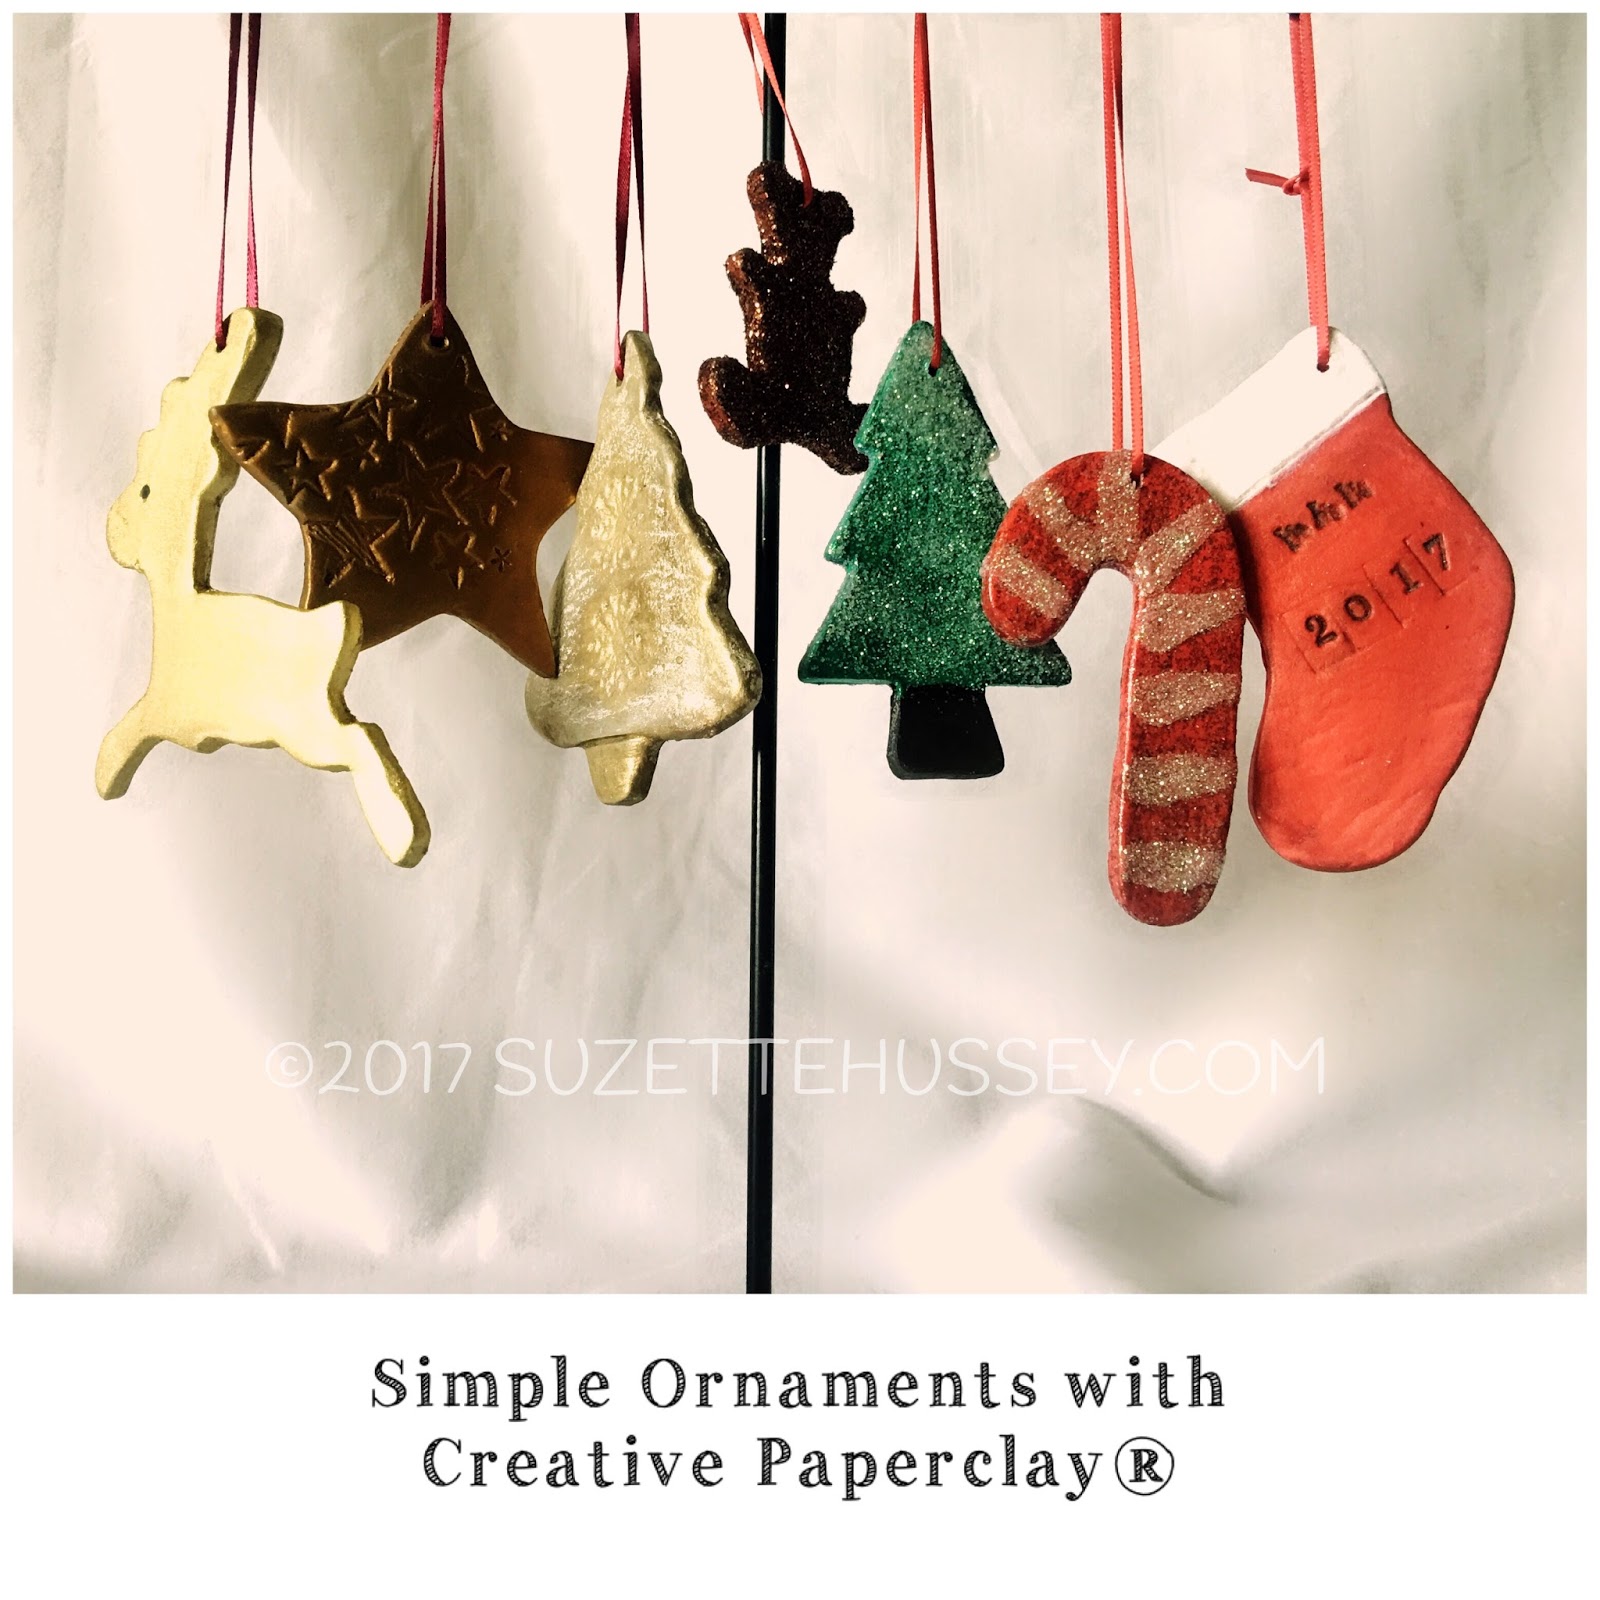
Of course I did a video tutorial so you too can make this cute little church for your Christmas Village. 
There is a full list of supplies below and a video for you to follow along.
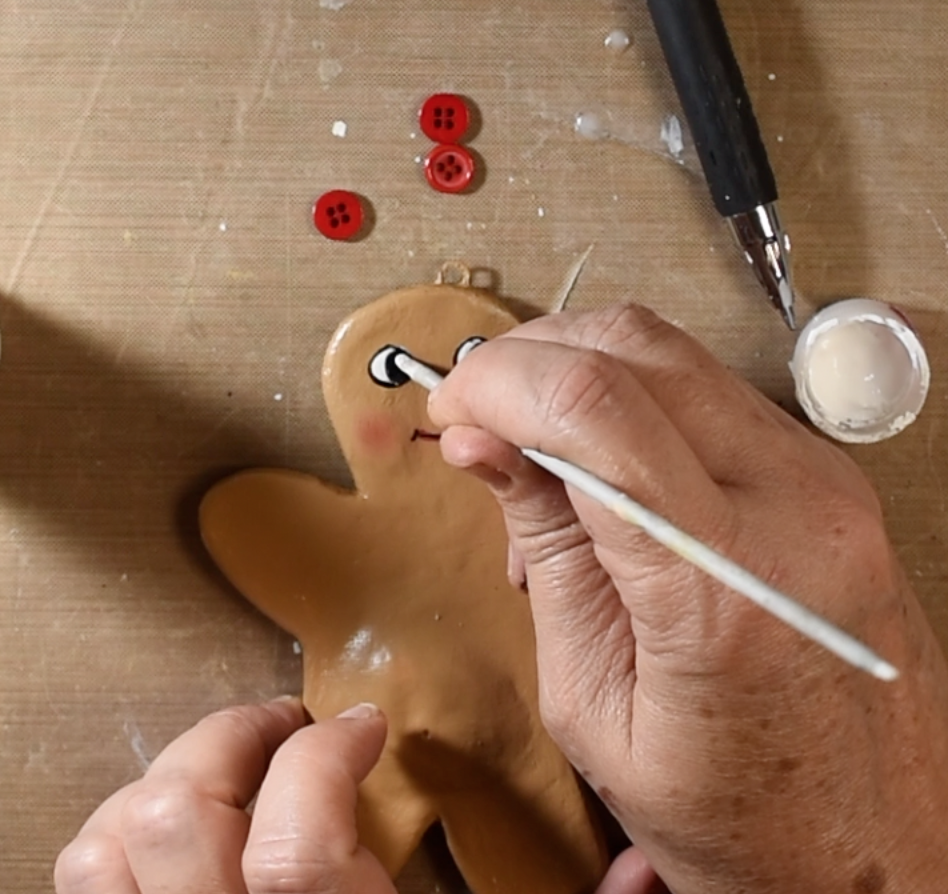


Supply list

Creative Paperclay®
styrofoam/floral foam
PVA Glue
Apple Barrel White Acrylic Paint
Folk Art Antiquing Medium
Folk Art Multi-surface Paint - Patina
Apple Barrel Acrylic Paint - Flag Red
Golden Acrylic Glazing Liquid (gloss)
Golden Regular Gel Medium (Matte)
Mod Podge
white glitter
wooden Base
white flocking
water
paint brushes
craft knife


Gather your supplies and follow along in the video below.


You can share your creations with us on our Facebook page. We would love to see them! For more inspiration have a look around the blog. There are tutorials for many levels using Creative Paperclay®. You can also visit my blog www.papermachepatch.com.

You can find Creative Paperclay® online at Creative Paperclay Co and also at Michaels, Hobby Lobby, Dickblick and Amazon. 

Thanks for stopping by!

Suzette


Friday, December 22, 2017

How to make a Christmas Angel

Hi!
I have treat for you today. I decided to do a video showing how I made a beautiful Christmas Angel using Creative Paperclay®.


The supplies needed are as follows:

Follow along in this video tutorial.


I hope you enjoyed this tutorial! Thanks for stopping by and have a safe and peaceful holiday!

Suzette
Blog: https://papermachepatch.com
Instagram: https://www.instagram.com/papermachepatch/

Monday, December 18, 2017

How to Make a Gingerbread Man with Creative Paperclay®

Hello!
This is my last Christmas craft for the season, a cute little gingerbread man!


It is a simple tutorial, great for any level!


Supplies needed:

Creative Paperclay®
Template of gingerbread man (see below)
1/2" piece of craft wire
small pliers
3 tiny buttons
Assorted ribbons
Brown acrylic paint (I used Americana Multi-surface Paint: Brown Sugar)
White acrylic paint
Black acrylic paint
Red acrylic paint
Chalk pastels
Black gel pen
Spray Varnish
sculpting tools
Gesso
Sand Paper
craft knife
water


Transfer to thin cardboard and cutout.

Step 1

Transfer template to thin cardboard such as a cereal box and cutout.


Step 2

Roll out clay no less than 1/4" thick.

Step 3

Place gingerbread template on clay and cut out.


Step 4

Smooth edges with water.


Step 5
Make a hook with craft wire and press into top of gingerbread man. Set aside to dry.


Step 6

Add clay for the cheeks and a tummy. Smooth and set aside to dry.


Step 7

Sand if needed and apply a coat of gesso.


Step 8

Paint your gingerbread man brown.


Step 9

When dry, draw on face and paint.


Step 10

Use chalk pastels to add cheeks.


Step 11

Outline the eyes with a pen.


Step 12

Add a dot of white acrylic paint to the eye.


Step 13

Spray with varnish and let dry.

Step 14

Stick on the buttons.


Step 14

Add ribbon.


Step 15

Hang on your tree!

You can also follow along in the video below.


Thanks for stopping by!

Happy crafting!
Suzette
Blog: https://papermachepatch.com
Instagram: https://www.instagram.com/papermachepatch/

Thursday, December 7, 2017

Getting Festive with Creative Paperclay®


Hello friends and fans! Jenn here today sharing my Holiday Spirit by getting festive with Creative Paperclay®!!

Using Creative Paperclay® Modeling Material and some simple holiday cookie cutters I have created a few different things today to share.

First, here is how I started with all the fun shapes!

First, roll out a nice even layer of Creative Paperclay® with a rolling pin onto wax paper. Cut each shape desired with cookie cutter. Let these dry for at least one night. 
As an added tip***lightly brush some corn starch on your rolling pin to prevent any sticking when rolling out your clay.

Now we are on to the painting and adding hangers!

All of the pieces were painted using acrylics. The tree was assembled as an ornament using ribbon adhered to the back. The stars were assembled using a string of metallic red beads which were embedded into the clay before drying. The other pieces were painted and set aside to use as embellishments for another crafty creation!

As you can see creating these lovely ornaments and embellishments is simple and fun using Creative Paperclay®!! This would be a fun holiday project to do with your children as well!!

Creative Paperclay® is available to purchase at the online store as well as Michael's, Hobby Lobby, and Joann's.

Thanks so much for viewing my post today and Happy Holidays!!


Monday, December 4, 2017

Making Simple Ornaments for your Christmas Tree with Creative Paperclay®

Hello and welcome to another tutorial using Creative Paperclay®. Today I will show you how to make simple ornaments for your Christmas tree. This is the perfect tutorial for beginners!


Supplies needed:

Creative Paperclay®
rolling pin
cookie cutters
craft knife
rubber stamps
baby powder or cornstarch- optional (this prevents rubber stamps sticking in clay)
acrylic paints
glitter paint
watercolor paints
gilding paint
gilding wax
Rub 'n Buff
varnish
glitter
flocking
stamp pad
Sharpie or pen

paintbrushes
sculpting tools
water

ribbon

Gather your supplies and follow along in the step by step video tutorial below.


Please share your creations with us on our Facebook page.


Happy crafting and thanks for stopping by!

Suzette
Blog: https://papermachepatch.com
Instagram: https://www.instagram.com/papermachepatch/
Facebook: https://www.facebook.com/papermachepatch/
Pinterest: https://www.pinterest.com/suzettehussey/