
 A Real Turkey of a Project with Creative Paperclay®
| It’s November, and yes, we crafters are all thinking about the holiday seasons, lol! In the U.S. we celebrate Thanksgiving at the end of the month, so I decided, for my first project as a member of the Creative Paperclay® team, to drum up a turkey. He’ll sit around my kitchen and make me feel guilty for anticipating the upcoming feast, lol!  Recommendation: Read all the directions before starting. It’s always easier to follow a path if you know where you’re going beforehand. |
 |
| Supplies: 2 inch Styrofoam ball 1 inch Styrofoam ball, cut into halves ½ inch Styrofoam ball White Glue Acrylic Paint in black, yellow, buff, red, metallic green, metallic copper Pearl Eraser Paperclip Drafting or masking tape One 2.5 inch paper cup for tail, or draw template to size Two 1.75 inch paper cups, or draw template to size Approx. 4-6 oz. Creative Paperclay® 2 small Googly eyes Tools: Something to work on (wax paper, baker’s mat, etc.) Tool for rolling out the Creative Paperclay® Tool to dent, and pick out detail in the Creative Paperclay® Brushes-one square flat and one round & pointed Water Paper towels Slip (I’ll explain this below) Reference photos of turkeys. |
 |
Slip is a term used for dried Creative Paperclay® mixed with water to a thin, goopy texture. You use it to smooth out areas or fill cracks. If you don’t have dried, fresh will work, but this is a good way to use up left over bits. I like to have at least a fingertip’s worth of slip. |
| Making The Wings: 1. Fold one of the 1.75 inch paper cups in half, and then in half again, so that it is quarter size. Or draw a the shape to size, cut it out, and use it for the template. 2. Roll out a bit of Creative Paperclay® to the size shown below and smoosh over the triangular shape. You want the wings to dry with some flex to them, so make them thin. 3. Then take a tool, or brush handle and press it into the clay to create ruffles. |
 |
| But don’t make the wings too thin, or you’ll get a hole like I did! If this happens, stick your finger into the slip and use it to fill in the hole. See? Can’t even tell it was there. |
 |
| Making The Tail: 1. Take one of the 2.75 inch paper cups and fold it in half (or use your drawn template) and a walnut-sized lump of Creative Paperclay®. 2. Sandwich the Creative Paperclay® between layers of Saran Wrap or wax paper and roll it out to the size of the folded paper cup/template. To get the approximate shape, press at the center of your rolling tool. Roll straight until your clay is the correct height at the center. 3. Then reposition your rolling tool about 45 degrees so you are rolling toward one side. Roll until you’ve got the width you want on that side. 4. Reposition your rolling tool and repeat for the other side. 5. Use your fingers to even the wing out, and use your folded paper cup/template as a guide to trim off excess. |
 |
| The tail should be thicker than the wings. If you don’t have something close to the picture shown, it’s easiest to just start over. Grab some more Creative Paperclay®, and roll it and the wing into a ball. Annoying, I know, but really—it’s faster and easier than trying to adjust what you’ve got. |
 |
| 6. When the size is right, use a tool or brush handle to get a feathery look. |
 |
| 7. Take the 2-inch Styrofoam ball and mold the tail around it. You won’t be attaching the tail at this point, just getting the shape. Make sure the ‘feathers’ don’t curve too far inward. Don’t sweat getting this exact. The object of pressing around the ball is so you won’t have to reshape your tail too much later. |
 |
| Forming the Head & Neck: 1. Straighten out the paper clip, then fold it in half as in the picture. 2. Stick the ends of the paper clip into the ½ inch Styrofoam ball and push through it, leaving the curved end to form the beak. 3. Stick the ends into the 2 inch Styrofoam ball, far enough so it stands on its own. 4. Grab a strip of masking tape and wrap it around the paper clip. Keep adding strips until the paper clip is covered. 5. Work some of the tape onto the Styrofoam balls.  |
| In a project like this, I actually use the tape to shape the form, and the Creative Paperclay® to add detail. You can’t avoid tape creases, but you can minimize them by using shorter pieces of tape. For a project this size, I use pieces about the length in the photo below.  Remember, that you are working in 3D now! Move the turkey around constantly to look at it from different angles, so you can see what’s happening. Forming The Chest: 1. Take the two halves of the 1 inch Styrofoam ball and glue them to the sides and just below the neck (sort of like turkey boobs, lol!). Don’t worry if the surfaces don’t match exactly. 2. Tape them down. Work the tape in to fill the gaps.  |
Adding the Base: 1. Put a generous dab of glue at the center of the eraser. 2. Tear off two strips of tape about twice the length that I recommended above. 3. Center the Styrofoam body over the glue. 4. Apply the tape strips to hold the two together while you add more tape. 5. Keep taping (go back to the shorter strips now) until the eraser and the bottom of the body are completely covered. Forming the Head: 1. Wrap a strip or two of tape over the beak, working the strips toward a point, and making sure the paper clip is entirely covered. 2. Wrap tape under the cheek until you get a double chin effect. 3. Wrap tape around the back of the head until the head is oval in shape. |
| Forming the Body: 1. Continue taping around the rest of the body until you feel you have the shape you want. Gluing the tape: 1. Pour on a generous amount of white glue and spread it evenly over the turkey (sort of like you’re basting him, lol). Set the turkey aside and let the glue dry completely. |
 |
| Applying the Creative Paperclay® 1. Tear off a fingertip’s worth and roll between your palms to make 3 ropes. 2. Wrap the ropes around the turkey’s neck so they overlap at the bottom to form those bobbles that turkeys get. 3. Use a bit of slip to seal the pieces. Try not to lose too much detail, but if you do, you can use a brush handle or clay tool to recreate it later. Don’t fuss with it too much now. |
 |
| Remember to rotate your bird and look at it from different angles as you apply the clay. Use slip and wet fingers to smooth. 2. Add a little blob of clay to the beak to form the ‘snood’, that little red gobbly thing that male turkeys have. |
 |
| Adding the tail and wings: 1. Hold the tail to the body to see how well it fits. 2. Add or remove clay as necessary. It doesn’t need to fit exactly (and probably won’t).  3. Grab one of the wings and make sure that it fits between the bottom of the tail and the table . You can cut Creative Paperclay® with scissors, so you can trim the wings and tail as needed, but don’t get carried away. |
| 4. Get a lump of Creative Paperclay® about the size in the picture—enough to fill the indentation so the back is higher than the shoulders.  5. Gently push the tail into the body so that it stays in place. You may need to prop the turkey against something. You’re remembering to rotate and view the turkey from all angles as you’re working, right? |
 |
| 6. Tear off part of the lump and start filling and smoothing the Creative Paperclay® to seal the tail to the body. Leave some indentation between the body and tail. 7. Gently dig the top of one wing into the body and then cover it with Creative Paperclay® to seal and smooth. Remember—you can trim the wing or tail with scissors if you need to. 8. Add on the other wing.  |
. Fill in the backside. For some reason, I couldn’t find a photo of a turkey’s backside so I had to make it up from imagination, lol!  At least, that’s my story, and I’m sticking to it, lol! |
Adding the tail: 1. Use one of the tools or a brush handle to add dents all around the turkey’s body to give it a ‘feathered’ texture. |
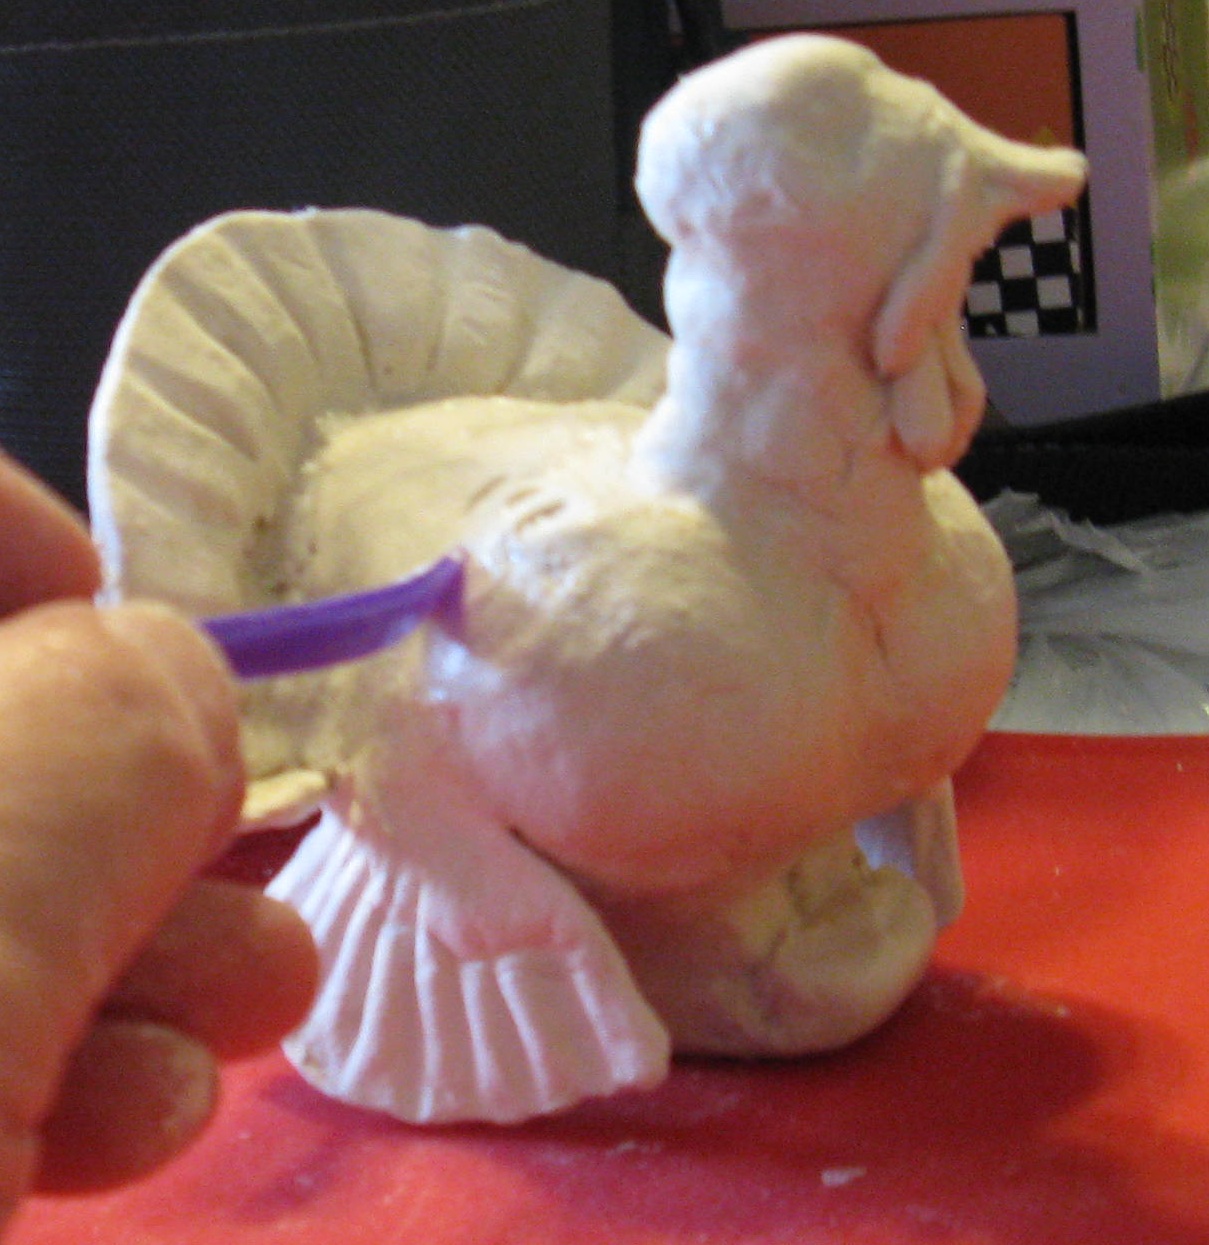 |
| 2. Press the googly eyes into the head. 3. Inspect the beak, head and neck and tweak with fingers to reshape, if needed. Use a tool or brush handle if you need to carve out detail. |
 |
| Painting the turkey: 1. With a round brush, add metallic green dots over the body and wings. 2. Add red paint to the head and neck, dry-brushing (almost no paint on brush) lightly over the back of the head. 3. With the flat brush, add black between the tail and body, over the base & backside. Use the round brush to apply black around the eyes. 4. Let dry. |
 |
| 5. Use the flat brush to apply Copper Metallic paint over the body, wings and tail. Apply thinly enough that the black & green show through. 6. Let dry. 7. Paint the beak Yellow. 8. Dry-brush white over the back of the head and neck—don’t cover all the red. 9. Add white dots over the wings, body, head, backside, and the very tip of the tail. 10. When the beak is dry, add one thin line of white down the center, for a highlight. 11. Let dry, and your turkey is done!  |
 |
| For other great paperclay ideas, be sure to check out the project page at the Creative Paperclay® website! Come visit my blog, Life Imitates Doodles, for more of my projects. |


