Tuesday, December 11, 2012

Here is the Dec projects
Snack for Santa
Supplys
"Creative Paperclay® modeling material" 
acrylic paint
White ( egg)
straw(toast& egg)
brown (toast)
Black( egg)


Roll out the white of the egg
roll a ball for the yoke then flatten to shape of yoke
Roll our flat then trace a toast pattern cut out.I made mine thin put can be the same a toast.

Use a sponge to make a texture for toast
Just tap on clay
When dry paint, it is good to have a piece of toast by you to copy


I sprinkle a little powder on surface so nothing sticks
Roll out the white of the egg I like it to be on even and splits 
Roll another  ball for the yoke then flatten to shape of yoke and press to white part.


When dry paint white,
 yoke yellow
Sprinkle with black for pepper
Place on your favorite place.
I did the sign to explan the egg and toast keeping warm.
Hope you like the project.

Saturday, December 8, 2012

Brenda's December Quick tip

Good morning,

Brenda here again and I am sharing a quick tip that I've found works best for me.  My work table isn't always the best place for me to work because I have a million and 1 projects going on, but my resolution is so simple.  While browsing through the aisles at my favorite store (Dollar Tree) I came across the chopping mats.  They are flexible and an idea came to me.

they come 2 to a pack 
and flexible. 
So I roll out my Creative Paperclay® 
then I turn my flexible chopping mat and 
roll over the clay again. 
Then I cut out my pieces 
move them to a different area on my mat
and move the entire mat to it's drying area.
This way my work table stays clear of my paperclay
projects and I can continue working.

Thanks so much for checking out my quick tip for this time and please make sure to come back in a couple of weeks so you can see what I made with these snowflakes.

As always, have a great day and God Bless.

Friday, December 7, 2012

Repurposing a Busted up Bust

Hello! It's Rachel Whetzel here. While I was on the Amazing Mold Putty design team, I created some decorations for my sister's wedding. When the wedding was over, she mentioned wishing she had a neat way to display her birdcage veil. That is when the idea for this bust was born.
SUPPLIES YOU WILL NEED:
I started my project with a junked out old styrofoam head I bought at a thrift store forever ago. It was very much worse for wear, but that won't matter for this project!
To create interest in the piece, and to make it more feminine, I used Creative Paperclay® to add hair and very slight facial features to the bust. I also changed the shape of the base by adding "shoulders" to the bottom.
Once the clay was dry, I didn't even bother sanding. (which for me is rare, because sandpaper and I LOVE us some Creative Paperclay®) Next, I glued torn bits of book pages over the whole piece. I use my fingers to apply the paper and glue. I have the most control this way, and I can work the paper most easily over the contours of the bust. To keep your fingers from sticking, keep the glue wet, and apply it liberally over the top of everything as you go.
The next step was to paint the bust. I used a wet rag, and some brown craft paint to "stain" the piece, and kept the hair area in thicker paint.
Once that was done, I added more dimension by shading the hairline with black paint, and adding just a TOUCH of red to her cheeks. I don't have my sister's veil, but she'll be able to add it similarly to the brooch I placed on the bust for the "final" picture. Now, my sister will be able to display a piece of her wedding in her house! I personally think she'd look adorable on a stack of old books inside a glass bell tower.

If you create something inspired by my project, please leave a comment with a link here, so I can come and visit to see! I would love for you to visit me at my "house" too!! Thank you so much for reading!! 
~rachel

Thursday, December 6, 2012

Jess B's Eclectic Tree Ornament

Hello Everyone!
It has been pretty 
busy around here
and brain is working on overtime with 
creations to share

Sometimes things you envision comes
out different in the process


ECLECTIC TREE ORNAMENT/GIFT


I used star shaped cookie cutters
and put them to good use

 After following the directions for 
baking the Creative Paperclay®
 I painted the stars with Lumiere Acrylics
 Halo Blue Gold and Pearl White on one side
Mod Podged
 with Martha Stewart's Aquamarine Crystal and Tinsel Glitters
Rolled and used Tim Holtz Distress Stain
Brushed Pewter to create balls to be placed between the
stacked stars

I added pearls underneath the faux leaves/branches ;0)

This can also be created with your 
children and given to their teachers for the holidays
just changed to your color palette
and add beads or metals or whatever your heart desires   

Thanks for stopping by
will see you soon 


Tuesday, December 4, 2012

Super Fast (STRESS FREE) Ornaments

Hey Everybody, It's Edie, I can not believe it is already December!!!! This year has flown by and the Holiday Season is now upon us.

 With the holiday season comes gift giving, decorating, crafting and blog hops! With that in mind I have created a BRAND NEW CLASS "Mixed Media For The Holidays" and it is now available!

In the class, I teach you how to make three holiday projects that will help you in all of your decorating, crafting and gift giving endeavors. There is even a bonus lesson for an extra embellishment ;) All of the projects are made using simple, common household items and inexpensive crafty supplies!

After finishing the projects for my class, I was on a Holiday crafting roll! I was able to create the base for these TEN ornaments in less than 10 minutes using the technique I am sharing with you today. These ornaments are so simple, fast and stress free, you will be able to produce a handful of them before the holiday cookies finish baking in the oven!

 DSC07092

These ornaments are perfect for teacher's gifts, class projects, family crafting, art swaps, unexpected visitors, all of those people you would like to get something for but just don't have the money, your mail carrier, vet, favorite coffee barista and the list goes on and on!!!!

 DSC07106

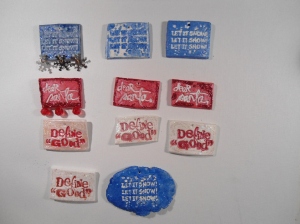
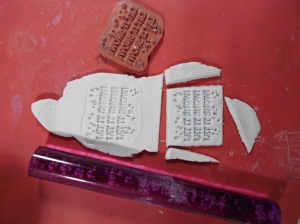
Simply roll out some Delight® or Creative Paperclay®. Brush a stamp with water and tap off the excess. Press the stamp into the clay and cut into desired shapes! Simple, simple, simple :) You could even use cookie cutters instead of a straight blade to give your ornaments even more personality.

DSC07093

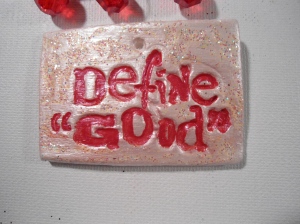
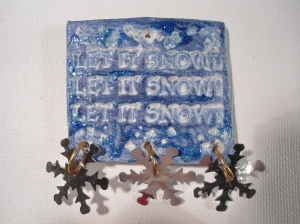
Paint, embellish and glitterfy to your hearts content and then share them with everyone you know. A great idea would be to have these hanging on a wreath designated for visitors. As they leave, they can choose an ornament to take home and display.


DSC07095

I hope you enjoy this project and I hope it helps to make your holiday season just a little less stressful. BIG, BIG Hugs!!!!!! You can always find inspiration on my blog.

 DSC07094

Friday, November 30, 2012

A Cute Little Creative Paperclay® Santa Ornament or Tag


I’m getting in the Christmas spirit now that Thanksgiving is over and this project is just too easy. I’ve got a couple of Santa head molds and thought I would put them to use. I started out by pressing my Creative Paperclay® into the molds and once it dried popping it out.

2023-01-12 11.35.24 

I then painted the Santas…………………..

2023-01-12 18.22.15

Cut out some snowflakes out of different papers on my Cricut machine, put them together and voila’, here you have some wonderful ornaments or tags. You can use these for so many different things.

2023-01-12 19.50.49   2023-01-12 19.51.57   2023-01-12 19.54.29

2023-01-12 19.52.31

See what I mean? So many different things that you could use these on. Easy peasy to make and they look really nice too, I think, what about you? You can purchase Creative Paperclay® at Michaels, Hobby Lobby, or directly from the company. Pick some up and try it out today while you’re working on those Christmas projects, you’ll be happy that you did.

Barbara

Saturday, November 24, 2012

Headwrap Charms


Good morning and welcome to another Creative Paperclay® post.  Today I am showing you a follow up from two weeks ago when I created some paperclay charms from "non" molds.  If you don't know what I am talking about go here.

So I started with one of the charms I created while it was still a bit wet.
When the clay is not yet hardened all the way
I took the original charm 
and laid it onto the clay and gently pressed
it into the clay 
it gives the clay some definition 
see. 
After the clay piece was completely hard
I painted it with Metallic Pure Gold
Acrylic paint. 
Then I used the Shimmering Garnet from 
Terri Sproul's Mixers and you can get 
those here.  Not only does this give the
crown a glitzy effect, but it also seals the
piece when you mix it with the 3D 
Crystal Lacquer.
I wanted to add some glitz to my crown and remembered a purchase 
I recently made from my favorite "Dollar Tree". 
In the health and beauty aisle I came across these
nail art bottles.  I knew I needed them for
my altered art projects and they came in
handy for this project. 
I added some rhinestones and these itty bitty
pink balls from the nail art with the 3D Crystal Lacquer 
and covered them again with it to seal it. 
Then I took an unfinished crown, (yes I
usually make more than 1 piece at a time
in case of mishaps) and traced it onto a scrap
of soft faux leather. 
I cut it out just a bit bigger than the piece itself. 
I also bought these elastic headwraps at 
the Dollar Tree that day, (but not knowing
what I would be doing with them).
I might have a buying problem lol.
I added some glue to the backside of the crown
and glued a part of the headwrap to it.
Then I glued the faux leather piece on top
of the elastic ribbon onto the crown. 
and now I have a gorgeous headwrap charm. 
Close up (it's hard to take a picture of yourself)
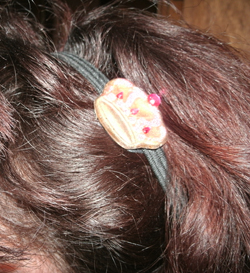
So...what do you think?  I think I might be making some of these for my granddaughter for Christmas.  

Thank you for joining me again today and I hope I've inspired you to use some Creative Paperclay® and make your own hairwrap charms.  
As always, have a great day and God Bless.