Thursday, May 9, 2013

Mixed Media Journal

Hello all!  I am excited to be posting my first ever blog entry for the Creative Paperclay Design Team.  I am having a great time with this product and finding that it works well with other mediums that are available in my studio (clay, powders, paint, paper, rubber stamps, glitter, markers...I could go on & on).

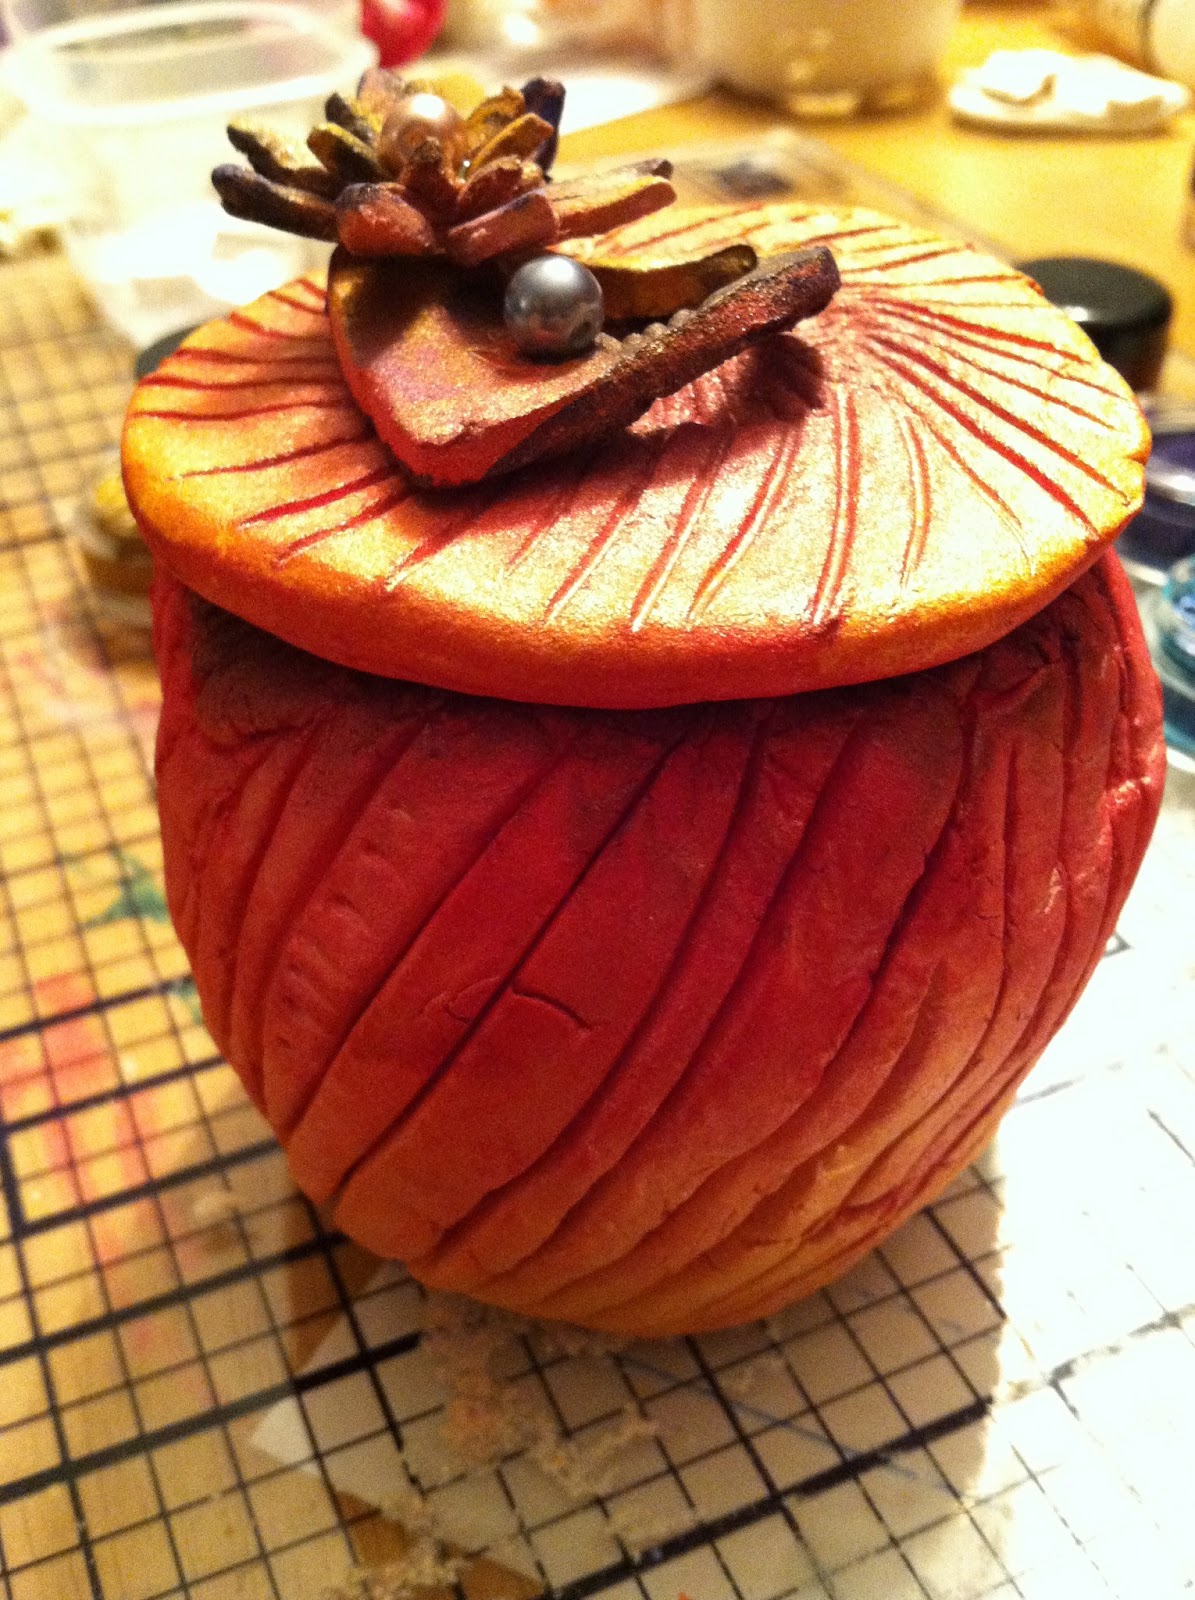
Last week I attended (as a teacher and demonstrator) a polymer clay retreat in Florida called OrlanClay Fandango.  What a perfect venue to work with the Paperclay!  Many of the ladies were interested to see what could be done with Creative Paperclay, a product that many had never seen before, so I was happy to be able to introduce them to the possibilities.   One thing that seemed to amaze them was the way I mixed color into the off-white clay to color it rather than paint it afterwards!  You can see the mixed media project that wowed them below:

 
Mixed Media Journal
Materials: Creative Paperclay, Prismacolor markers, acrylic roller, small glass surface, texture sheet, Pearl Ex powder, rubber stamp, Ancient Page ink, "The Ultimate" Glue, polymer clay flowers, blank journal, acrylic paint
Step 1: Paint the cover of your journal with acrylic paint.  Set aside to dry.
Step 2: Roll a 1 1/2"-2" ball of Creative Paperclay.  Flatten slightly and dab with chosen color of marker (Note: I used Prismacolor markers, but any brand will work).  Fold sides of clay over color and mix in.  Additional color can be added until the desired color is achieved. 
Step 3:  Use the acrylic roller to flatten colored clay on glass surface.  Be sure to create a large enough piece for your rubber stamp. 
Step 4: Roll another ball of Paperclay slightly larger than the first.  Flatten with the acrylic roller (on glass surface) making sure it is larger than the colored sheet.  Press texture sheet onto the clay and remove.  If desired, Carefully rub a bit of Pearl ex powder over the raised texture.  Cut edges straight if desired.  Tap the corners to curve slightly.
  Step 5: Allow the pieces to dry thoroughly...or (if you are like me and are impatient) bake your pieces at 275 degrees for 10 minutes, flip the pieces over and continue baking for 10 more minutes. Let cool before continuing. (Note: If the sheets of clay curl during baking process they can be flatten by placing a weight on top)
Step 6: Use Ancient Page ink and rubber stamp of choice to stamp the colored sheet of clay.  Be sure to press firmly or the stamped image may distort (Note: I have to admit I stamped this one twice because I DID NOT  press firmly enough the first time!  that is okay...you have 2 sides to the sheet :-)
Step 7: Smear a bit of "The Ultimate" glue on the back of your textured sheet of clay.  Position and press firmly onto the painted journal.  Smear glue onto the back of the colored clay sheet.  Position and press firmly onto the textured sheet.  Glue polymer clay components into place (Note: If you don't have polymer clay components buttons, sequins, or any findings will do to decorate the cover).  Bank edges of cover (if you have them) can be detailed with spirals, dots, squiggles, etc. using the Prismacolor markers.
Step 8:  If desired, ribbons can be added to the spiral edge with additional clay flowers, beads, sequins, etc tied onto the ends. 
Until next time, Clay on!

Friday, May 3, 2013

Poppy Flowers by Rachel Whetzel

Rachel Whetzel here! I have spring fever!! Because of that, I've been bitten by the flower bug!! I was at a local boutique, and there were headbands there, with layered fabric flowers LIKE THIS. They reminded me of poppy flowers, and I wondered if I could make some using Creative Paperclay® modeling material.
WHAT YOU WILL NEED
  • Creative Paperclay® modeling material
  • Acrylic Craft paints (I used Folk Art) 
  • Double Sided Flower Stamen (Or something similar. These are pictured below.) 
  • Valspar antiquing stain (watered down black paint will work also)
  • Crafter's Pick the Ultimate Glue (hot glue or any thick glue will work also)
Once you have your supplies, it's time to start!! I began by rolling balls of Creative Paperclay® into different sizes. The largest being about the size of a large marble. (not as big as a shooter)
 Then, I started pressing just inside the very edge of each ball, until I had created small bowl shape. Then I started nesting each piece inside the other.
 I used different amounts to each flower. The larger the flower, the more layers I gave it.
 Next, I painted my poppies red. Once the paint was dry, I worked antiquing stain into the crevices of the flower, and wiped off the excess with a cloth.
Prior to staining
 Have you been DYING to know what a Double Ended Flower Stamen was!? Here they are!! They usually come in bunches. I found mine at a thrift store, but they are available at craft stores too. :) I cut the ends of each stamen, at varying lengths.
 I plopped a dab of glue into the center of the flower, (it dries clear) Then I stood the cut stamen into the wet glue.
 Once the glue dried in the center, I reapplied some stain to the very center of the flower, to cover the transparency of the glue. I have plans to use these on a piece of Spring artwork, but they would be really cool as jewelry too.
Does YOUR Spring Fever have you wanting flowers!? Leave me a comment, and let me know if you create any flowers using my tutorial! I would love for you to visit me at my "house" too!! Thank you so much for reading!!  ~rachel

Thursday, May 2, 2013

Jess B's - Mother's Day Keepsake Jars

Hello Everyone
Excited to be with Creative Paperclay® 
for another term

Today I am going to show you
how to altered a small votive candles
into a 
Mother's Day Keepsake Jar
My mom loooves all types of jewelry so why not
make her something that would make her happy

 Rolled out a large sum of  Creative Paperclay®
 used the daisy cutter
and shaped flowers
  
This is what I did to make the lid
 
You can air dry or you can bake it

 
I used Luminatre Twinkling H2Os
 the colors are so vibrant and luminous
This flower is so pretty it can be
a ring, earrings, necklace, brooch, etc.
 
INGREDIENTS

Thanks for stopping by
Happy Mother's Day


Sunday, April 28, 2013

Meet our Design Team

Meet our New Design Team
Terri Sproul - Team Leader

Terri Sproul is the force behind a fun paint called “Terri Sproul Mixers” from Sakura Hobby Craft and of a DVD called "MasquePen Magic" to see more of her video check out her Youtube Channel at http://www.youtube.com/terrisproul and a Tuesday Night Live stream. http://www.linqto.com/rooms/terrisproul
She is a diverse and experienced designer, design team leader  and instructor for multiple companies in the paper craft world including “ Robin Nest” “Creative Paperclay®”, “Sakura Hobby Craft” and Amazing Mold Putty ” to name a few.  Terri and her husband Marc have the pleasure of living in San Diego County On top Of Palomar Mountain. She has received a Bachelor of Scrapbooking Arts from Creating Keepsakes and Bachelor of Scrapbooking Education from EK Success. Terri’s passion is teaching fellow Scrapbooker’s and Stamper’s new techniques and to think ‘out of the box’ and ‘off the Page.’  Visit her website and blog to see all the exciting stuff she does at http://www.terrisproul.com – link to blog is also there.  

Rachel Whetzel
I specialize in creativity and mixed media art through thrifting, up-cycling, re-purposing and new design.. I am the owner of A Year in the Life of an Art Journal and Monday Mugshots! I am also MADLY in love with Creative Paperclay® . I am: Thrift junkie. Free Spirit. Believer. Artist. Photographer. Mom to boys. Rust Lover. Worm Farmer. Blogger. Creative Soul. Rule Bender. Spider Saver. Coffee Drinker. Cream Lover. Chook Farmer. Goat Milker. Sailor Mouth. Music Listener. Phone Talker. Garden Grower. Beek. Mess Maker. Risk Taker. Chewy Mom. Gritty Gramma. Good Intender.
You can find me on line
BLOG:
http://MineToThine.com
FACEBOOK:
http://Facebook.com/RachelWhetzel


Jessica Baker

Hi, I am Jessica Baker a/k/a Jess B. I am a mother of 3, a wife and die hard crafter living in the Midwest. My styles have evolved throughout the years from flat to mixed media to 3D Altered designs. I love getting my hands dirty; touching all kinds of paints and textures. Steampunk has bolted gears into my heart. I dream, daydream, and vision many designs that I will create. Most times I am working on three projects at one sitting. I wish I could say that I have an organized craft room but I would be lying. I love challenges and discovering new materials. This product is PHENOMENAL and so user friendly. So excited to be apart of the Creative Paperclay™ design team for a second term. Take this journey with me, let's think outside the box and become a fan of Creative Paperclay ™products too.

 
Diana Gonzalez
Diana Gonzalez is a self taught artist, writer, and maker of things. She has been writing since childhood, and loves to paint and make things. She is an avid knitter, and crocheter, and spins her own yarn which she sells on etsy. Her art and poems can be found both on her blog and on etsy.

Dawn
 Hey...Do you know what time it is?  It's time to get artsy fartsy...along with the other designers for Creative Paperclay Products. I'm ready to take crafting to another dimension...the third dimension!  After years of paper crafting, I am eager to break out of flat...and start to design and create using this three dimensional products.  I loved using clay in college and I'm so ready to roll up my sleeves and get some dirt under my fingernails.  Oh, how I love the process of making something!  Come follow me on my blog: "Sunnyside Up" and you just might be amused! 
 Barbara Rankin
 My name is Barbara Rankin, and I am so excited to be a part of the Creative Paperclay Design Team. I have been a crafter since early childhood... always making things. After pursuing many different artistic endeavors, such as sewing, needlework, and Pergamano (embossing on parchment), I found my way into rubber stamping and graduated into becoming a self-taught, mixed-media artist. I have taught classes at my local scrapbook store, as well as teaching the members of my local stamp club. I have also been a guest instructor at another out-of-state stamp club on several occasions. I love making cards, tags, ATCs (Artist Trading Cards), as well as making and altering books and mini albums. My style is usually vintage or shabby chic, with a sprinkling of steampunk whenever possible. I am also currently a design team member for The Robin's Nest and Sin City Scraps. I have been published in Altered Arts Magazine, as well as in a book "Make it in Minutes: Mini Books". I was also recently published in the Just Steampunk Volume II magazine. I have a wonderful, supportive husband of thirty years, and we share our home with our two cute little Yorkie fur babies, Chloe and Zoe.
Lynda Jeffs
My name is Lynda Jeffs, owner and designer at Memories in Tyme! I have been creating for over 22 years now, my first project was my daughter's birth announcements! 7 years later - I moved home to Utah where I found out about scrapbooking. I went to 2 classes with my sister, re-organized all of my stuff and have been scrapbooking now for 15 years. I love to do all types of projects from 12 x 12 layouts to cards to altered projects... I love to do it all!
I have three awesome "kids", my sons are 27 and 20, and my daughter is 22! I have a wonderful husband named Del - who truly was my knight in shining armor and came in my life when I really needed him the most. He was taken out of work 10 years ago, so I've lived in the current economy and learned a lot along the way! Del and I moved to Sacramento, California area in June, 2012 to put him through school...now that we are done with that part - the rebuild process begins!

 Linda Hess
In 1994 I purchased my first pieces of polymer clay jewelry. The artist told me about the material and how easy it was to work with. I immediately purchased some of the clay at my local craft store and went home to experiment. From that experimentation an addiction to polymer clay was born!
Tired of "cookie cutter" looking arts & crafts, I decided to create pieces that were unique and all handmade. Similar pieces each have their own personality and style. Designs range from jewelry to wearable art to home decor to scrapbooking & cards. I do LOVE a challenge!

Through the years I developed my style and began to teach children & adults. Passing along the love of this medium is one of the best jobs on this Earth!

In the past few years the title of designer has been added to my resume. Designs and tutorials can be found in magazines, books, and online. Working with many different companies and products has transformed my CRAFT into ART.
  Thanks for stopping by and we hope you continue to stop by and see our creations. 

Friday, April 26, 2013

DawnMercedes' April Tip

Here's my quick tip for today.  

Nails...

Cut them off... Super quick, right?


I have found that if I keep my fingernails trimmed, I am better able to manipulate my Creative Paperclay © without getting "fingernail" marks embedded in my wet paperclay!  So, today, I trimmed my nails.  Once I get caught up on housework and my craft work, I am going to break out some Creative Paperclay ©.  

Be sure to scroll through this blog. There are so many fabulous craft ideas and tutorials that you will be eager to try.  I know I do!!

Thanks for stopping by!
Dawn Mercedes, of Sunnyside Up

Thursday, April 18, 2013

Jess B's - Mini Wedding Dress

Hello Everyone

someone posted this on facebook yesterday
which inspired me to make

Mini Wedding Dress
I am in the middle of completing
custom wedding invitations for a client this weekend
so it was only suiting to create this


This wedding dress has a vintage feel to it and my flowers are not the best

 
The seems could have been smoother but since
I have long acrylic nails my knuckles were the next best thing
sports length next trip to nail tech. lol
Bake Creative Paperclay® according to instruction on the
package

 Once dried I kept it in its natural color and added
Plaid Folk Art Hologram acrylic paint and pearls
 
you can catch a glimpse of shimmer
 
 Thanks for stopping by