

Faux Rock Candle Light Holder With Creative Paperclay Material® by Gloriann Irizarry

Materials
1 Pack 16 oz of Creative Paperclay® modeling material
Glass mini fish bowl
Hot glue
Hot glue refills
Acrylic hearts beads
LED lights or regular tea candles
Metallic acrylic paints
Paint Brush
Sponge
Magic eraser
Delta air dry Perm Enamel Clear Satin Glazed

Let start by plugging the hot glue gun and let it heat up and
wash the glass bowl to make sure is free or dirt and oils.

Glue the centers of the flower design so they are all even.
Be very careful with the HOT glue when holding the beads so you don't burn your fingertips.
Make sure you carefully keep holding the beads until the hot glue sets to prevent any shifting
and it sets properly in place.

Glue the first petal on top.
Make sure you carefully keep holding the beads until the hot glue sets to prevent any shifting
and it sets properly in place. .

Repeat the process and glue the second petal on the right.
Make sure you carefully keep holding the beads until the hot glue sets to prevent any shifting
and it sets properly in place.

Glue the third petal on the left.
Make sure you carefully keep holding the beads until the hot glue sets to prevent any shifting
and it sets properly in place.

Glue the fourth petal on the lower right corner.
Make sure you carefully keep holding the beads until the hot glue sets to prevent any shifting
and it sets properly in place.

Glue the last petal on the left.
Make sure you carefully keep holding the beads until the hot glue sets to prevent any shifting
and it sets properly in place.

To make the piece more interesting use a contrasting center bead like these clear acrylics hearts.

Make sure all the beads are set in place and secure before this next step.

Open your creative paperclay® modeling material and start adding a thin layer to cover all the glass bowl around the mosaic design.

Little by little add more clay all over and with your finger and watered down to make the clay easier to apply.

Press the clay firmly around the tiles so when it dry it will hold the glass beads in place.
It will hold nicely because the creative paperclay® modeling material will have a little shrinkage. Enough to hold the beads in their place after it dry.

Once you have cover the entire piece with creative paperclay® modeling material get you hads all wet and pat the clay in firmly.

A variation is this cute blue candle light holder.

Little by little glue each glass bead and create a mosaic design.
Make sure you carefully keep holding the beads until the hot glue sets to prevent any shifting
and it sets properly in place.

Use a big piece for the center to create a nice eye catching candle light effect.

Add more beads all over.
Be careful smaller beads are trickier.
Since they are smaller there is not much space for the glue to hold it in place.
Make sure you carefully keep holding the beads until the hot glue sets to prevent any shifting
and it sets properly in place.

You can make a different design on the other side of the candle holder to create a more interesting effect to your ooak candle holder.

Add the clay to the glass bowl very carefully around the smaller beads so they don't peel off.
TIP: Make sure the clay is very moist. It helps for it to get under the small crevices of the mosaic and hold the glass beads in place once it dry.

Get your hands all wet and pat and firmly press the Creative Paperclay® modeling material in.
Set aside to dry over night or
put it in the oven to speed the drying process at 170 degrees for about an hour.
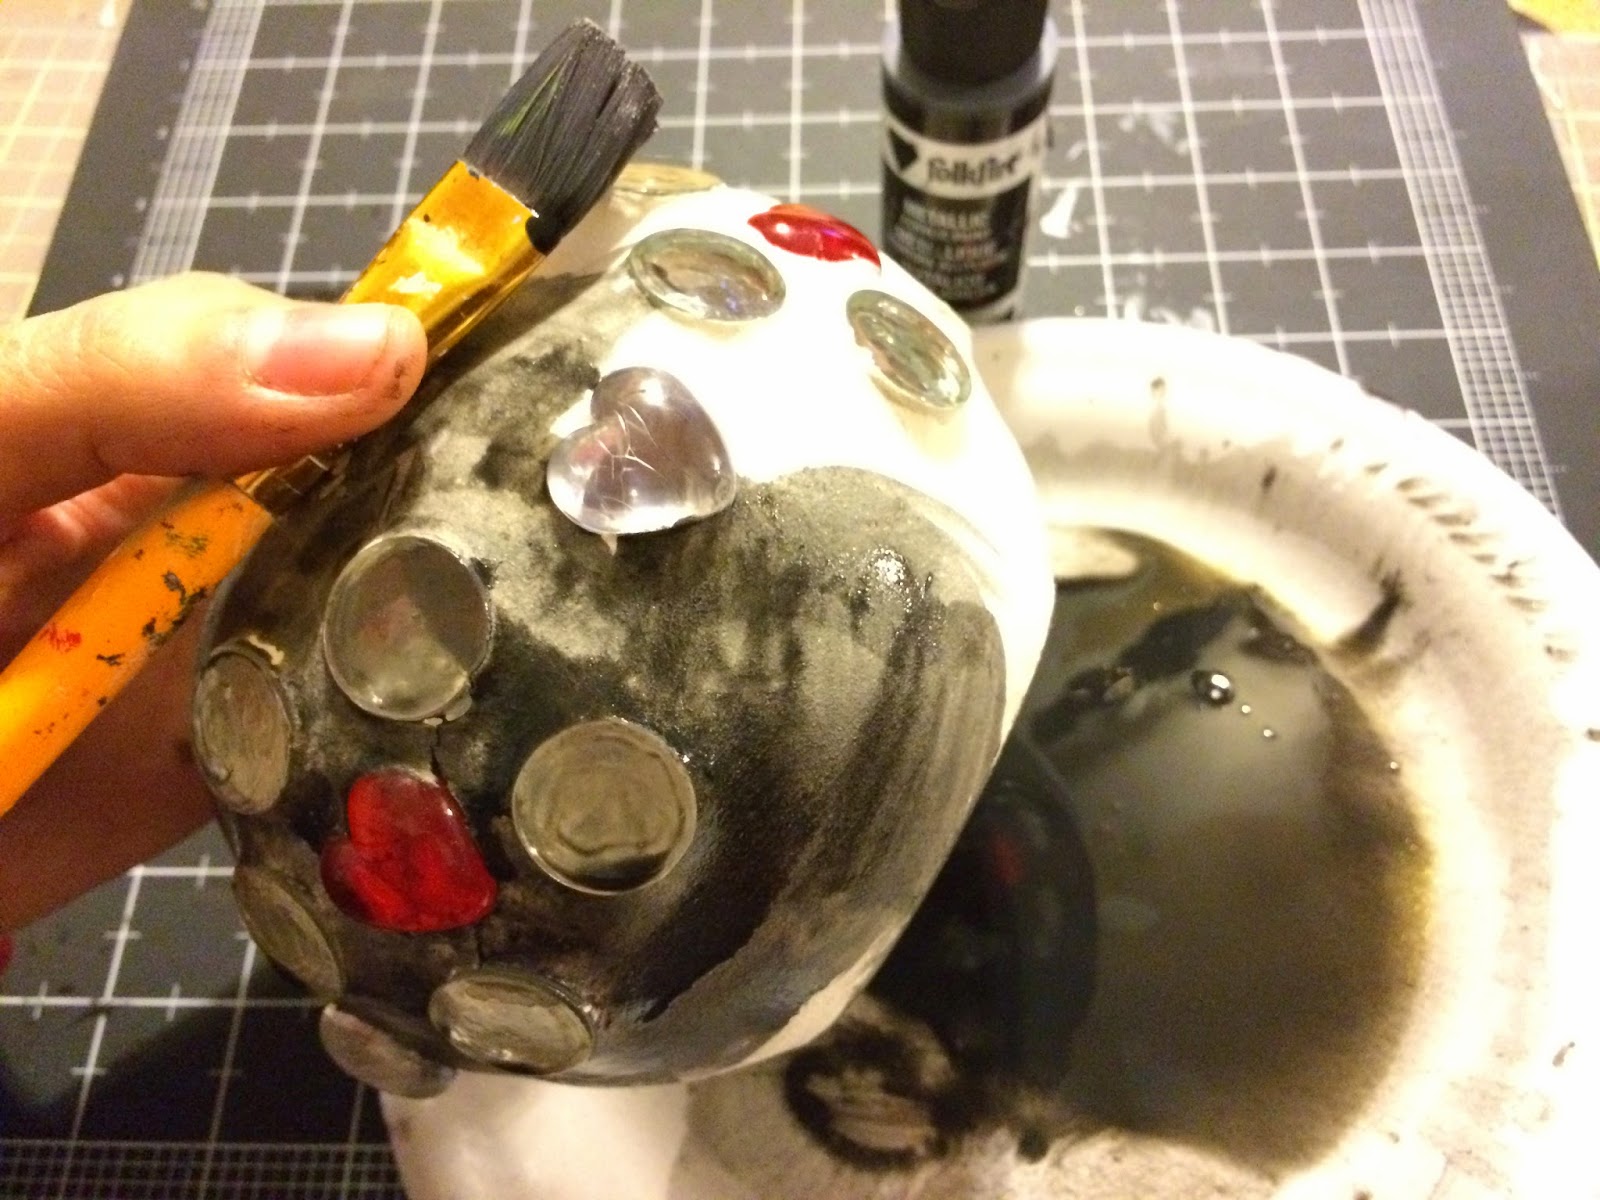
After is completely dry use Acrylic Metallic black acrylic watered down and paint the whole piece.

This will be the base color so make sure you get all the paint around the beads. Set it aside to dry.
Don't worry you can paint over the beads it will not hurt them at all.

For the second coat use a water down metallic black and pat it to the bowl.
Make sure you apply and even coat. Set it aside to dry.

You might need to repeat the sponge process once more it depends on the quality of the acrylic paint.

For the Rock effects use the Tooth brush technique with watered down silver acrylic paint.
Stroke the semi wet toothbrush with the thumb to splatter the paint over the bowl.

For the blue beads bowl also use the water down Martha Stewarts Blue acrylic paint.
Stroke the semi wet tooth brush with the thumb to splatter the paint over the bowl.

Another splatter effect coat wasthe watered down FolkArt Champagne.
Stroke the semi wet tooth brush with the thumb to splatter the paint over the bowl.


Sometimes it is easier to add the splatter effect if you wait for each one to be completely dry before a new coat is added.


Now to give the piece the rock effect water down the metallic black and stroke the semi wet tooth brush with the thumb to splatter the paint over the bowl.

Now don't worry about painting over the beads. They can be later clean but make sure they paint is all dry before cleaning them.


To clean the beads use a wet magic erasers and gently rub the paint of each bead.

Place a LED light inside to see if all the paint has been removed.

Now for this center piece to be a little more durable make sure is fully sealed.
Add the first coat and set aside to dry.

After the first coat is completely dried add a second coat and set aside to dry once more.

I strongly recommend 2 coat to seal for this type of item. Candle light holder will be handle a lot and 2 coats will protect your piece from falling apart.

Now your ready for the Candle light dinner.


They look specially unique and now one will now they are made with Creative Paperclay Material® . Nope these one of a kind candle holders are not caved out of stone.
Feel free to visit our New Creative Paperclay Material® Q&A Facebook section
and all our designer team will help you answer them for you.
I hope you enjoy this tutorial and always remember,

Sincerely


