

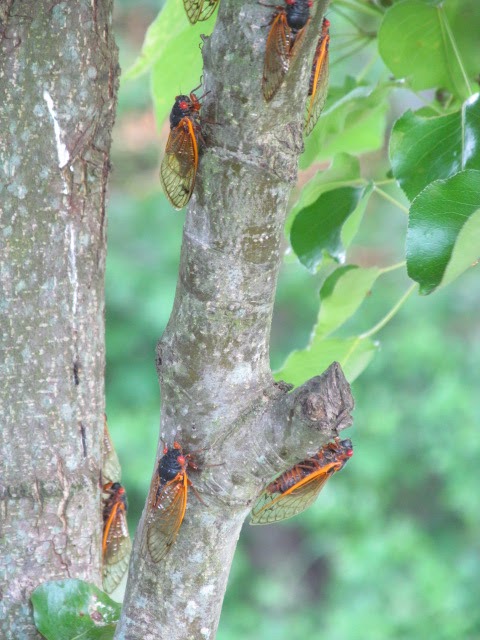
Anyone who is currently living on the East Coast knows about the emergence of the 17yr cicada brood. Over the past few weeks the hummmm (think alien spaceship landing) of these creatures has been the background music for everyday life. Even inside, with doors and windows closed tight, there is no escape from the call of the cicada as each looks for a mate.
So it is not a surprise that cicadas have now crept their way into my art thoughts. Using the actual body would be a bit crunchy...using the gorgeous red eyes would be too gross even for an immune mom of 3. So I went to the one part of the cicada that I could "harvest" without the natural heebie-jeebies that would accompany the other parts: The wings! They are absolutely gorgeous and in great supply as the cicada carcasses are littering my yard :-/
I decided that one of the easiest ways to use the wings was to mount them on a flat surface. I love creating mixed media canvases with paint, glitter, clay, inks, etc. Cicada wings are just a new embellishment to be experimented with :-) My husband discovered my wing stash before any creative process had begun and asked "Why?" My response (of course) was "Why not?"

Time to get crafting...
Part 1 Materials:
small stapled canvas (one shown is 6"x6" gallery wrap)
acrylic paints in choice of colors
sponge
paper plate
Procedure: Pour a small amount of each color of paint on the paper plate. Using the sponge, begin to sponge paint your canvas. I usually start "painting" with the darkest of the colors and then layer lighter colors and highlight on top. Be sure to cover the top and sides with each layer, overlapping colors as you go. (FYI: Do not worry about multiple sponges, as one will be perfect for helping colors to flow one into the other). Set canvas aside to dry when you are happy with the look.

Part 2 Materials:
Delight Air Dry Modeling Compound (white)
acrylic roller
texture of choice (I recycled a mesh tomato bag)
Pinata Color Ink (shown: Burro Brown)
Rubbing Alcohol
sponge brush
work surface (I recycled a piece of glass from a broken frame!)
Paper Towels
Procedure: Remove a small amount of Delight clay from package. Immediately wrap remainder of clay in a plastic Ziploc bag squeezing air out of baggie (if you wish to get a second project out of the package :-) Place clay onto work surface and use the acrylic roller to flatten clay into a sheet. Place texture over clay sheet and roll texture onto clay surface. Remove texture to reveal the textured surface!

Now comes the fun! Drip ink from bottle directly onto the textured surface. Ink should begin to spread into the nooks and crannies. Ink can be blotted if the look is too dark. To lighten the inked surface, dip the sponge brush into rubbing alcohol and lightly brush across inked surface. Occasionally blot with the paper towel until the clay surface is completely painted.

Set aside to dry. (Please note: I placed mine outside in the sunshine to help speed the drying process. Flip occasionally to dry front & back evenly.)
Once your inked sheet is dry, the clay can be torn into pieces for the project. Try to imagine what your finished canvas should look like. I envisioned the wings forming flowers. I planned on using the inked sheets for ground and stems. With this in mind I torn the sheet into thin, curved pieces. Tearing the clay towards you will reveal the unpainted white clay underneath!
Part 3 Materials:
The Ultimate! glue
Ancient Page ink pads ( Coal Black shown)
assorted rubber stamped sayings and alphabets
scrapbook paper
Envirotex Lite 2-part epoxy
small plastic cup for mixing plus popsicle stick
disposable brush
Procedure:
Rubber stamp saying to canvas (if desired). Rubber stamp scrapbook paper with lettering. Once dry, tear paper edges towards you to reveal white edges (if desired). Of course, edges can be cut with scissors for an even edge, but I really like the organic nature that tearing allows. Position clay, paper, and wing components on the canvas. Do not glue anything down until you are happy with the look. Use glue on the clay and paper components, but not the wings.
For the wings, mix a small amount of the Envirotex Lite according to manufacturer's directions. With the disposable brish, paint small amounts on the back side of each wing and "glue" in place on canvas. Once all of the wing components are in place, additional Envirotex Lite can be carefully brushed over the top of the wings. this process will #1 glue fragile wings in place and #2 give the wings more strength once dry. Set canvas aside to dry for 24 hrs.
Obviously you have noticed that my "flowers" have gone through a transformation and have grown into palm trees! Allow your "plan" to change as the canvas progresses and don't get frustrated if it isn't exactly your original vision. This one turned out better than the "vision" and I think the cicadas would be pleased that their temporary outdoor entertainment and beauty will remain with us...possibly until the next emergence in 2030!
ENJOY :-)
2 comments:
OMG, Linda. I love your palm trees canvas, and love how you made the Paperclay® pieces for your canvas. Excellent tutorial!!!
Wow, talk about recycling Mother Nature: what imagination. I just love it.
Post a Comment