

Plaid® Crafts sent a box of goodies a couple of weeks ago filled with a variety of paints, glitter, and Mod Podge®! Yippee...I had everything that I needed! Mod Podge®, paint, and water plus a stash of canvases. I tend to jump into things with both feet...this was no different. I started with a 50/50 mix of Mod Podge®/paint. Most people would mix a couple of colors and then test. Yea, not me.


I divided the remaining 2 clay balls in half, rolled each into a ball, and then continued with the directions to create 4 more petals. These were added to make the snuflower come to life. once i had all of the petals in place I wasn't as happy with the center, so I removed it to rework the shape.


Once dry, The sunflower was glued to the canvas. It looked a little bare, so again I went to my stash of materials (I have been crafting for so many years I have a little of everything!). I found metal scrapbooking words that were the perfect finishing touch.


I mixed up 6 colors of paint adding enough water to make it flow (or so I thought). Plaid® sent me Mega Glitter Mod Podge® along with the regular gloss I mixed up a cup of that too (50/50 with silver paint). I mean, who doesn't like glitter?? Excited to get started I took all of my supplies outside to paint. (NOTE: Flow painting can make a HUGE mess. I worked on a plastic covered table and then was able to roll up the mess and throw it away at the end).

I am not going to bore you with the details of my first painting experiment since you can check out my blog post for the results of that one and the subsequent experiments...let's just say that my first mix was a bit....ummmm, thick. Instead of getting gorgeous the gorgeous flow painting I expected, I got what I have referred to as rocky terrain. Bummer. You would think that seeing one rocky terrain I would think "Perhaps I should thin the mix a bit more...get a better flow." Yea, No 😖 Instead I carried on and created 3 more rocky terrain canvases using up all of the paint mix in the process.

While not the effect that I thought I would get, I set them aside to dry in hopes they would speak to me in some way. Fast forward a few days and they began to scream "CLAY!!" I grabbed one of my favorite products Delight!™ Air Dry Modeling Compound as a vision took hold. I saw 2 versions in my head, so decided to do both (of course). (NOTE: Each flower used about 1/4 of the Delight!™ package)
I decided to start with a sunflower, growing from the side of my canvas. I separated the clay into 8 pieces to start.

One of the pieces was rolled into a ball, flattened (about 1/4" thick), and pinched on one side to form a teardrop. This was the start of my sunflower center.

The petals were created using the following steps:
1) Roll a ball.
2) Roll the ball into a log with a slightly tapered end.
3) Flatten the log into a petal shape (about 1/4" thick).
4) Pinch the edges to thin and make it more "petal like".
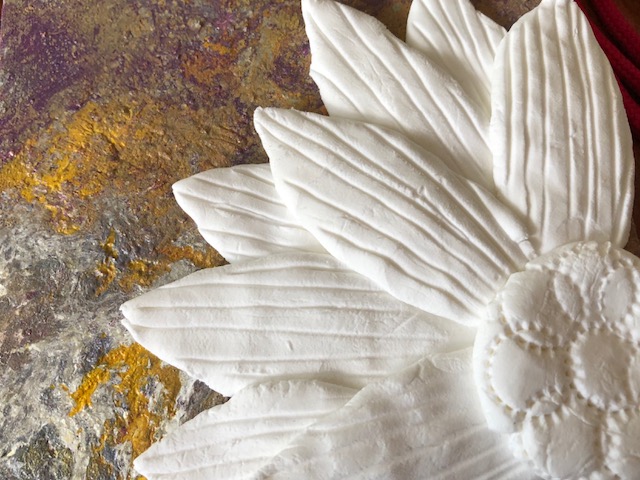
5) I used a turkey lacer (or you can use a toothpick) to make texture lines on the petal. The shape can be adjusted at this point (if desired). Repeat process with 2 more pieces.

The petals were positioned with the center before starting on the next batch of petals.

2 more were created following the above directions. I wanted these to fit behind the others without the design sticking out too much, so I flattened the bottom edges to fit each snuggly behind the first petals.


I divided the remaining 2 clay balls in half, rolled each into a ball, and then continued with the directions to create 4 more petals. These were added to make the snuflower come to life. once i had all of the petals in place I wasn't as happy with the center, so I removed it to rework the shape.

A little texture gave the center just the look I wanted (NOTE: The texture was created with the tip of a fruit corer!)
The entire piece was set aside to dry overnight before adding paint. I quickly moved on to my second floral thought: An artsy flower, not as realistic in nature as the first.
For the second flower I thought of 7 petals and a simple center. I separated the clay into 8 pieces and rolled each into a ball.

7 of the balls were rolled into teardrops and flattened to about 1/4" thick.

A few of the petals got cracks in the surface as I flattened them. A fingertip dipped into water and then rubbed over the surface and edges helped to smooth any problem areas.


The petals were put together, manipulated as needed to fit together without too many gaps.

I wanted the center to be simple, so a ball of clay pressed on top of the petals worked perfectly. (NOTE: The center was pressed on loosely to allow for additional details to be added)

The design needed some "POP". I grabbed some texture sheets and stamps from my stash (I do love texture) and went to work.

The first thought was all petals the same, but that seemed a bit...plain. I decided to use multiple textures, some bold and some simple to give the flower a wonky balance.

The center was replaced. With the texture on the petals I thought the center needed a little something too. The fruit corer came in handy once again.

Happy with the design, I placed the flower onto the canvas and set it aside to dry overnight.

DAY 2: Painting
I am a member of the NAEA (National Art Educators Association). I recently participated in an online conference. We received a goodie box filled with materials to use during the conference. One of my absolute favorite products in the box was from OOLY, the Chroma Blends Pearlescent Watercolor set. I wondered if they would work on my flowers...so of course I jumped in (no turning back once I start!)
For my sunflower I wanted to use colors that made it come alive on the canvas rather than blending in. For that reason, I began with the orange and then highlighted with the golden yellow. The center was painted first with brown and then highlighted with purple (I pulled the color choice from the canvas background).


Once dry, The sunflower was glued to the canvas. It looked a little bare, so again I went to my stash of materials (I have been crafting for so many years I have a little of everything!). I found metal scrapbooking words that were the perfect finishing touch.

For the second flower I wanted the color to be a bit more bold, so I chose the vibrant red.

Purple helped tie the flower to the canvas color.

Once dry, the flower was glued in place.
I hope you have enjoyed this super easy way to create new pieces for your home decor. I post for this blog the 2nd Wednesday of every month. Hope to see you again next time!
You can also visit https://polymercreations4u.wordpress.com/ for experiments in creating Acrylic Flow canvases.


3 comments:
It's so happy and seasonal! Great way to save those experimental pieces!
I love it! Great job!
This is such a wonderful site. I always love to see the new pieces and the process involved in bringing them to life. A real class act.
Post a Comment