Saturday, July 1, 2023

"No Place Like Home "


 "No Place Like Home"

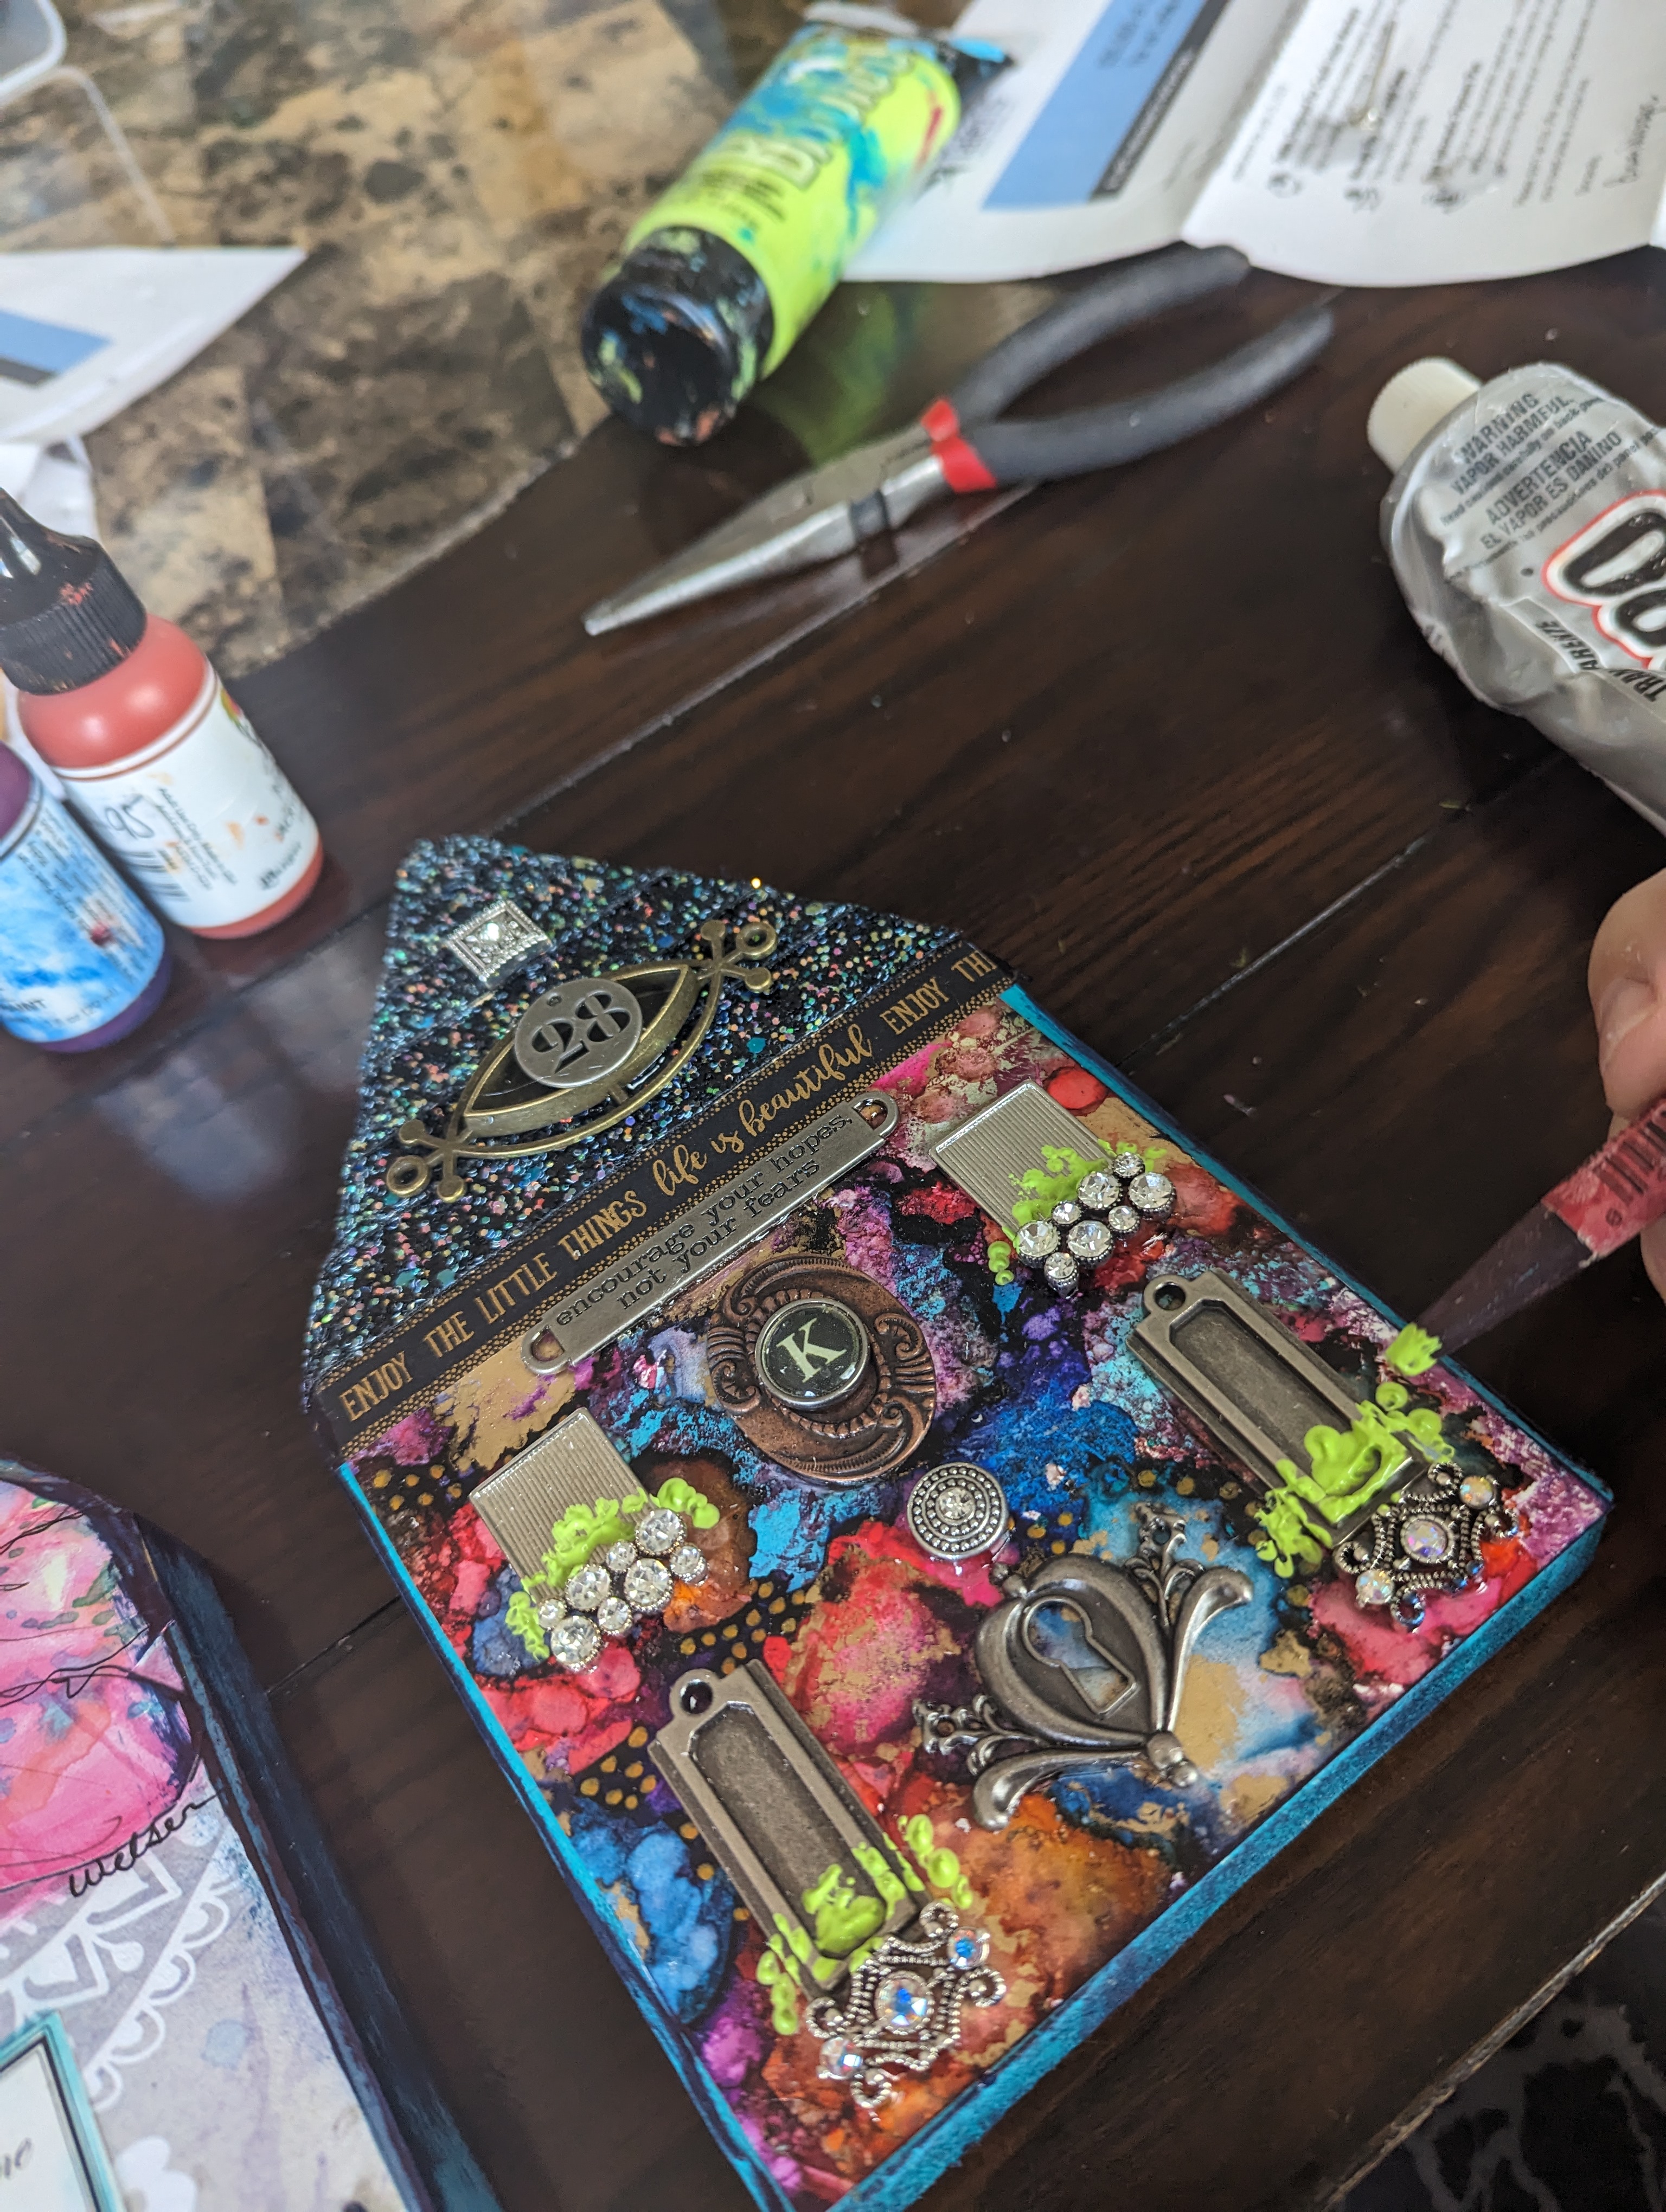
I always have loved creating houses.. adding fun embellishments really custom makes your own ! Adding sweet quotes, metal embellishments, jewelry components ,papers and paints all helps to make them feel personal ! 

Supplies

  • Wooden houses .. I had mine cut out with a scroll saw and then used Proxxon belt sander to smooth the rough edges
  • Collage papers
  • Metal embellishments
  • Jewelry components
  • Washi tape in black with glitter and one with a saying
  • Paint
  • Ink pad in deep blue 
  • Paint
  • Paper quotes 
  • E6000 glue
  • Gel medium 
Now that you have your supplies grab you wooden house and sand down the rough edges with the belt sander till smooth . Adhere the collage papers/ paper quotes where you would like with the gel medium. Let dry  and paint the the other house and let dry. You can now start building the house with all of your supplies ! Use your imagination and come up with fun and unique supplies and uses !


Enjoy creating your home sweet home using Proxxon Tools ! 


Saturday, June 24, 2023

Stranger Things with Delight® and Creative Paperclay®

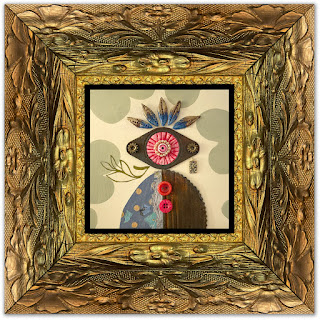
Stranger Things artI have created a Stranger Things series (https://www.darleneoliviamcelroy.com/stranger-things) where I reach into my inner child and come up with strange creatures and happy little monsters. There is a simplicity to them but things don't have to be complex to have beauty to them. The art piece will use both Delight® and Creative Paperclay® but in a simple manner that is fun and creative. Plus I will also show you how to fix a ornate vintage frame.

SUPPLY LIST
Creative Paperclay® & Delight®
Mark Making Tools
Modern Masters 2 part Rusting Kit
Glue
Found Objects
Scissors
Brayer
Amazing Molding Putty
Acrylic Paint

Delight®
I love the fact that you can roll out Delight® into a thick paper and then cut it with scissors or an exacto knife. I already have ideas for some future projects using the Delight® paper (as I call it). 


Found objects and cut/textured Delight®


When working on my Stranger Things series, I start blocking in my design with objects I would like to use. I cut out my Delight® paper with both regular scissors and pinking shears prior to giving it texture with my tracing wheel. The left shape at the bottom is a paint skin that I made. 

The Delight® shape I made in the last step is now painted with a base color that will eventually be rusted. I made a circle of Creative Paperclay® that I added an eye to and which I will glue down when the clay dries. Texture was added with a rubber shaper. The found metal object will be rusted and embellished. This is the first in my Stranger Things series where I have added these two air drying clays and I am really enjoying it.
All Dressed Up
I finished my cute little monster with painting, rusting, adding found elements and hair made with Delight®. The rusting was done using the Modern Masters 2 part Rusting Kit. 


An ornate frame plays off the contemporary minimalist art but it is hard to find one that is in mint condition however they are fixable with Creative Paperclay®.
two part Amazing Molding Putty
I used two part Amazing Molding Putty to make a mold of part of the frame that was in good condition. Once both parts of the putty are blended together, I laid it on the frame. It sets up in approximately 15 minutes.


Creative Paperclay® was applied to the frame in the areas that needed to be fixed then I laid the silicone mold matching it up to the good areas of the frame. When I am happy with how it looks and it is thoroughly dry, I coat it with polymer gloss medium to seal it and then decide whether to spray gold or black.

Dream in Color!

Darlene Olivia McElroy
NARRATIVE MIXED MEDIA ARTIST
www.darleneoliviamcelroy.com


Saturday, April 29, 2023

 Hi there, I'm Susie and I'm happy to bring something different than my usual sculpt. I hope you enjoy and find some inspiration to create one of your own. I do keep my videos short, because if you're like me, I like to get to the main idea and get busy creating on my own. So here's a few pictures of my progress and then there is a video link to You Tube.


Paint your background.  I painted directly on the wooden frame.


Adding clay to the outer frame and glass

Painting everything a dark base color gives depth and shadows 

Lighten up all the dark painted areas with the color or your choice.

Add moss for more interest and texture


Little details like mushrooms, rock and birds nests give a fun touch 


Some supplies you'll need to gather:

Thrifted picture frame Masking tape aluminum foil air dry clay (I use Creative Paperclay®) water clay tools sand paper (fine grit)

glue

dry flowers, moss etc

acrylic paints paint brushes

twinkle lights


You can find more tutorials from other design team members on the Creative Paperclay® blog. 
http://creativepaperclay.blogspot.com/ You can find my work at: www. ArtbysusieK.com @Artbysusiek on IG, FB and TikTok @WillowHollowWoods on IG and FB

email ArtbySusieK@gmail.com

Saturday, September 24, 2022

How to Create a Zombie Ornament


Hello everyone! My name is Cinnamon Willis and I am going to show you how I created this ornament! I had some left over plaster disks laying around after working on another project and I wanted to see if I can get some use out of them. You won't need plaster to make this ornament, you can just use some foil, paper or whatever you would like to use for the middle and cover it with the Creative paperclay.


Supplies:
  • Creative Paperclay®
  • Acrylic paint
  • Sanding paper
  • Aleene's Original Tacky Glue
  • Exacto knife
  • Wool or whatever you would like to use for hair
  • Pliers
  • Flexible wire


This is some left over plaster from a previous project, I let it cure in the bottom of a plastic cup so that I could get this disk shape and use it later. Take whatever you are using for the core of your piece and cover it with paperclay


Take your wire, tie it in a knot and then cover the knot with masking tape.


Take the knotted wire, put it in the back of the flat disk and cover it with clay. Bulk out the back of the head so that the wire sits smack in the middle of the piece. This ensures that the piece hangs right on the tree, if it is too far in the back the front will dip forward towards the floor.


Here I just started working on the face a bit. After working up the cheeks I sit the piece aside to let it dry for about 24 hours.


I find it easier to work in layers with paperclay. I let the first layer dry and then come back to work up more of the features like the eyes and mouth. I go through this process about four times before things start to look right for me.


Chisel into the face with your exacto knife to further create the desired face shape for your piece.


Now that I am happy with the way things look with the face, I can begin to sand it down to get it to look smooth.


Paint your piece with acrylic paint. I wanted to go for a zombie look.


Wanted to give her a little bit of freckles to add more interest to the face. After you are done with painting, make sure you cover the piece with varnish to protect the paint.


I am using yarn here for the hair. Cut to the length that I wanted want and then felted the pieces together so that there is a base for the head.


Take your Aleene's tacky glue or whatever glue you like to use and smooth it on to the top of the head.  Then take the hair that you prepared and push it down in place.


I take saran wrap and secure it over the head with a rubber band to make sure the hair stays in place. Let it sit overnight and make sure there isn't any glue coming through the hair to glue the wrap to the doll's head.


Here is the completed piece and it is currently for sale here!


Thank you all once again for stopping by, and I hope that you enjoyed today's tutorial! You can find Creative Paperclay® at the following retailers Creative Paperclay® Online Store, Michael'sAmazon, Joann's.

See more of my work at Melandolly.com and be sure to catch updates on my Instagram page