Friday, March 1, 2013

Kokeshi Inspired Art Doll

DSCN1651
A Kokeshi Doll is a traditional Japenese doll.  It is normally made out of wood with a simple trunks and an enlarged head.  It has no arms or legs and the details of the "dress" are hand painted onto the doll.
My art doll is inspired by the Kokeshi Doll, it is pretty simple and straight forward with just a it of my personal flair.
DSCN1614
I started out with a cardboard tube and a Styrofoam ball.
DSCN1620
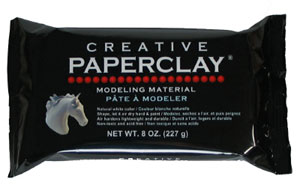
I covered both with Creative Paperclay and let them dry overnight.  Once the two pieces were dry I adhered the head to the body using E6000.
DSCN1638
Then I painted the head with a flesh-tone acrylic paint and the body in turquoise   I sanded the Creative Paperclay before painting.
DSCN1641
I added some shaggy black yarn for hair.  I also added the eyes and nose with a thin brush.
I added the mouth once everything was dry and instead of hand painting the detail onto the doll I wrapped it in some sheer fabric.
DSCN1650

Spring Nest by Rachel Whetzel

 Hello! It's Rachel Whetzel! Today, I'm going to show you how I created robin's eggs for a spring themed nest using Creative Paperclay® modeling material. I live in Oregon, and it seems we might have an early spring here. The sun has been shining most days, even the rainy ones! I'm starting to get excited about it, and I've also been thinking about Easter. That gave me the idea to get creative and MAKE my own eggs!!
SUPPLIES YOU'LL NEED:

Let's get started!!
Gather your supplies. 
 I'll be using news paper for this tutorial. Start by balling up some news paper. This will be the INSIDE of your egg. It will help your project dry faster, and save you the amount of clay you need to use.
Next, use your masking tape to bind the paper into a "ball" shape. At this point, exact ballness isn't important. If you're using foil, just bunch it up, and skip the masking tape.
Do this for each egg. I stopped at three.
Next, add Creative Paperclay to the outside of your ball. I created a ball first, and then added another small ball of clay to the top, and used that to make the egg shape. I didn't worry too much about getting the shape exactly right here either. Just close is good.
Once you have all your cores built up with clay, let them dry.
Once they are dry, you can sand them to help fine tune their egg shape. I'm pretty happy with how these turned out, but that one in the middle on the bottom could use a LITTLE more sanding... I will just turn it so that part is closest to the nest.
Next, I painted the eggs blue.
Then I used some stain to make them a little less bright, and used a toothpick dipped in brown to tap speckles onto the eggs. Some strips cut from a dictionary make a cute nest for them all to rest in!
If you create something inspired by my project, please leave a comment with a link here, so I can come and visit to see! I would love for you to visit me at my "house" too!! Thank you so much for reading!!  ~rachel

Saturday, February 23, 2013

Brenda's Wine Plaque

Good morning, Brenda here again and welcome to another project using Creative Paperclay®.  I love recreating things I see in the stores for a fraction of the cost and today I am here to show you how you can make your own signs.  I am slowly turning my dining room into a "wine" motif.  I love wine and thought I'd like to have a wine room.  I then need to have a sign for my "wine" room and here is how I started. 
For Christmas I received this awesome vanity mirror and the box it came in was so super sturdy I threw it into my "recycle" room.  Yes, I have a room dedicated to recylceable crap as hubby calls it.  I might have a small problem...

I cut the cardboard down to the size I wanted my plaque to be and cut two pieces of it. 
Then I mod podged those two pieces together and held them in place with some clothespins to dry. 
It only takes a few minutes to completely dry.    
If you were here in the beginning of the month I had my February tip and that's when I told you you could cover most anything with paperclay and didn't even need to use any bonding stuff.  I am here to show you how to do that.
I rolled my paperclay fairly thin and just wrapped it around the cardboard pieces.  Make sure to get the corners good.  You can always add a bit of clay to the backside if needed. 
This is how it looks all wrapped up. 
Then I used my brick embossing folder and just layed it on top of the paperclay wrapped cardboard and pressed ever so gently.  You can using a rolling pin for this also. 
and here is my embossed plaque,  make sure you let it dry completely.  This took about 24 hours to dry. 
Then I painted it with red acrylic paint, but it was too red for me. 
I watered down some brown acrylic paint and painted, wiped,  
painted, wiped until I got the affect I was looking for. 
I used an emery board and distressed the plaque a bit more.  I was going for that weathered look. 
Then I cut the words Cheer up a little out of some chipboard using my cricut and laid that upon my plaque 
to use as a stencil and 
using white acrylic paint I stenciled those words. 
Pretty cool so far, huh? 
I got the word Wine and a tiny cork screw out of vinyl also using my cricut and attached them to the plaque.
I also used some tiny clothespins and painted them brown to use as wine glass charms so everyone knows whose glass is theirs.

I cut some tiny "wine bottles" out of reddish cardstock and glued them to the front of the clothespins and just attached them to the plaque with some hot glue 
added some beaded wine charms that I also made and voila 
 I am so very happy with the way this turned out.  I've seen plaques in the stores for as little as $5 to as much as $30 and this project not only didn't hardly cost me any money, but I made it my OWN.

Thank you so much for coming by today and checking out my Creative Paperclay® project and I hope to see you again real soon.  As always, have a great day and God Bless.

Friday, February 22, 2013

Shamrock Pin

Today, I thought I'd play aorund with Delight ™.
This air dry, modeling compound can easily be colored.
(I'll post a tutorial March 8th...so be sure to stop back here!)

I love celebrating..anything. But it must be a family thing.
When my younger sisters were growing up, they loved to wear pins and buttons
that proclaimed "Kiss me, I'm Irish!"
So, when my father tracked down our Irish history, you can imagine my sisters were 
extra joyful that St. Patty's Day!


Here's a pin to wear if your are Irish...or if you just like to celebrate!


OR...


You may want to make this into a locker magnet as my daughter did.
I love sharing crafting with my kids!
(And yes, I think she showed me up on the decorating!!)

Supplies:
Delight ™...dyed green
Rolling Pin
Scalloped heart cutters
Dew Drop embellishments from The Robin's Nest
Pin backing
magnets
Glue Gun


1. Roll out Delight ™.
2.  Cut out 3 hearts.


3. Gently press them together to form a shamrock.
4.  Let dry.
5.  Decorate the front as you wish.
6.  Add a pin back or magnet.


My DD just announced that she wants to make more things with Delight ™.
Go buy some Delight ™ and spend one on one time with your child.
The time is priceless.

Thanks for stopping by again!


Thursday, February 21, 2013

Jess B's - Under the Sea

Hello Everyone,

Can you tell I want to be somewhere warm
Heck I always want to be somewhere warmer than the 
mid west
I always tell my mom that she had me in the 
wrong month (November) and in the wrong country
I am not a fan of cold weather 
but this is where we are

The sea is full of rich
intense bright colors
that we can only try to mimic
INSPIRATION

UNDER THE SEA

Wooden heart 
I painted gesso on the entire heart for color spraying later
  wanted wall piece to be 3-dimension
I rolled balls of Creative Paperclay®, flattened and curved each piece
with finger to look like a sea coral bed
 not the best rendition but it works
 Baked Creative Paperclay® and sprayed with
Adirondack - Color Wash - Stream
Lindy's Stamp Gang - Flat Fabio - Ocean Breeze Blue & Aloha Avocado
Tattered Angels - Iridescent Gold
I streamed hot glue on the edge or heart
and sprayed Steam and Iridescent Gold 
Pounced gold pigment gold to make the textured hot glue pop

thanks for stopping by
see you soon